A Book About Turns on a Board
Maria Pisklova & German Osmak
2025 edition –> https://www.carvebook.ru/
The book is put together from materials on the OnEdge.ru forum and the OES snowboards chat, but that does not stop it from being the author’s personal opinion, which may differ from the original sources.
Riding technique does not stand still, and neither does the understanding of it. Everything moves. Along with that movement, whenever there is time and desire, this not-for-print edition will grow and develop. So as not to miss anything, subscribe to my Telegram channel “SciCarve” and/or join the cozy little chat, where I announce all changes, additions, and assorted interesting bits.
How to read this
It is best to read the text from the beginning and in order, using the “Next ➡️” button. Some sections contain a “Summary” that captures the main idea. Many sections contain an “Introduction” or “Disclaimers” that are not indexed in the Table of Contents, so don’t forget to scroll up — there may be something important there.
Below is the Table of Contents. At the moment the Book consists of two volumes, “Overture” and “Carving Base”; the rest is in progress.
At the end of some chapters there are hashtags you can use to find the corresponding discussions in the chat, which may expand and/or clarify your understanding of the text.
To understand something, you need the system of knowledge required for it — a grid of concepts that lets you grasp the essence of a phenomenon with your mind. If there is no such system, then correct intuitions can help you reach the goal. The Overture is meant to build the necessary system, to set up the right intuitions, or to put your existing notions in proper order. Do not skip any of its sections.
Only through feedback is there a chance to bring this text to its ideal state, where it will be understood by absolutely everyone. So any remarks and suggestions about the text are welcome in my Telegram chat.
For instructors and critics
This is not a teaching manual, it is a self-teaching guide. To get a teaching manual, this text has to be decompiled back into the methodological ideas and concepts that run “under its hood.”
Volume One
OVERTURE
Chapter 1. Riding. What can it be?
Chapter 2. Riding. What should it be?
Chapter 3. How to teach yourself to ride a snowboard
🔘 3.1. A person taken as they are, with no riding experience
🔘 3.2. Where does learning begin?
🔘 3.3. How do you understand something with your mind?
3.3.1. Understanding and the multitasking that doesn’t exist
🔘 3.4. How do you understand something with your body?
🔘 3.5. How do you carry a movement over to the slope?
3.5.1 Fears and how to fight them
🔘 3.6. How do you tell what you’re doing right and what you’re doing wrong?
🔘 3.7. “Who knows their stuff?” or “How do you find an instructor?”
Chapter 4. The snowboard. What should it be?
🔘 4.1. Reference points for choosing a board. In brief
🔘 4.2. A snowboard is a “symphonic work,” not a simple sum of parameters
4.2.1 A word about all-mountain boards
Chapter 4(3/4). Boots and bindings — how to choose?
🔘 4(3/4).0 Signs that something is wrong . . .
🔘 4(3/4).2 Common myths and fakes about choosing boots
🔘 4(3/4).4 On the stiffness of boots and bindings
🔘 4(3/4).4(1/2) Is this text really for beginners? What are they supposed to do?
🔘 4(3/4).6 Links for further reading
Chapter 5. How and why does a snowboard turn? An introduction to the physics
🔘 5.1. How do you control the board’s turning?
Chapter 6. The physics of the carved turn
🔘 6.2. Angular acceleration and angular momentum
🔘 6.3. Centrifugal and centripetal forces
🔘 6.4. On loading the nose of the board, weight on the front leg, and the “50-50” stance
🔘 6.5. What else to read on the physics of the turn?
Chapter 7. Summary
Terms and definitions
Useful quotes
Useful links
Volume Two
TURNING BASE
Chapter 8. A word to the learner
🔘 8.0. What is the “turning base”?
🔘 8.1. Learning “from scratch” and “from some level”
🔘 8.3. The difference between learning to ride and riding
🔘 8.4. On the speed of progress and the overall picture of riding
🔘 8.5. On a universal system of learning
🔘 8.6. Why doesn’t what I’m learning look like the riding I see?
8.6.1 The basic stance that doesn’t exist
🔘 8.8. On unloading, overloading, and other fascinating terms
Chapter 9. First steps on the board. Stance (Step 0)
🔘 9.1. An exercise on flat ground with no slope
🔘 9.2. Why torso along the board?
🔘 9.3. What does “straighten up” mean in snowboarding? The basic stance
🔘 9.4. Problems and mistakes in the first steps
🔘 9.5. Harder variations of the exercises
Chapter 10. First descents on the slope (Step 1)
🔘 10.3. Getting used to speed, the traverse, and the basic side-slip
10.3.1 Problem #1. Catching an edge
10.3.2 Problem #2. Leaning back BEHIND the rear binding
10.3.3 Problem #3. Shifting weight onto the front leg
10.3.4 Problem #4. Catching an edge on a flat board
10.3.5 Problem #5. Somersaults over the nose
10.3.6 Problem #6. The board “sliding out”
Chapter 11. A pre-arc primer
🔘 11.3. Scene three. The trajectory
🔘 11.4. How do you learn this?
Chapter 12. First frontside arcs (Step 2)
🔘 12.1. The theoretical and practical minimum
12.2.1 Solving problems and the work of the rear hand
🔘 12.3. On stability in the arc
🔘 12.4. Changing the edge angle over the course of the arc
🔘 12.5. J-turns. An exercise that makes no sense
Chapter 13. First backside arcs (Step 3)
🔘 13.1. The theoretical and practical minimum
🔘 13.2. The goal compared with the frontside turn
🔘 13.3. Six stages of mastering the back almost at home
🔘 13.4. Braking as a lead-up exercise (optional)
🔘 13.5. The first backside turn
13.5.1. The unforgivable mistake
🔘 13.6. Important points to emphasize while learning
🔘 13.7. Getting used to working with centrifugal force
13.8.1. Under-loading the tail
13.8.2. Body position along or across the board
13.8.3. Getting stuck in the arc, and the front leg
13.8.4. The gaze that twists the body
Chapter 14. First linked arcs (Step 4)
🔘 14.1. The theoretical and practical minimum
🔘 14.3. Cutting the arc off on time
🔘 14.3(1/2). Trajectory glitches
14.3(1/2).1 Glitch #1: Steering the board with your legs
14.3(1/2).2 Glitch #2: Picking at the edges while riding straight down
14.3(1/2).3 Glitch #3: Rolling out sideways
🔘 14.5. How to help yourself at the front exit
🔘 14.6. How to help yourself at the back exit
🔘 14.7. Riding the pelvis on the swings of centrifugal force
🔘 14.8. The mirror nature of front and back
Chapter 15. Conclusion
Volume Three
CARVING BASE
Chapter G. A word to the learner
🔘 G.1. What has been, and what will be?
Chapter 16. The backside turn (Step 5)
🔘 16.0. A warning and the theory minimum
🔘 16.1. Important conditions for success
16.3.1. What we do before the edge change
16.3.2. The pelvis movement. The end is the beginning
16.3.3. The torso movement. The beginning is the end
16.4.0. The trajectory comes first
16.4.1. A tool for choosing the direction of the throw
16.4.2. The sensations of the throw
16.4.4. Pelvis “along” or “across the angles”?
16.5.1. Mistakes at the start of the movement
16.5.2. Mistakes in choosing the direction of the throw
16.5.3. Mistakes from not thinking much
Chapter 17. The frontside turn (Step 6)
(available in the Telegram channel and the chat under the hashtag #Глава_17)
Chapter 18. The beginnings of flight (Step 7)
(available in the Telegram channel and the chat under the hashtag #Глава_18)
Under those same hashtags there is more info in the chat than in the channel.
Copyright This work is licensed under the CC-BY-NC-SA 4.0 International license
Chapter 1. Riding. What can it be?
What is riding, and how can we do it on a groomed hill?
You can go down a hill on a sled. Mostly that will be a descent along the fall line, with linear speed controlled by dragging your feet on the slope, or with a special little brake pedal. You can go down on an inner tube — that is an uncontrolled descent along the fall line.
An uncontrolled descent is a descent with no control over speed or trajectory.
On a snowboard, unlike on a sled or a tube, you can build your trajectory in all sorts of ways and not be a hostage of the fall line. To control the trajectory, you use turns. Turns come in two kinds: with skidding and without it — the latter are called carved turns. In motor racing, a turn with skidding would be called a drift. Skidding is a shift / sideways slip in the direction of the excess speed — the direction you were moving in before the turn. Turns like that are not enough for full control of the situation during a descent (for what “control” means, see Chapter 2). Picture a car that can only ever move by drifting. As one element of driving, that is useful — sometimes even spectacular; as your predominant and only style, it is unsafe.
So: you can come down a hill on a snowboard in a straight line (along the fall line), or by making turns, with skidding or without it. Turns without skidding are carved turns. For a turn to have no skidding, the board has to be set on its edge, after which it starts moving along an arc on that edge, the way skates travel on ice. People also say “to carve up the slope” — hence the name “carved turn.”
Executing carved turns is technically harder than skidded turns. Skidded turns, in turn, can be obtained as a by-product while you study carved ones. A skidded turn is not a necessary rung on the way to carving that you have to study hard on its own; it is nothing more than an “intermediate result” in the process of learning stable, controlled riding.
Riding a snowboard in the mountains can and should be thoroughly varied, just like driving a car. Somewhere we go straight, somewhere we make turns, somewhere we enter a turn with a drift, somewhere we scrub off speed, somewhere we accelerate. The main thing is control of the trajectory. On one hand it gives us safety; on the other, the ability to build the most interesting descent line, not just the fall line, as on a sled.
Chapter 2. Riding. What should it be?
This chapter is based on a post on Onedge.ru (link)
Let us define three characteristics that correct riding must have:
- Safe
Injuries while riding must be ruled out, both for yourself and for the people around you.
- Controlled
You must be able to stop or change your trajectory BEFORE a collision with anything happens — it does not matter whether it is a lamppost that was standing there before you were born, or a person who jumped out from under the snow. You must see what is going on around you and build your trajectory in accordance with that seeing.
- Steered by you, not by the board
You must go where YOU want to go, not roughly wherever you manage to get. Find a lump of snow about 30 metres ahead of you and try to ride right up to it. For those who don’t ride slalom gates, the result will be surprisingly interesting.
Riding must be safe, and therefore fully steerable and matched to the external conditions.
The predominant direction of movement on a hill — the way most people move down it — is top to bottom. In arcs or in a straight line, but top to bottom. Trajectories that cross the slope also cross the trajectory of that predominant flow of riders. For those reasons, people who ride across the slope get hit by the people coming down it. Sad, but a fact. You can feel about this fact however you like and argue at length that whoever is lower has the right of way. The gravestone will say exactly that: “Here lies the one who was right. The one who was wrong went on living.”
Riding across the slope is caused by over-closing the turn, when the board — together with the snowboarder on it — starts rolling across the slope, crossing a substantial part of it. The bigger that part, the higher the chance of being run over. Especially on the back edge, where you can’t see who or what is flying in from above to send you to the hospital. So over-closing the turn is wrong, because it contradicts the accepted points 1 and 2.
Video 1. Riding across the slope is wrong riding, because it is unsafe. Better to drift (skid) than ride like this.
Riding across the slope, in traverses, in wide closed turns, is wrong riding. Most people ride top to bottom, and the more you ride across, the greater the chance of ending up under the trolleybus that is coming down.
Riding a snowboard is a person on a board moving along some trajectory — that is, the body on the board has the same direction of movement as the board. If the body is moving straight down the slope and the board is put across that movement with the legs, that is braking. If the board is put not across but at some angle to the across position — somewhere between “straight down the slope” and “across” — that is still braking. The only difference is that if there is enough speed, then after a while the system stabilises and the body changes its direction of movement to match where the board is pointing, and the whole structure goes off somewhere sideways. For riding to happen, rather than a string of brakings on one edge or the other, the board must be set / tilted onto its edge so that its direction of movement coincides with the movement of the body.
To ride the board straight down, the board has to point down — that is obvious. If we want to ride in arcs, i.e. move along a sine wave — that is a sequence of left and right turns in which the body changes its direction of movement — then the board must always point where the body is moving at that moment. That can be called riding.
Pointing the board straight down the slope, riding 10–20–30 metres, putting the board across the movement, braking with a skid for 3–4–7 metres, then repeating the procedure on the other edge — that is some strange kind of riding. It is like flooring the gas in a car, then hard on the brake, then gas again, then brake, all on a straight road with gentle curves where you could just drive calmly.
To ride a snowboard, the direction of movement of the board and of the body must coincide.
The two videos below are given to illustrate riding and not-riding. What you have to watch is the trajectory of the board and the trajectory of the body. On the whole, the body can be replaced with a point; what it is doing on the board does not matter in this case. In the first video the board moves in arcs, the body moves in arcs, the directions of movement of board and body coincide. In the second video the body moves straight down the slope, and the board is periodically put across that movement to control linear speed.
Video 2. Not ideal, but it is riding. The board runs in arcs, the body moves in arcs. “Not ideal” because it contains mistakes, but the base is built correctly.
Video 3. Completely NOT riding. The body moves down. The board is put across the body’s movement. Braking happens. The board comes off edge => the board points straight down => acceleration. The board is turned across the movement with the legs. Braking. Then repeat.
Video 4. Riding on a hard (alpine) setup
Video 5. Riding on a soft setup
P.S. In Video 3, as I recall, there was an attempt to do “short turns.” But for there to be short turns, you need 1) turns and 2) for them to be short. There are no turns here. There is straight-line movement downhill with periodic braking by putting the board across that movement. Discussion of the rest of the bouquet of mistakes is beyond the scope of this section.
P.P.S. In the first second of Video 3, in the top-left corner, you can see a second snowboarder who is essentially doing the same thing.
Search the chat for messages on this chapter’s topic under the hashtags: #Глава_2 #контроль_скорости #закрытые_повороты #тайминг
Chapter 3. How to teach yourself to ride a snowboard
What follows is an extensive case for six simple rules about what you should and should not do to teach yourself to ride a snowboard:
There is no point in:
- trying to copy — or to understand — riding technique from videos of people who ride an order of magnitude better than you;
You must:
- understand the theory of riding with your mind;
- understand the movements with your body;
- try to bring points 2 and 3 to life on the slope;
- film your descents so you understand what you actually are and are not doing on the slope;
- ask more experienced riders for advice and for comments on your videos.
Now, each of the points in more detail:
3.1. A person taken as they are, with no riding experience
3.2. Where does learning begin?
3.3. How do you understand something with your mind?
3.3.1. Understanding, multitasking, and the number of degrees of freedom
3.4. How do you understand something with your body?
3.5. How do you carry a movement over to the slope?
3.5.1. Fears and how to fight them
3.6. How do you tell what you’re doing right and what you’re doing wrong?
3.7. “Who knows their stuff?” or “How do you find an instructor?”
3.1. A person taken as they are, with no riding experience
For as many years as you have been alive, your brain and body have been learning to walk over the surface of planet Earth — without loss of generality, just over a flat plane. During that kind of movement, the gravity vector points vertically down, perpendicular to that plane. You face forward, in the direction of travel. You catch your balance by alternating your legs underneath you — two points of support. Movement is produced by active muscular work. Those are the conditions in which your body formed its reflexes and motor programs, and in which your brain learned to build movement schemes — to predict the short- and long-term consequences of one action or another.
Unfortunately, when you strap yourself to a board and ride in that state top-to-bottom down a hill, your whole lifetime of accumulated experience is mostly useless, and often harmful. A slope appears; the gravity vector points at an angle to the plane you are moving along. A top-to-bottom linear acceleration appears, one that depends not only on the active work of your leg muscles; angular acceleration in the turns, centrifugal and centripetal forces.
Neither your brain nor your body knows these new conditions. The brain tries to use the old motor programs, but they don’t work properly. Folding over the board for balance; turning the torso to face the direction of travel; bracing on and leaning on the front leg — all of that comes from the old experience of moving on your feet over a plane or over gentle slopes, and it is irrelevant for riding down a hill on a snowboard. In effect, the brain and the body have to develop motor programs from scratch for the new conditions.
Here we come to an important point. The old motor programs don’t work. Predicting the consequences of movements is not possible. What’s more, it is not only the body that moves down the hill — the board does too. The board has characteristics of its own, and it reacts differently to different movements, to the state of the surface, to the slope angle, and to speed. In other words, we are dealing with a “body–snowboard–slope” system that is completely unfamiliar from prior experience.
On the other hand, snowboarding is a highly coordinated sport, meaning that all movements matter, even the tiniest. The moment a movement is made matters, and so does its duration. They have to relate to the state of the surface, the board, the boots, the bindings, and the current task. One and the same movement, at different moments and in different conditions, can either help you or harm you — up to and including injury.
For these reasons, there is no point at all in trying to teach yourself by watching other people’s videos with the aim of copying technique that is an order of magnitude above your own level. Most likely you will simply fail to notice details that are barely visible to you. Even with a theoretical grasp of some fundamentals of riding, you won’t see the whole picture of the movement, because there are many movements you have never performed yourself, and neither your brain nor your body has the slightest idea how it works in the conditions the hill imposes. Trying to understand descent technique from a video of someone whose riding is above yours is almost like trying to read a foreign text without knowing 30–40–50–70% of the written words. Sometimes you get lucky and fill in the right thing from context, but most of the time you miss the point. Here, instead of words, there are movements. Big and small movements, each in its allotted time. Either you know them and read them, together with their consequences, or you don’t know them and don’t notice them, and the integrity of the picture slips away.
Summary. Do not try to understand from a video what a person who rides an order of magnitude better than you is doing on the board. With a probability approaching one, you will get it wrong.
↩︎ Back to the start of Chapter 3
3.2. Where does learning begin?
It will be useful to find your own answers to the seven questions below, and those answers should match your current level. That is, if you don’t understand some answer in its full depth, then perhaps a simplified version of it is enough for you for now — there is no need to get too hung up on any one thing.
- How, why, and along what trajectory does the board travel?
- How, and with what, do you set the board on edge?
- How do your various movements affect the board’s behaviour?
- What forces act on you and on the board at different moments of the descent? How do you use them?
- Following from points 1–3 — what position should your body take over the board at different moments of the descent?
- Which movements can help you with points 4–5, and which can harm you?
- How do you put all of this into practice on the hill?
Without answers you actually understand to each question, your plan is most likely doomed (what “understand” means comes later, in section 3.3). After all, if you don’t know even in theory what movements you must make on the board for it to go in the direction you want and in the way you want, then how can you teach yourself those movements?
There is, of course, the option of evolutionary selection of movements. For that you have to spend many months, and the result definitely will not match the effort spent. I think it can be compared to training a neural network to run (video at this link). It, too, has neither a plan of action nor the slightest understanding of how to build a movement scheme.
The result of evolutionary selection in riding will be near zero, because, first, over the centuries, adapting to external conditions, the Homo sapiens organism evolved to move over a flat surface, not to descend a hill on a board strapped to its feet. Second, the human brain is the most energy-hungry organ in terms of consumption, and therefore tries to conserve energy — or, put simply, it is lazy. So it will try to make maximum use of the motor programs it already has. Yes, that way you can learn to descend without falling, but it will be a stance on the front leg, a rounded back, and sweeping with the rear leg to control speed and produce some kind of turns. That very position is what most often wins the evolutionary selection, and it has nothing in common with stable, safe riding.
Summary. Nothing will happen on its own. You have to switch your brain on. Learning begins where the brain begins to work.
↩︎ Back to the start of Chapter 3
3.3. How do you understand something with your mind?
Riding a snowboard is always a person strapped to a board moving top-to-bottom down a hill. The person makes some body movements, the board reacts to those actions somehow, changing its trajectory in accordance with the conditions on the hill (state of the surface, speed, slope angle). So we are dealing with a “person–snowboard–slope” system, and every movement of the body has to be described within that system: the consequences of body movements or of their absence; the ways they can be done wrong and the consequences of doing them that way. Then there is understanding.
For example, the pronouncement “up-unweighting is when you extend your legs at the knees and the board / edge is unweighted” — that is not understanding, that is a fiction.
To understand a phenomenon means not merely to give it a definition or come up with a name, but to express it in the logic of concepts that form a system of knowledge.
As we established above, a person rides a snowboard while descending a hill from top to bottom. The body movements made on the board must somehow affect the trajectory and/or speed of the person and the board, otherwise they are meaningless. The end result also depends on the state of the surface. Running on asphalt is one thing; running through a bog is quite another. It is the same on the hill: one movement — a different result on a different surface. So we are always dealing with the “person–snowboard–slope” system, and therefore for any action performed on the board it is useful to find answers to the following questions:
1. What for?
The goal of the action / movement. What is it aimed at?
2. How, and with what?
What needs to bend? What needs to extend? Where to lean or lean away? Where to place the centre of mass? What to swing, and where? Where to look? Where not to look?
3. What happens afterwards?
What will the board’s reaction to these movements be, in the conditions the hill imposes?
4. When?
Timing — i.e. at what moment of the arc, or with what board behaviour, do points 1–3 happen.
The description “up-unweighting is when you extend your legs at the knees and the board / edge is unweighted” is a fiction, because it says nothing about what it is for. What is happening to the board before this movement? What happens to the board at the moment of the movement? What happens to the board after? What is the timing — when should this happen in order to achieve the stated goal? On top of that, such a definition is tautological, because it defines “unweighting” using the concept of “unweighting.” So it is not merely a fiction, it is drivel.
Understanding something is mental movement through meanings / concepts, a practical command of those meanings / concepts — not the art of inventing names. To name a phenomenon / process does not mean to understand it. In the case of snowboarding, understanding is a clear mental picture of your actions on the board, expressed in concepts, with a detailed description of the goal / task of each body movement (or of its absence), of where the body parts are in space, and of the board’s reaction to those movements in the conditions the hill imposes.
Summary. Understanding in snowboarding is when specific concepts / words are tied to a specific picture of a person’s movement on the board — its timing, its goal, and its consequences in the conditions the hill imposes.

Through understanding the text you have to form a picture of the riding. If the picture does not come together, or comes out “blurry” => there is no understanding. Watching moving pictures on a monitor screen gives only the illusion of understanding.
P.S. On the illusion of understanding created by moving pictures on a monitor screen.
For example, you often need to do something with the shoulders or the arms — say, put the rear hand out over the tail of the board. You can do this by engaging the core muscles (i.e. by putting the whole torso out), or you can do it in isolation with the shoulder (i.e. put the arm out in isolation). The first works on the slope, the second does not. If you don’t know these details, then from a video you won’t see what is happening and what actually needs to be done. That is why, in learning, the lead role goes to the text.
3.3.1. Understanding and the multitasking that doesn’t exist
The joints and muscles give an insanely large number of degrees of freedom for movement — points where something can bend, rotate, straighten. Over many centuries of evolution, our brain learned to finely control all these points of possible body movement. When we get onto a hill, that whole store of experience doesn’t work. You have to consciously control all that diversity, and yet we physiologically cannot control more than two foci of attention (article in Science, a review of the article in Gazeta). In practice, at first, it is best to reduce each task to controlling a single point. One descent — one task — one focus of attention.
That is why, at the start of the path, it is important to understand in what position you need to lock ALL the joints involved in riding that do not relate to the current task, so that you can deal with them one at a time and see how each of them works. Later, the coordinated work of all of them together will make up a single system of movements, in tune with your style and with the board’s behaviour on the slope you are riding.
Riding is movement. Not a set of static poses. You move on the board, the board responds and moves down the slope. You are riding. If you freeze, the board can decide for itself where to go, and then don’t be upset when it takes you into a lift tower or smacks you against the slope.
↩︎ Back to the start of Chapter 3
3.4. How do you understand something with your body?
Understanding something with your mind is not enough. It is important to feel, with your body, at least an approximately correct movement. So any methodical text on riding technique should not merely be read — you should try to perform all the movements it describes at home, on a board or without one. Next to a wall, or by a pull-up bar, or with a friend’s help. This is not standing up once and having a go. A correct movement has to be brought to automaticity; best of all, build it into your morning exercises, or give it 10–20 minutes every day.
“He who thinks clearly, states clearly.” If a person cannot describe in detail and correctly what he is about to do, then what can he actually do?!?!!!
If there is 100% understanding of the text with your mind and 100% understanding of the movement with your body, with automatic execution — i.e. you can perform that movement standing on the floor without thinking much about controlling it, and it works 10 times out of 10 — then you have a chance of executing on the hill at least 10% of what is written. Otherwise the chances are zero. None. If it’s “well, broadly clear” — zero chances.
Summary. It must be crystal clear what you are going to do on the hill, what your stance will be, when and what you will bend and extend. You must be able to state that clarity briefly and clearly in words, and be able to perform the necessary movements automatically — without thinking much about controlling them. Then there is a chance that in one arc out of ten you will do something right. Then in two, then in three . . . And only when you make the required movement at the required time in more than half the arcs can you consider that it is “well, broadly clear.”
↩︎ Back to the start of Chapter 3
3.5. How do you carry a movement over to the slope?
The hardest part. Discipline matters here. And there has to be a plan. Discipline, so you stick to the plan; and a plan, so you move from point A, your current riding level, to point B, a better riding level. Movement without a plan is chaotic movement. Moving chaotically, you may never arrive anywhere — and you may even go off in the wrong direction.
As said above, descending a hill on a board strapped to your feet is an activity the brain and body are not used to. On the hill, a host of distracting factors appear — people, slope angle, speed, the sun, clouds, uneven surface, MOVEMENT, and so on.
Do not try to fight these factors; choose the conditions most suitable for learning. Go to resorts or slopes with few people, or better yet, none at all. Do not try to do anything in bad weather.
Descent speed must be absolutely comfortable. Do not fight a high speed and try to get things done in time; go to a hill with a gentler slope.
Speed must not be high. If it is high, you will tense up, fear will bind your movements, you will not keep up with the board.
Speed must not be low. At low speed there is almost no centrifugal force, and you have to ride on balance, which is significantly harder, because it requires well-developed stabiliser muscles.
Speed must be sufficient and comfortable.
If it seems to you that you might be going fast — you are already quite definitely going too fast.
If it seems to you that you are going too fast, then you already quite definitely control nothing at all, and it is long past time to brake.
In one descent you can try to fix one mistake or modify one movement, no more. Try to fix everything at once and you will fix nothing — just as you will add nothing new (why? see section 3.3.1). Building riding technique is a step-by-step improvement of your current level. Fixing mistake after mistake, from the larger to the smaller. Once a correct base has been built, it too can be improved, step by step, movement by movement. You cannot skip steps, nor master everything at once.
On the hill you can either ride, or learn to ride. To learn to ride, there has to be a goal (a plan) for the day, broken down into clear, short tasks for each descent, whose purpose is to build your technique step by step. If you have come to ride (not to learn), then you are just-riding for your own pleasure. You cannot learn by just-riding; you will be just-riding (more on the difference between riding and learning later, in section 8.3 of Chapter 8).
For progress to go fast, you must eliminate wrong movements and mistakes from all of your riding as far as possible. If your old or incorrect technique comes out on a steep slope or at high speed, then for now do not ride on such slopes and speeds. Better not to ride at all than to ride wrong. Every arc with an incorrect body position grooves that incorrect body position into you. The incorrect grooves in far faster than the correct, and un-learning it is far harder. So even when you are just-riding, do not ride “however it goes.” After the basic technique is in place, you will be able to ride for pleasure and not think about your movements, but until that moment even just-riding has to be as conscious as possible. However, no matter how conscious the just-riding is, it does not stop being “just-riding,” during which you are not learning but just-riding the way you can.
Learning is will and discipline. It is the drive to do something right in every arc, and when that right thing finally comes off in one of the arcs, you must not let it slip — you have to catch it and try to reproduce it in the next one, and so on until the right thing starts coming off in more than half the arcs. Just-riding is just… riding…, when you enjoy the descent from top to bottom rather than tracking your every movement, trying not to miss the moment when the right thing comes off.
Summary. On the hill you can either ride, or learn to ride; you cannot combine the two. To learn something, it must be crystal clear what you are going to do on the hill in general, and on this particular descent in particular; you must have a goal for the day, broken down into a task for each descent. One descent — one task. The task must be stated clearly and briefly, for example: “be along the board for the whole arc.” During the descent, in every arc, you try to carry out the set task. At first it won’t work at all, then it will work in one arc, then in two, then in three . . . And only when you perform the movement you need in more than half the arcs can you consider the task complete and move on to the next one. Studying riding technique is a series of small, successive improvements to your current level, step by step. A multitude of small improvements will, at a certain moment, produce a qualitative jump to a new level, and then it all starts over.
3.5.1. Fears and how to fight them
Fear is natural. We find ourselves in new conditions that we don’t know how to control or what they will bring us (see section 3.1 for more). This is where fear comes from — from the fact that your brain subconsciously knows better than you what you can and cannot do. You may not notice how you constantly catch your balance, but the body and the brain are on top of events.
Fear is a natural safeguard against stupidity. If you are afraid, it means you are not confident in your strength, knowledge, skills, movement speed, the board, the surface, or something else. You have to find the cause and remove it. You must not remove / suppress fear without removing the cause — that is a road to injury.
You have to rationalise the fear and offer a rational solution. The brain will believe it and agree to try, and then the task is for the attempt to be SUCCESSFUL — i.e. the solution has to work 100%. If it doesn’t work and something unpleasant happens, the brain will no longer believe you :)
This is the general way of fighting fear — through rationalising it and finding a rational solution . . . Fear on the hill most often arises from the brain’s and body’s natural failure to understand what is going on, and above all from a lack of control over the situation. All fears arise from not-knowing, in the broad sense.
You have to find a way to convey the information. It doesn’t want the hill. Fine. On a gentle, very gentle slope, zero angle, where someone tows you in arcs by a handle. Then you move to a bigger angle… one degree, i.e. the runout of some hill, and you do the same thing there… Then you increase the angle… As soon as the angle is such that the board can move on its own rather than you being pulled around in arcs by a handle, you start letting go of the helping handle little by little. On the flat there will be no fear; the brain knows how to work with the flat. You have to show it the new movements, and show it that they work on a slope, with centrifugal force standing in for the helping hand. It should be no more than a couple of hours’ work.
↩︎ Back to the start of Chapter 3
3.6. How do you tell what you’re doing right and what you’re doing wrong?
Buy a video camera and a tripod, set it all up at the bottom of the hill, zoom in on the stretch of slope you care about — where something works or doesn’t work best of all — and film your descents. Take those videos and consult people who are able to say something useful about riding. There is no other way. On your own you may not see certain mistakes or big problems, for the simple reason that you don’t know where to look.
Don’t worry about the camera’s safety. If it is lost, you can treat that as an opportunity cost. As of March 2023 the price of a perfectly decent filming kit is about 15k roubles; for the same money you can get about 5 hours with an instructor. But a camera that has put in more than 6 hours with you on the hill can bring you no less benefit — and usually far more — than 5 hours of lessons with the overwhelming majority of instructors.
The value of sensations during learning is zero. That is why filming is essential. For the reasons described above in section 3.1, you don’t know what you are doing on the hill, how your movements work, and which sensations are correct and which are not.
A knowledgeable person you can ask to break down your videos can speed up your learning many times over. Without such breakdowns you may not notice critical mistakes and/or be working on entirely the wrong thing. The reason is the same as why you cannot grasp the technique of someone whose level is an order of magnitude above yours (see section 3.1). When you are learning penmanship, you don’t yet know how letters come out of the copybook strokes. You have no whole-picture understanding of the final result, so you may not notice certain mistakes — mistakes that are not critical now, but which later may turn out to be the crack in the foundation that forces you to demolish the whole house.
Summary. A necessary condition for assessing the results of learning is filming. Without it there is nothing to discuss. The necessary and sufficient condition is a breakdown of your video by a person who knows riding. That person can perfectly well be you yourself, given enough persistence, rote study, and a lot of time — but that is a longer road. In the first case it is moving along a lit highway; in the second, wandering through a dark forest with a flashlight.
↩︎ Back to the start of Chapter 3
3.7. “Who knows their stuff?” or “How do you find an instructor?”
A question as hard as finding a specialist in any field.
To begin with, it is worth understanding that someone having technical riding does not mean that this someone can pass that technique on to you. Being able to do it yourself and teaching others are two different worlds. On the other hand, an instructor is unlikely to be able to teach something they can’t do themselves — for the very reasons set out in section 3.1. There are exceptions to this thesis, but they are so rare they can be neglected.
A person who knows their stuff, like an instructor, should have video of their own riding, because if they don’t film themselves, how do they know what they are and are not doing on the hill? And if they don’t know what they are doing, how can they know their stuff? All of this is also set out above — see section 3.1 and section 3.6.
A good specialist knows the limits of their abilities.
You can spot a number of indirect signs of a good instructor:
Mandatory filming and a breakdown of those videos with you.
They don’t explain the material in terms that make an impression but that are not clear to you, like “up-unweighting,” “down-unweighting,” and so on. The explanation is at the level of “bend your legs when… extend them when…”. What “clear” means is described in Part 3, above; for more on the terminological muddle in people’s heads and in reality, see section 8.8 “On unloading, overloading, and other fascinating terms” — you can go there and come back without any damage to the narrative.
Riding technique is a system of knowledge and movements. That systematic quality should be clearly visible. The main line of your learning’s development should be visible. And the learning should develop in sequence. The instructor should explain and draw up a plan for how to turn what-you-can-do-now into what-you-want-from-riding. Often those two things do not match at all. If at your first meeting with an instructor you immediately started working on what-you-want, then it is either luck or a scam.
Guiding you by radio. You should spend less time sitting / standing / lying on the slope and more time riding — you are learning to ride, after all; to learn to ride you have to ride. Theory can be gone over in a café or at home. An instructor without a radio has to either always ride right next to you and shout to be heard, or lead you down the run by the hand (depending on your level). The lack of a radio slows the process down by at least half once speed goes above walking pace. Quite convenient for the instructor if you pay for time rather than for results. The process slows down because, as described above, at first nothing works, and then a correct movement slips through in one arc. That moment has to be caught and reproduced. It is far easier to catch that moment when you are constantly “in contact,” rather than when you have reached the bottom of the hill and the talk begins about how “reeemember, back there, in the third arc, after the fourth lift tower in the middle of the run, when a skier in a blue jacket flew past…”
Some result of the learning must be visible on video. That is, there must be visible changes. Small or large, they must be visible on video already after the first lesson on the hill. If there is no result on video, only an abstract “understanding,” “sensations,” and “you need to groove it in” — that is a scam. To groove something in, there has to be something that can be grooved in, and that something has to be visible on video, while the price of “sensations,” as we know from section 3.1 and section 3.6, is zero.
It is good when there is video of students with some result achieved over a finite, known period of time. If they could teach them, maybe they can teach you.
Certificates and diplomas mean nothing. Just as well, since they are not needed. An instructor’s technique is visible on their video and you may either like it or not; and the result of their teaching is visible on their students’ videos — in particular on yours, after the first lesson, however long it lasts.
A “yes” to each of the points does not guarantee an adequate instructor, just as “no” answers do not tell you the opposite. These points are no more than reference marks, notches cut into trees in a dark forest, which have to be interpreted in the overall context rather than followed blindly.
Search the chat for messages on this chapter’s topic under the hashtags: #Глава_3 #НЛИ #про_петельки #школы #обучение #учителя #funcarve
↩︎ Back to the start of Chapter 3
Chapter 4. The snowboard. What should it be?
Disclaimer
First
Everything here is considered from the standpoint of choosing a board for carving, or for just-relaxed-riding. Of course some of the considerations can also be used to choose a board for freeride or freestyle, but it is still better to turn to sources on those topics — they may have their own nuances (or may not).
Second
This is a big and convoluted topic. There are no simple answers, and the choice depends on many parameters: riding level, edge angles, the speed of the rider’s movements on the board, riding style, stability of the riding, working with torso position relative to the board, riding speed, the state of the slope, the rider’s weight and height. The parameters are listed in decreasing order of importance for a correct choice; weight and height are in last place.
4.1. Reference points for choosing a board. In brief
Stiffness
The higher the speed and the bigger the edge angles, the stiffer the board must be. The harder the slope, the stiffer the board. On the other hand, the stiffer the board, the friskier the speed build-up => the rider needs fast movements on the board to control it.
Soft, short boards are compliant; they will adjust to any wrong move you make. They don’t punish fundamental mistakes, and from small mistakes they simply stop holding the edge. It is very hard to carve on soft, short boards.
Stiff, long boards have character; they can teach you, they can chase you around the slope, they have their own temperament, which you will feel if you know how to set a board on edge. They will punish you, and hard, for fundamental mistakes. They can even break a leg. On the other hand, they forgive small mistakes. Where a soft board would drop you onto the slope because of flaws in your weight distribution, a stiff one will carry you on. Carving on stiff boards is pleasant, and learning on them is easy.
You can read more on the comparison of stiff and soft here. That compares the fully hard setup with a not-quite-soft one, but that is like comparing the extreme points. As you increase stiffness within a soft setup, everything happens the same way, just less vividly.
Board length
An abstract length figure tells you nothing. The longer the board, the longer a radius it makes possible (but does not require) — the longer / more drawn-out the turn can be => more time to think. On the other hand, a large radius and high stiffness will not turn any way other than by changing the edge angle => you have to be able to set the board on its edges, you need technique. The longer the board, the longer a camber it makes possible (but does not require); the longer the camber (= the contact length of the edge), the better the board holds the arc, but also the harder it is to pull it out of that arc. So a board’s length is a very integral, high-level characteristic that, taken apart from the other parameters, tells you absolutely nothing. The “other parameters” are the contact length of the edge, the sidecut radius, the camber shape, the longitudinal and torsional stiffness and their distribution, the materials used inside… some of them are discussed below.
The rider’s weight and height set the lower bound on longitudinal stiffness and/or length, but it becomes obvious that an exact choice of board based on those two parameters alone is impossible.
A board must be chosen strictly by analysing all the parameters together with the desired style and the current riding level (be sure to read the Summary below).
4.2. A snowboard is a “symphonic work,” not a simple sum of parameters
A snowboard is a single construct that has certain characteristics, but all of them are technologically interrelated and work together, like the instrumentalists in an orchestra. You cannot fully understand the role of the violin in a composition by considering its part abstractly, apart from the whole symphony.
But you cannot understand the role of the violin if you don’t know what kind of instrument it is at all, so… A snowboard has:
Sidecut radius, which together with the edge angle determines the radius of the real turn;
Longitudinal stiffness — the board’s resistance to bending;
Torsional stiffness — the board’s resistance to twisting;
Bend shape. A poor translation of the English “camber profile,” because it is not a bend but rather a “curve” that you can see if you put a snowboard on a flat surface. Since we are interested in boards for carving, we will speak exclusively about what shops call “Traditional camber.” Camber has a height and a length. Roughly: the higher and/or longer it is, the better and more stably the board holds the arc; the flip side of the coin is that the harder it is to pull the board out of that arc.
More strictly, a camber profile may also have different geometry. As of 2023, the correct bend profile is traditional camber + rockered sections at the nose and tail of the board. Rocker is not a piece of the board bent in the opposite direction to the camber — that is called reverse camber. Rocker is a flat section located between the start of the nose / tail and the camber’s contact point (see the figure below). If you step on the camber, the camber bends downward and the flat sections rise slightly upward. This lets you “shorten” the board when initiating and finishing arcs, because the rockered sections engage only at large edge angles — i.e. where grip is needed.
In other words, when grip at high edge angles matters, the board “becomes” longer, and when you need to change edges, shorter. The exact length of the rockered sections is a matter of taste; it is like salt and pepper — some people want more, some less, some none at all (but those are rare cases :)).
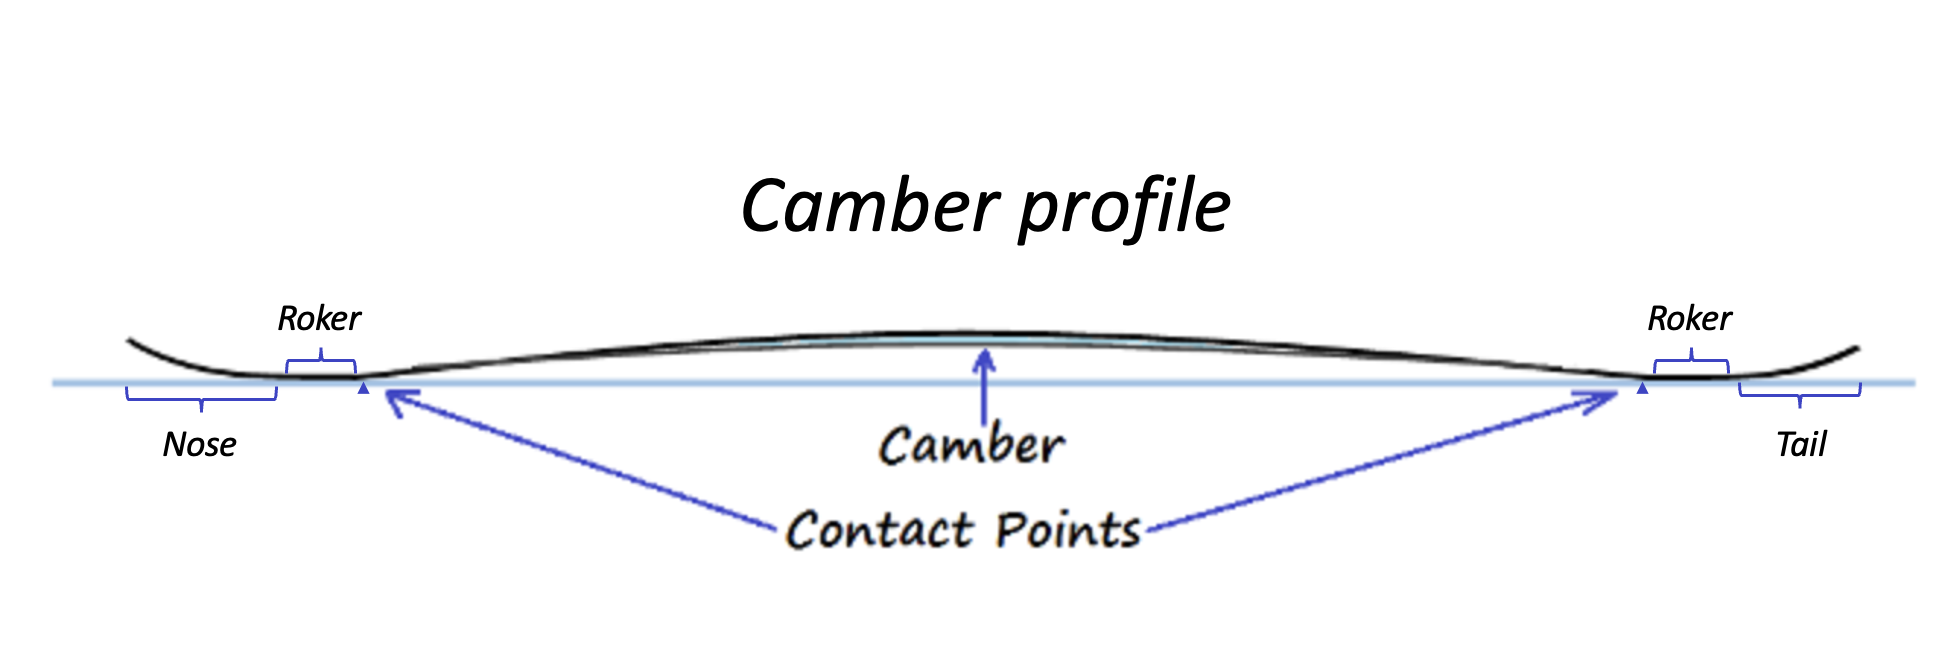
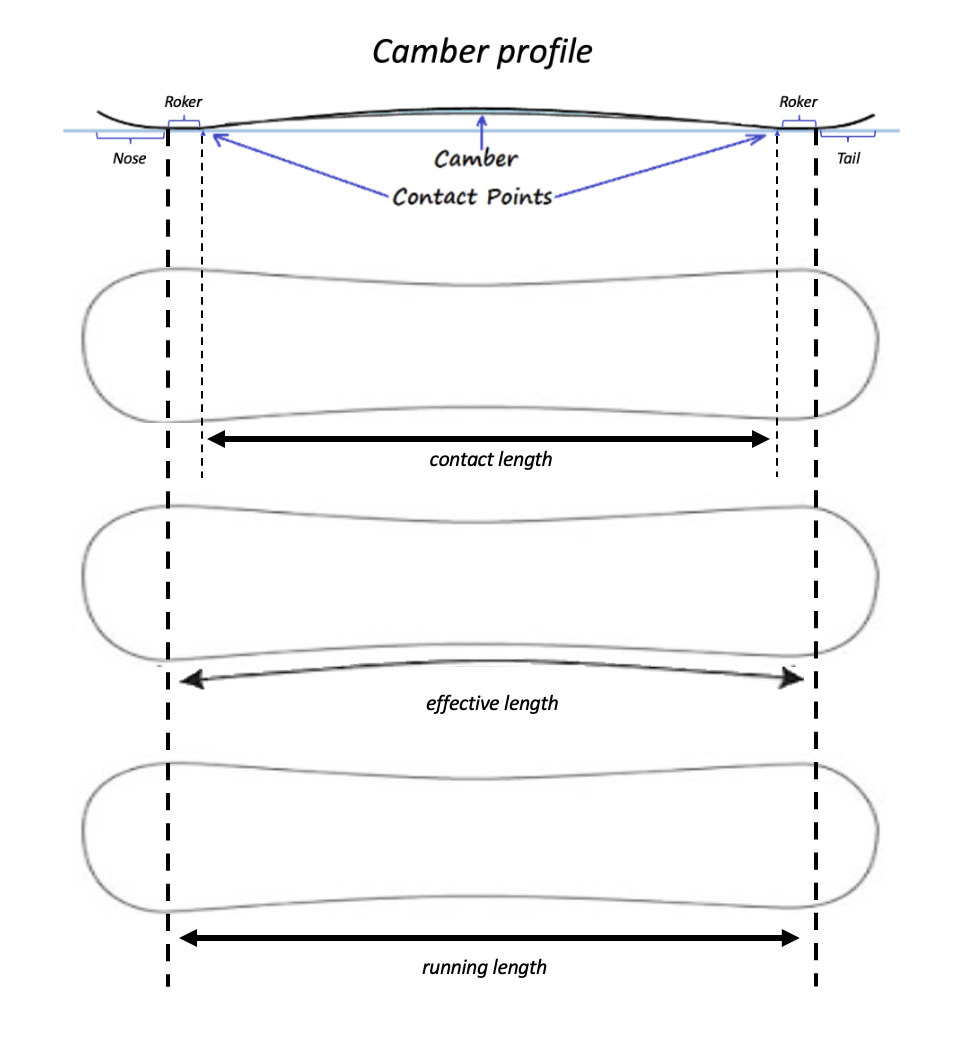
- Contact length — the length of the camber, the straight-line distance from contact point to contact point. Running length is the contact length + the rockered sections. Effective length is like running length, but measured along the curved edge rather than in a straight line. Running and effective length include the rockered sections — i.e. these are the board lengths that start to be felt at high edge angles, conventionally above 45 degrees.
So the lengths relate to one another as follows:
Contact < Running < Effective
Beginners should be most interested in the contact length of the edge, because on a groomed slope it is precisely that which feels like the “length of the snowboard,” and it is also that which gives the best grip in the arc, all else being equal.
- Geometry, or Shape, a straight loan from the English Shape. Without going into detail, almost all carving boards have a directional shape — i.e. the nose is not the same as the tail. From nose to tail, the distribution of longitudinal stiffness, the sidecut radius, and other characteristics may also change, tuned for specific tasks.
All six of these characteristics, plus the materials the snowboard is made of, are connected to one another and work only in combination. You cannot change one characteristic without changing another and get the same board but with one parameter changed. And conversely, by changing the stiffness distribution and the geometry, you can make a board with a 14-metre radius ride like a board with a 7-metre radius — i.e. by changing n − 1 characteristics you can cancel out the effects of the one you picked. So:
Considering isolated characteristics in the abstract will give you no idea how the board will ride.
However, such consideration can give a rough idea of how hard or easy it will be to do various things on it. Continuing the analogy above: obviously, if you have a size 45 foot, don’t try to squeeze into a size 39 boot. The characteristic figures help you outline a preferred set for a later fitting, and it is the fitting that lets you choose the one thing you need.
Two remarks are in order here 1) Of course, all of this is subject to the manufacturer acting sensibly, because if, for example, you make a large radius and low torsional stiffness — that will be not a blessing but a curse for carving. 2) If you know how, you can carve on any board, maybe even on the lid of a grand piano. The question of how much pleasure it brings is left aside, but it is better to learn on something that helps you learn, not something that hinders you. end of remarks
A sidecut radius below 10 metres hinders learning. The real turn radius will be even smaller, and the bigger the edge angle, the more dramatically it shrinks (see Chapter 5 for more). Dramatically, indeed, because the relationship there is not linear but a power law. Add to this the low longitudinal stiffness that is often built into small-radius boards, because of which the board bends more in the turn under the physics of the turn and the rider’s weight, further shortening the real turn radius. People say it “curls into a bagel.” All of this leads to an abrupt end of the arc, which does not even have time to begin. You will have no time to think, to feel something, or to realise something; you have only just set the board on edge, and it has already finished the arc. That is not riding and not even learning — just torment.
With low torsional stiffness, the board gains the ability, under the forces that arise in the turn, to twist along its length like a propeller in the arc; as a result the nose and tail try to travel along different trajectories, along different radii, and that is instability and a washout. For carving, torsional stiffness must be high. There is no choice here.
Longitudinal stiffness must be appropriate to the riding level. High edge angles need a stiffer board. If you add speed to that (not separately, but precisely to the edge angle), the load on the board grows even more, which means the board needs to be even stiffer. The rider’s weight and height impose a limit on the lower stiffness threshold, but not on the upper. The upper bound, at an adequate riding level, becomes a matter of taste, like pepper or salt for a dish.
By this point in the text it should already be obvious that choosing a board by the manufacturer’s height/weight tables is a pointless exercise, because the mass-snowboarding industry is not merely in a stage of degradation but in a steep nosedive, where the main goal is to make a board that will be cheap and that will somehow ride from the favourite, most common wrong movements — such as vertical torso twisting, repositioning the board with the legs, or torsional twisting of the board with the feet. All of that needs soft, small, compliant boards. They have nothing in common with stability at speed and safe riding on slopes steeper than green. They are not made to be set on any edge angle visible to the eye.
4.2.1. A word about all-mountain boards
There is no such thing as an all-mountain board.
Everything universal is worse than the specialised.
In summer it is better to ride on summer tyres, and in winter on winter ones. All-season tyres will be worse than summer tyres in summer and worse than winter tyres in winter — i.e. equally bad in both winter and summer. In the case of carving, riding will be easier and more pleasant on specialised boards than on “carving + freeride” or “carving + freestyle” boards; on which, in turn, it will be easier and more pleasant than on boards just-for-freeride; on which it is better than on all-mountain “do-everything” boards; on which it is better than on park boards. In other styles the order is analogous.
Universality is just as much a limitation as specialisation. Everything is decided by the conditions . . .
There is a time to ride freeride, a time to ride the piste, a time to ride the park. Freeride and groomed slopes generally live on different days. When it is dumping snow and the freeride is excellent — then the pistes are too soft for carving; when it is frosty, the sun is out, and the pistes are hard — the freeride is usually already tracked out… Spring slush is a favourite time for the park; in the freeride the snow is by then, if not tracked out, then heavy, and on the piste it is too soft for carving.
There is no bad weather — there is a wrongly chosen craft . . .
. . . of course, when hazelnut-sized bits of ice are flying around your helmet, a gust of wind can knock you over while you’re strapping in, and the humidity is 100% — it is better to just stay home.
4.3. Summary
First. A board must be chosen either for the current riding level and predominant style, or for specific tasks.
Second. Studying the technical specifications will not let you choose anything precisely. There are three options:
Contact the manufacturer about choosing a board for your specific tasks. Precisely the manufacturer — not shop salespeople or marketing departments. Contact the one who makes the boards. Manufactures them.
Discuss it with the instructor or coach who teaches you — finding one being, of course, a problem (see section 3.7 of Chapter 3 for more).
Get boards and test them yourself.
Third. Studying the specification figures on paper gives only a rough idea of a board, not a full one. It is like trying to buy shoes by studying only the size number of the boot.
And it might turn out to be badly glued… or not rated for running loads…
The manufacturing process of snowboard-building is complex and empirical; you cannot understand it without making boards. So for an exact choice of board, all that is left is to test them, or to talk to the manufacturing side in terms of “I ride like this… I need a board to do this… on which of your boards will this be as comfortable and convenient as possible.”
For more detail on boards, their characteristics, materials, and a choice strategy, read the OES Knowledge Base here.
Search the chat for messages on this chapter’s topic under the hashtags: #Глава_4 #выбордоски #contact_edge #effective_edge #running_length
Chapter 4(3/4). Boots and bindings — how to choose?
Disclaimer
This section is a guide to choosing boots for carving and/or just-relaxed-riding on a soft snowboard. A soft snowboard is a snowboard for soft (non-plastic) boots. A stiff BX board with titanal inside is also a soft snowboard, because it is a board for soft bindings and soft boots. If boots are being chosen for flat-freestyle, freestyle, or freeride styles that contain freestyle elements, then probably (though not for sure) some of the theses in this section will not apply to those disciplines. It is better to consult people who ride a lot and develop in the relevant disciplines.
Introduction
To begin with, it is worth getting a little clarity on the motivations of the parties involved.
The boot maker wants to earn more money => to spend less on production and to have boots bought more often => they have to wear out.
The salesperson or manager in the shop wants you not to leave empty-handed — that is their job. So when the range of choices starts running out, various tricks will come into play just so that some boots get bought.
The comfort of your riding is a concern for you alone. Everyone else couldn’t care less about it.
The average tourist rides no more than 10 days a year. If, on average, boots die 10 days after they were bought — that is not very good. The tourist might notice the catch. But if they die in two or three years — i.e. on the 21st–25th riding day (the person rides 10 days a year, but by inertia measures the lifetime of purchases in calendar days) — then that is acceptable. And that is how you get the average lifespan of the average boot on the average person.
4(3/4).0 Signs that something is wrong . . .
The foot… wobbles, gets cold, aches, goes numb, is squeezed… Overstrained muscles of the foot and/or shin on the front edge; crushed toes; heel play during edge changes; black toenails; the foot rolling over; pain in the instep or the arch — you need to do something with the boots or the footbeds. Pain during hard sets / washouts on the front edge — the boots are too soft.
Comfort while riding is the most important thing. Without comfort you can neither get any pleasure nor progress.
4(3/4).(1/2) The footbed
An orthopaedic foot-support footbed is the foundation of any boot. Under load, the foot flattens and is squeezed by the walls of the boot + the arch starts to hurt. Orthopaedic footbeds are footbeds made by an orthopaedic doctor, not in a sports shop. In a shop they are anatomical. If a footbed creases when you bend it with your hands — then how is it going to support a foot with 50+ kg of weight on it + centrifugal force? A footbed must be thin and stiff (on a rigid frame). Supporting, not correcting. Any correction will bring you pain on the hill. Even if the orthopaedist very much wants to build it [the correction] for you. No. Correction has to be done off the hill. On the hill — support only.
4(3/4).1 Boots
Boots must be comfortable, and boots must fix the foot excellently.
A boot consists of:
The boot, a.k.a. the shell, a.k.a. the soap dish, a.k.a. the outer skin.
The liner, a.k.a. the felt boot.
The shell provides stiffness, fixation of the foot, and transmission of your movement into the board.
The liner’s job is to fill the space between the foot and the shell, providing a snug, gentle, and comfortable fixation of the foot in the boot.
Liners come in three types:
thermo-fit
thermoflex
foam-injected
Thermo-fit is the cheapest type of liner. Marketers say it “moulds from the heat of the foot.” In fact, the fixation is “so-so” and gets worse every day. Which, on the whole, is logical: if something “moulds from the heat of the foot,” where is the point at which it stops moulding? Right. Nowhere.
Thermoflex — mid-price-segment liners, a.k.a. bakeable. There are a number of nuances here:
First, there are two brands that make bakeable liners — Intuition and Palau.
Second, which follows from the first: the bakeable liners that boots come fitted with as standard are garbage, even if it says Intuition on them — it is still garbage. Boot manufacturers order “lightweight” versions of the liners for themselves — i.e. cheaper and worse, i.e. just garbage. This is done because garbage a) costs less, b) breaks down faster => people come back for new boots faster.
A simple question. If a good thermoflex costs ~$200, then how can a good thermoflex be inside boots that cost $200? It can’t.
Here is an example. The Ride Cadence boots, in the 21/22 season, came fitted with the Intuition Dream Liner. If you go to the Intuition website, you can already spot from the pictures a certain difference, and if you go to a shop, for example here, and feel the original Intuition Dream Liner, comparing it with what is inside the Ride Cadence boots of the 21/22 season, then the trashiness of the stock liner becomes more than obvious, even if you have never held a thermoflex in your hands.
Stock liners are garbage. Even in $1200 boots. You buy the boots, and the liners go in the bin.
- Foam-injected liners — the most expensive option, and also the best, both in terms of fixation and in terms of comfort. For example the Atomic liners. This option has one downside. The liners are very cold, so much so that below −5 your toes will freeze solid in them within 20 minutes. So with this option you will also need to buy satellite-controlled socks.
How to choose?
There are two options here:
First. Go the usual way. That is, walk around shops and look for something that fits. Here you have to understand that:
Choosing snowboard boots is just as hard as choosing regular ones. The harder it is for you to choose regular ones, the many times harder it will be to choose snowboard boots. All the principles are the same… different manufacturers have different lasts, and they may fit you or not. Some people fit Nike… some people fit Reebok…
A lot of time will be spent, a very great deal, because finding the ideal fit is very hard. And you have to find it. That is, you have to go round all the shops, and possibly travel to another city or country, to try on ALL the boots. The salespeople’s claim that the heel is allowed to be a little bit mobile is nonsense, said so they can get rid of you sooner.
A “boots + stock liners” set bought this way will live exactly as long as the manufacturer intended — i.e. not long.
Which brand / lacing / model to choose does not matter at all; you have to try on everything and choose the one that is 1) stiff, 2) fixes the foot, 3) causes no pain / discomfort. See the section below, 4.3/4.2 “Common myths and fakes about choosing boots”; and anyway, you can read this whole article and the Velvet School.
Second. Buy the boots, throw away the stock liners, which are designed to be thrown away. Buy proper liners and enjoy life.
Choosing boots in this case differs a little from the “usual way.” The selection algorithm is written out in fair detail on Velvet School. It is written for hard boots, but for soft ones it is all the same. Here is its short version:
- You come to the shop and ask for the stiffest boots they have. You feel them with your hands; if the stiffness suits you, move on to step two.
An aside about boot stiffness Soft boots for carving cannot be too stiff. You can safely take the stiffest ones you can find. As a rule these will be the top models of the brands, so there is no need to discuss lacing methods and quality here. You will either like the lacing or not. Precisely as a matter of taste. Some people like BOA, some Speed Zone, some laces. A top model will definitely have at least two-zone lacing, and it is unlikely to be badly done. An example of bad lacing is when you press on the tongue and the upper lacing loosens on its own, at the expense of the lower one tightening — that is just awful.
You take out the liner and put your foot inside the shell without the liner.
We assess the length of the shell. Touch the front of the boot with your fingertips, and with a hard object assess the space between the heel and the back wall of the boot — it should be from 1 to 1.5 cm. If more, repeat the operation with the previous size. 1.5 cm is the maximum. If it is “around” 1.5 cm, then the foam may compress badly (depends on liner thickness) and everything may wobble, if not right away then very soon; the greater the distance, the higher the chance of this. If it is “around” 1 cm, then baking may be painful + the fit of the shell to the foot starts to be critical, because the foam compresses hard and will compensate for any irregularities of the boot minimally; the smaller the distance, the higher the chance of this. Summary: 1.6 cm is too much, 0.9 cm is too little. Optimally, there should be a gap of 1.1 to 1.4 cm.
We assess the free space around the ankle. Without the liners. The heel is pushed back all the way; by feel, try to work out how much room the ankle bones have — a margin of at least 3–5 mm is recommended.
Assessing the freedom in the ball of the foot and the width of the shell. Some conditional freedom is the ideal option, no more than the measurement (the width of the foot at its widest part) plus 3–5 mm at the ball.
We check that the shin hits the tongue before the toes do. The shin must hit the shell’s tongue before the toes hit the front wall — otherwise you will crush your toes and your nails will go black. In the shell without the liner, having laced the boot as if with a liner, when the shin touches the tongue you should barely, barely feel the front wall of the boot with your toes, or not feel it at all.
Finally read the thread on Velvet School; there are pictures there.
After the shell has been chosen, we buy a liner to the size of the shell. That is, the length of the liner should equal the internal length of the shell from the back wall to the toes.
My comparison of Intuition and Palau can be found here:
In short: Palau are softer, their thickness is 0.8 cm. They are easier to bake, they have great hard inserts on the shin that help prevent your legs getting battered by the boots during hard sets. Intuition are harder, thickness 1 cm, a bit harder to bake, but they fix the foot better, slightly increase the boot’s stiffness, and seem like they will live longer, thanks to being harder.
Injected liners fix the foot incomparably better than any others. They have plastic tongues and hard back walls, which substantially increases the boot’s stiffness, distributes the load on the shin better, batters it less, and lets the binding straps pinch it less. But they are COLD! You absolutely must buy thermo-socks.
If the set is assembled correctly, then it is quite possible that BEFORE baking your foot doesn’t fit into it at all — completely doesn’t, as if it were three sizes smaller than needed. No. Those are the correctly chosen sizes. After baking it all settles in perfectly and lives much longer than the stock slop.
How to mould a proper thermoflex?
A proper thermoflex is one hour to prepare the foot, 10 minutes to warm up the boot, 40 minutes to mould, and 10–20 minutes to talk yourself into the second boot, because moulding is done STRICTLY ONE FOOT AT A TIME, not both at once. So roughly two hours per foot, or four to five hours total. The procedure is described here. If you have doubts about your own abilities, you have to find specialists who mould boots for sport and get it done by them; as of 2023 the procedure costs FROM 5000 roubles. If the boots are moulded by clumsy hands in a hurry, nothing good will come of it.
How to mould an improper (stock) thermoflex?
There is plenty of video on YouTube about this; it can be done in any shop. Better to look for a shop that will at least throw a toe cap on for you. After moulding it should be comfortable in the boot IMMEDIATELY; light touches of the toes against the front walls are acceptable, and they disappear if you tap your heel on the floor.
How to inject foam-injected liners?
Foam-injected liners
Likewise, if you have doubts about your own abilities, you need to look for specialists connected with sport, or with skiing.
4(3/4).2 Common myths and fakes about choosing boots
- “The heel can move, we don’t ride the way you do in a boot anyway for your heel to move” — absolute nonsense. The heel must not wobble in the boot, not by a centimetre, not by a millimetre, not at all. The foot, and specifically the ankle, must be tightly fixed by the boot. For this the boot must be fitted in length, so that the foot (and heel) don’t move “back/forward”; the boot must be fitted in width, so that the foot and heel don’t move “left/right” and there is no possibility of the foot rolling over; the boot must be fitted over the instep, so that the foot has no play up/down.
The truth is that fitting boots correctly by going the “usual way” is very hard, so hard that it is almost impossible, which is why this drivel was invented — that “everyone’s heel moves a bit” or “you don’t make movements like that with the foot while riding.”
“When I bought mine, my toes were all curled up, I broke them in over two days.” Boots must be comfortable. If it is a thermo-fit — they should moderately squeeze the foot from all sides, but without pain. Curled toes are overkill. Any painfulness in the shop should be multiplied by 10, and you get what you will feel on the hill. If it is a thermoflex chosen CORRECTLY, then without baking the foot won’t fit in there at all. And if it is a thermoflex chosen “the usual way,” then before baking it may pinch, or pinch a lot, and after baking it should be comfortable IMMEDIATELY.
“These boots are soft without the bindings, but once you strap in, the bindings will start holding them and it’ll all become the right stiffness” — more nonsense, aimed at trying to fob off soft slippers as super-stiff boots.
“Soft boots and bindings are needed so it’s easier for a person to learn the basic movements, and stiff boots/bindings are for pros” — a partial truth that conceals a terrible lie. This applies ONLY to “soft” boots and bindings. It does not apply to boards or plastic boots. From Chapters 1 and 3 it is obvious that moving down a hill on a board strapped to your feet is a movement completely unfamiliar to the body and the brain. Soft boots let you take a partly correct position on the board, but with “traces” of old motor programs or reflexes. And why leave skeletons in the closet of our technique? Later you will have to painfully hunt them out and clean them from those closets. Another question: how do people learn to ride from scratch straight away in plastic? Any “soft” boots are house slippers compared with any plastic, which also has gradations of softness, by the way. Yes, snowboard gear takes time to get used to, and it is better to spend 1–2–3 days getting used to the right gear than to waste time and money on the wrong gear (which doesn’t help and sometimes even hinders). How to get used to gear I describe in detail in Chapters 9 and 10. The first days can be spent in your own back yard; you don’t even need a hill for that.
“Soft gear forgives mistakes” — the same kind of half-truth as point 4. Yes, soft gear forgives FUNDAMENTAL mistakes. At first a person on a board makes many superfluous movements, and thanks to the soft gear those movements will not go into the board. The flip side of the coin: correct movements, which at first are too timid, also will not go into the board — and how do you learn in those conditions? When the board barely reacts to any of your movements. And how do you un-learn wrong movements if the board doesn’t punish them? At the very start of the path, un-learning wrong movements takes hours, if not minutes. After a season spent on the board, un-learning wrong movements can take weeks. The main task of a beginner in the first days (described in more detail in Chapters 8, 9, and 10) is to eliminate all incorrect movements, and since a beginner cannot have any correct movements by definition — because they are a beginner — they should have no movements at all. Stiff gear will help with this goal; soft gear will let you ride however it comes out.
4(3/4).3 Bindings
Bindings must attach you to the snowboard and transmit your movements to the board. For soft-carving, the stiffer the bindings, the better. Obviously, plastic bindings are softer than aluminium ones. All composite / plastic / compound / nylon baseplates go in the bin, and in the end not many options are left — which, again, most often belong to the brands’ top models, and there is no question about the quality of the straps and so on there.
Bindings often used for soft-carving: Ride A8/A9/A10, Drake Radar, F2 Eliminator.
4(3/4).4 On the stiffness of boots and bindings
In soft-carving you cannot overdo the stiffness of boots or bindings. Any soft boots or bindings are soft boots or bindings, even if it says on them that they are stiff. If you are interested in carving or just controlled riding on groomed slopes — then you buy the stiffest thing you can get your hands on. For freestyle there are different selection criteria.
An example. A woman weighing 50 kg, 160 cm tall, doesn’t ride on edge, rides with a skid. She rode in soft Salomon boots costing 10,000 roubles and a Joint board = linoleum. She bought a set: Ride Cadence boots, a Palau Hard liner, Ride A9 bindings, an OES FR 150 S board. She rides with a skid, not carving, and gets far more pleasure. The board rides more stably, movements are transmitted into it better, her feet don’t hurt and don’t get cold, everything is wonderful.
Why, then, doesn’t everyone buy themselves the stiffest boots and bindings?
There is an opinion that soft forgives mistakes. To some extent this is so, but exactly as much as soft forgives mistakes, exactly that much does it prevent you from controlling the situation. A soft setup lets you bend it to fit incorrect technique, an incorrect stance, incorrect movements. The stiffer the boot, the harder it is to break / bend it in order to take an incorrect stance or load the board with an incorrect movement. That is, stiff boots will teach you to work on the board correctly, and if you already know how, they will only bring you pleasure.
This applies only to the choice of “soft” boots. In the case of “hard” — i.e. plastic — boots and the corresponding bindings, it is not so simple.
4(3/4).4(1/2) Is this text really for beginners? What are they supposed to do?
Yes, this text suits beginners too. On the whole, if you have a lot of money and spare time, you can spend them on a methodical increase in boot stiffness, as well as snowboard lengths (more on snowboards in Chapter 4). This will provide a veeeeeeery smooth entry into the subject, but it will be veeeeeeery long, veeeeery drawn-out, and veeeeeeery expensive. “Veeeeery long/drawn-out” means seasons instead of days, and “veeeeeeery expensive” means the amount of money thrown away on “intermediate gear” and “intermediate” instructors. On top of that, the soft and short setup that is successfully sold to beginners in every shop in the country will let you make mistakes (see points 4 and 5 of section 4(3/4).2 above, and also Chapter 8), which will smear the learning time even further across the space-time continuum.
The most compromise path is to take gear from a rental shop, on which you master the material of Chapters 9 and 10. And for everything after that, calmly buy what you need (described in this Chapter).
4(3/4).5 Short summary
It may seem that this is missing discussion of lacing types, brands, inserts, vibration damping, and some other super-duper-extraterrestrial technologies — all of that is 95% nonsense and marketing to justify the insane price. The “boot + liner” structure must be comfortable and must fix the ankle. Not squeeze it, but fix it. Squeezing is when blood circulates badly and fine motor control is disrupted; fixing is when joint mobility is limited by the boot, the foot sits snugly, it has no ability to “fidget,” but you can walk / sit in it for 2 hours. If after 15 minutes you get the urge to tear the boot off or gnaw your own foot off, then something is very wrong. Entirely. If the heel has even 1 millimetre of play — that is incorrect. In two weeks 1 millimetre will turn into 10, and then you will start popping out of the boots without loosening the lacing.
4(3/4).6 Links for further reading
2) OES snowboards Knowledge Base
3) OES article on choosing liners
Search the chat for messages on this chapter’s topic under the hashtags: #Глава_4, #ботинки, #снаряга, #стельки
Chapter 5. How and why does a snowboard turn?
Let’s start with something you can simply check by experiment. Lay the board flat, base down, on a flat section of the slope. Zero angle. The board just lies there. If you slide it back and forth, it doesn’t turn. You can turn it with your hands, but that is not a turn of the board — that is the board turned by hands (or feet).
Now set the board slightly on its edge — i.e. cut the edge into the slope at some small angle (one degree). If you now slide the board back and forth on its edge along the slope, the edge leaves a thin line on the slope where it cuts. Fix the board in that position — it is standing on its edge at some angle to the slope surface. That angle is the “edge angle.” Push the board forward. It rides on its edge, tracing a circle. Half of that circle is a turn. That is how a board turns. If we set it at a larger edge angle, it rides along a circle of smaller radius, and so on.
For a board to turn, you have to set it on its edges — then it turns on its own. If you don’t set the board on edge, it will not turn on its own; you have to swivel it with your legs.
When riding on the edges, the turn radius is regulated by the size of the edge angle. The bigger the edge angle, the smaller the real turn radius. The maximum turn radius is the board’s sidecut radius. The real turn radius can be roughly estimated as the cosine of the edge angle multiplied by the sidecut radius.
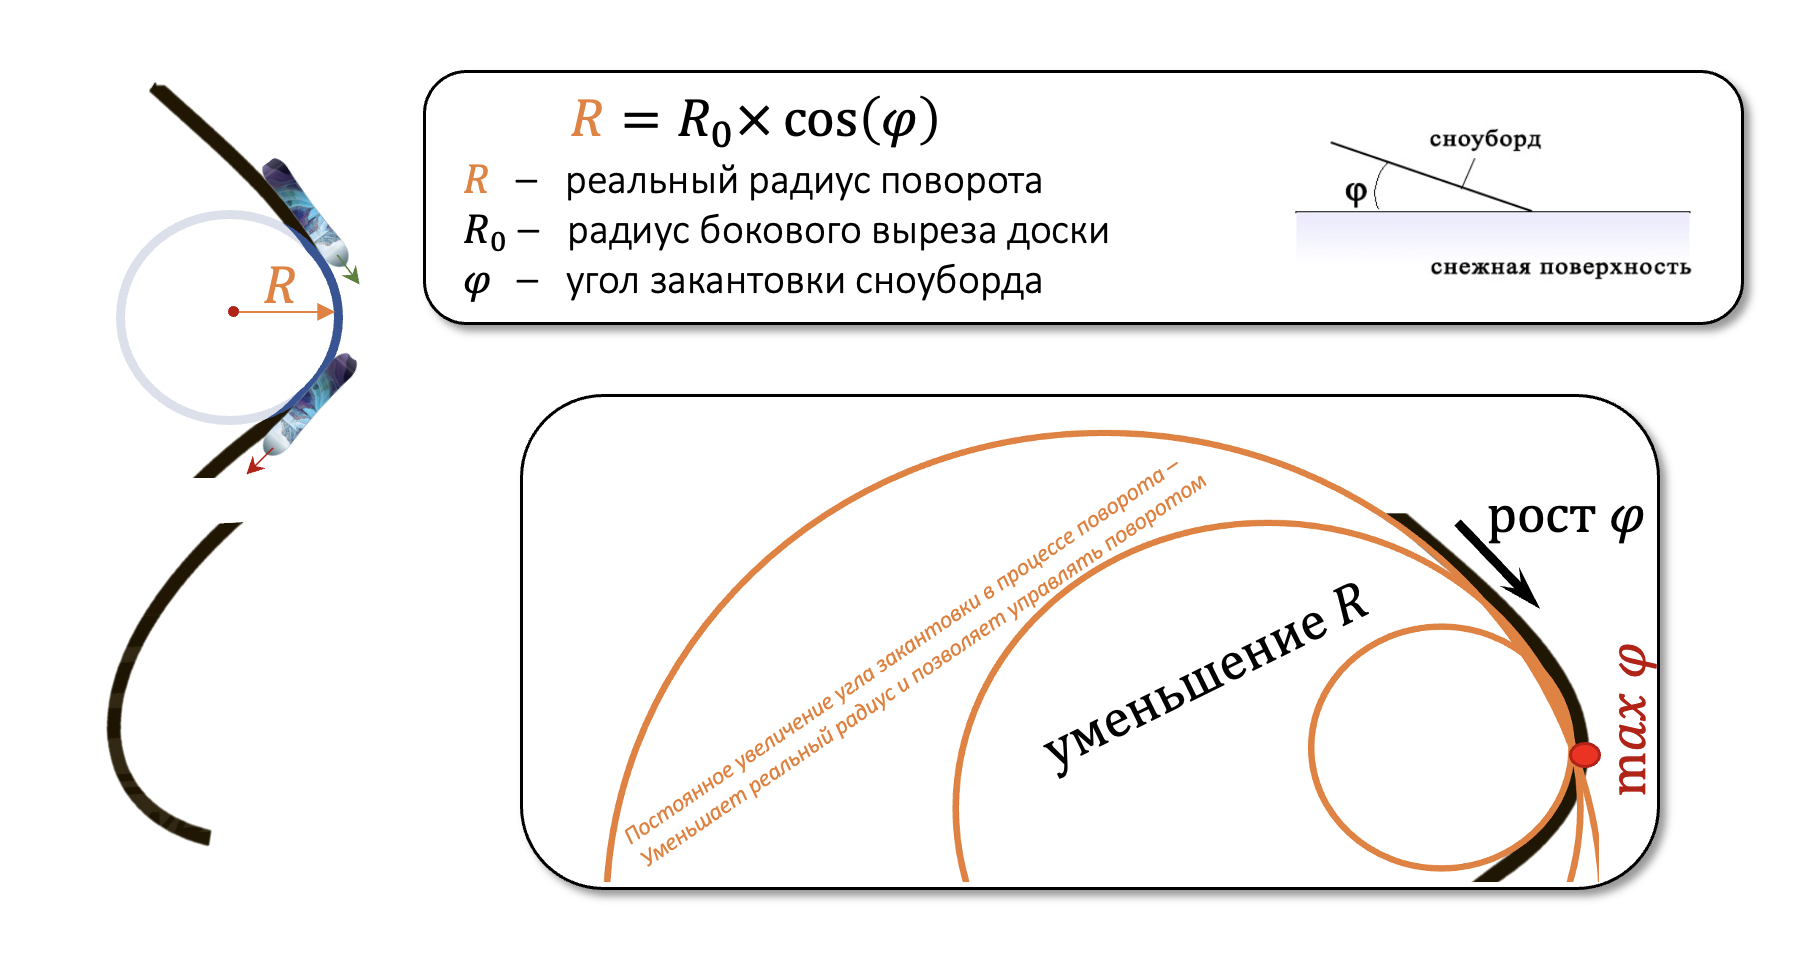
The real turn radius decreasing as the edge angle increases
The cosine is the projection of the board’s sidecut radius onto the plane of the slope. As the angle increases, the projection decreases => the turn radius shrinks. The formula doesn’t account for the board’s longitudinal bend. Yes, it exists in reality, along with many other factors. The formula gives a rough lower estimate of how the real turn radius depends on the board’s radius. That is, the board can turn even without its longitudinal bend (you don’t need to try to “press it through” or “flex it”). The dynamics of the change, even in this rough LOWER estimate, look impressive at edge angles above 50 degrees. In reality the changes are more dynamic, since the estimate is a rough lower bound.
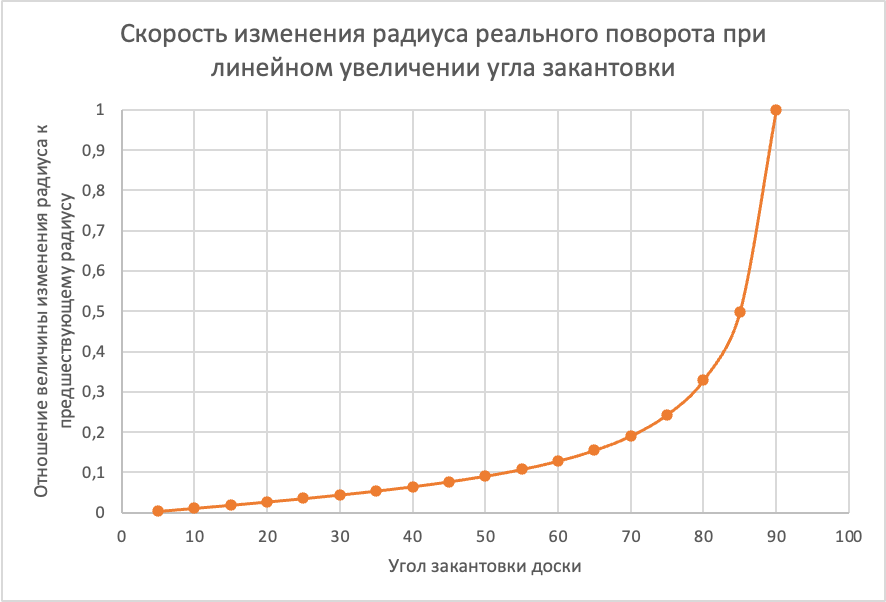
As the edge angle increases from 45 to 50 degrees, the turn radius decreases by 10%. That is, on a rough estimate that doesn’t account for the board’s longitudinal bend, at an edge angle of 50 degrees the turn radius will be 10% smaller than at 45 degrees. As the edge angle changes from 80 to 85 degrees, the turn radius decreases by 50%. The higher the edge angle, the faster the turn radius shrinks with each additional degree of edge angle, and that change is non-linear.
Moral — if you want the board to turn fast, set it at a large edge angle, and it will do everything itself.
5.1. How do you control the board’s turning?
The board is controlled by the rider’s weight — specifically by the position of the centre of mass relative to the board. That’s all.
You cannot control the board with your feet in carving, because the board has high torsional stiffness and there are no other stiffness options here (for details see Chapter 4, section 4.2). If the torsional stiffness lets you steer with your feet — then it is not something you can carve on easily, or learn to carve on.
Counter-rotations help swivel the board with your legs. That is not control of the board’s turning — that is turning the board with your legs. Why turn the board with your legs when the board can turn on its own?
Rotations, counter-rotations . . . these are all elements you can, and sometimes should, use. But if that is the only way you can move on a snowboard — then why do you need a snowboard? You could strap a long sled to your feet . . .
So: the board’s turning, which it does on its own, can be controlled only by weight — specifically by moving the centre of mass over the board somehow. To edge the front edge and make a frontside turn, you have to move the centre of mass past the front edge. For the back edge, correspondingly, the opposite.
The board is the ship, the person is the mast — the board tilts, the mast tilts. The mast tilts, and so does the board. The weight has moved further past one edge — the board has gone further onto its edge, the edge angle has increased, the turn radius has shrunk.
Need a radius under two metres? Set the board straight onto an edge angle of 85 degrees; the turn will be very fast — you may not even keep up with it.
The theory is simple, and the movement itself is hard to perform, but that comes in the next sections; for now, only the theory.
P.S.
Here and onward, to the end of Chapter 15 at least, nothing is written about the front leg and lengthwise work on the board — not because it is left out, or assumed known to the reader, but because it is not needed at this stage of learning and can only complicate everything.
Chapter 6. What forces arise in a turn?
So: a snowboarder rides in arcs, making turns. We are talking about carved turns, so the radius of these turns is regulated by means of the edge angle (Figure 1; for more see Chapter 5):
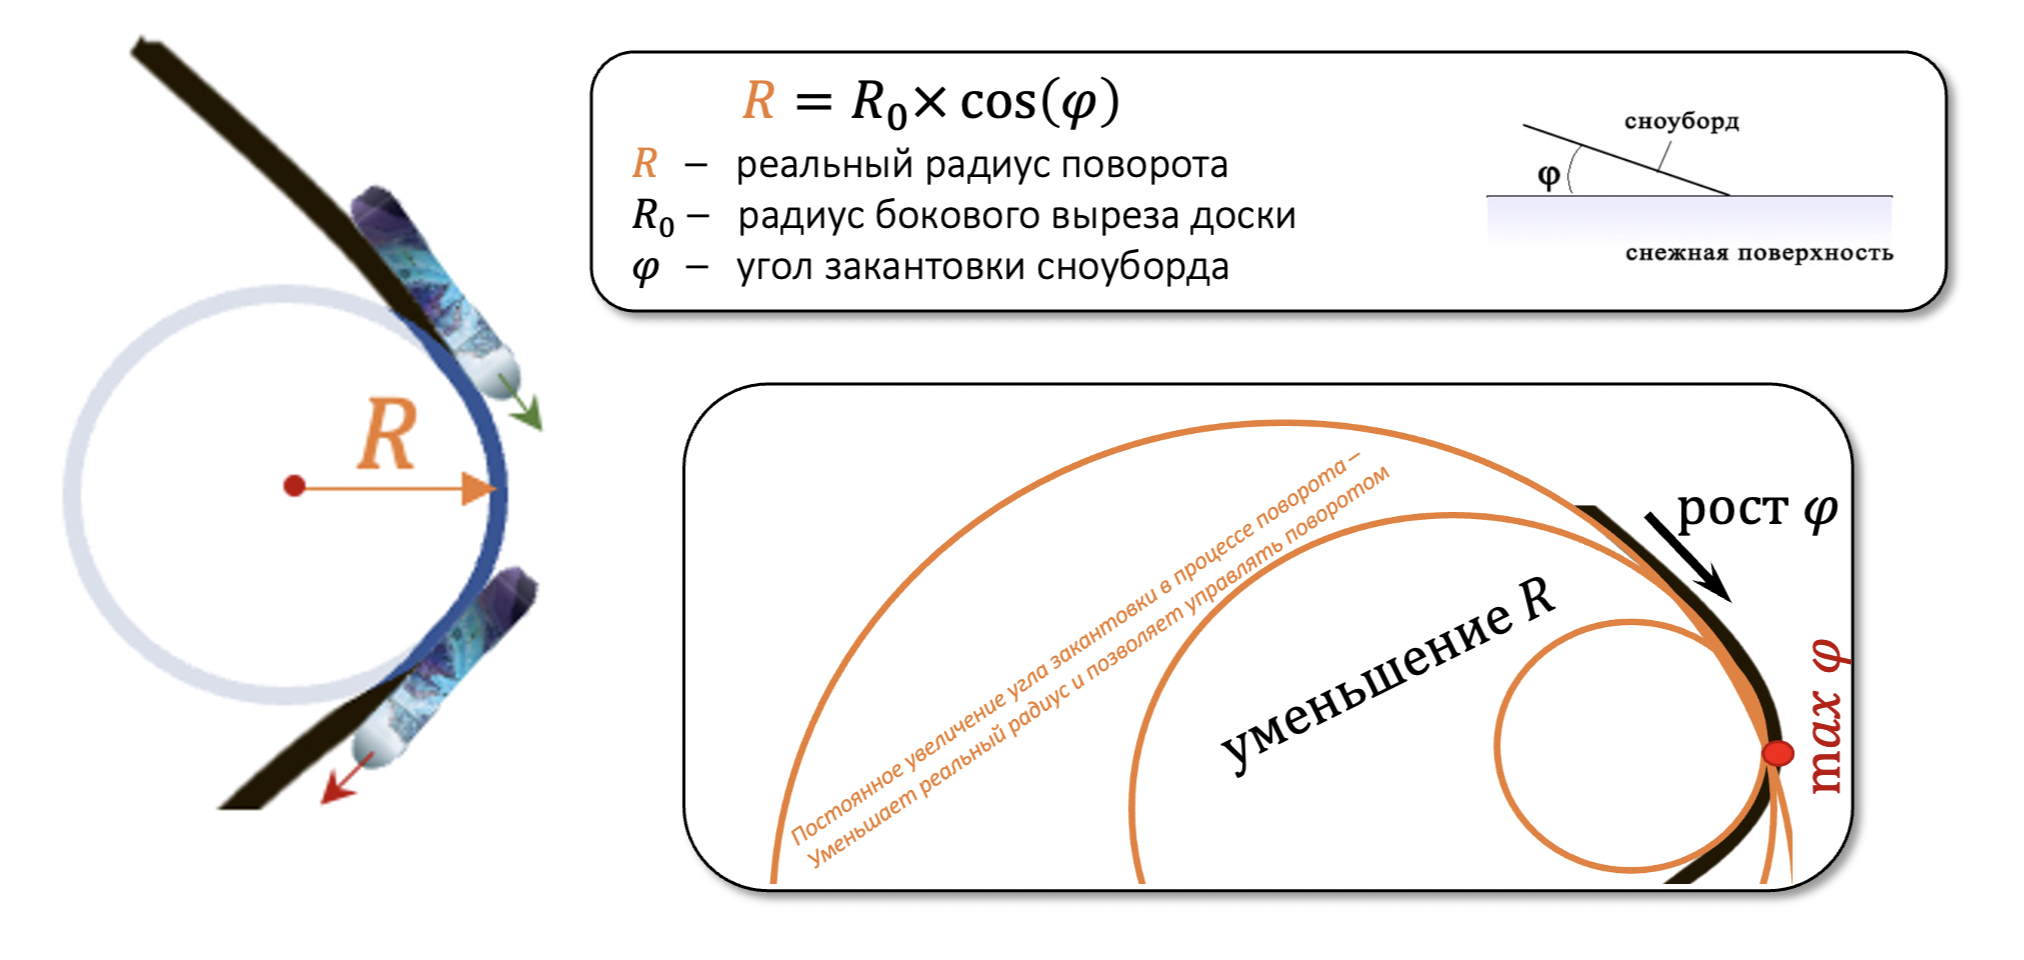
Figure 1. Regulating the instantaneous arc radius by means of the edge angle. The shape of the turn differs from a circle, or part of one, and has a somewhat “elongated” outline, because at the start of the turn the edge angle is small, but it grows toward the apex of the arc, where it reaches its maximum => at each separate moment in time the radius of the circle along which the board is moving at that moment will differ from the radius it was travelling along the moment before.
The snowboarder rides down the hill from top to bottom and makes turns, so both the rider and the board have some linear acceleration from top to bottom, there is angular acceleration in the turn, there is angular momentum in the turn, and centrifugal and centripetal forces act on the person’s body, forces that depend on the body’s position, on speed, and on the board’s edge angle. Let us try to sort all this out below.
6.1. Linear acceleration from top to bottom
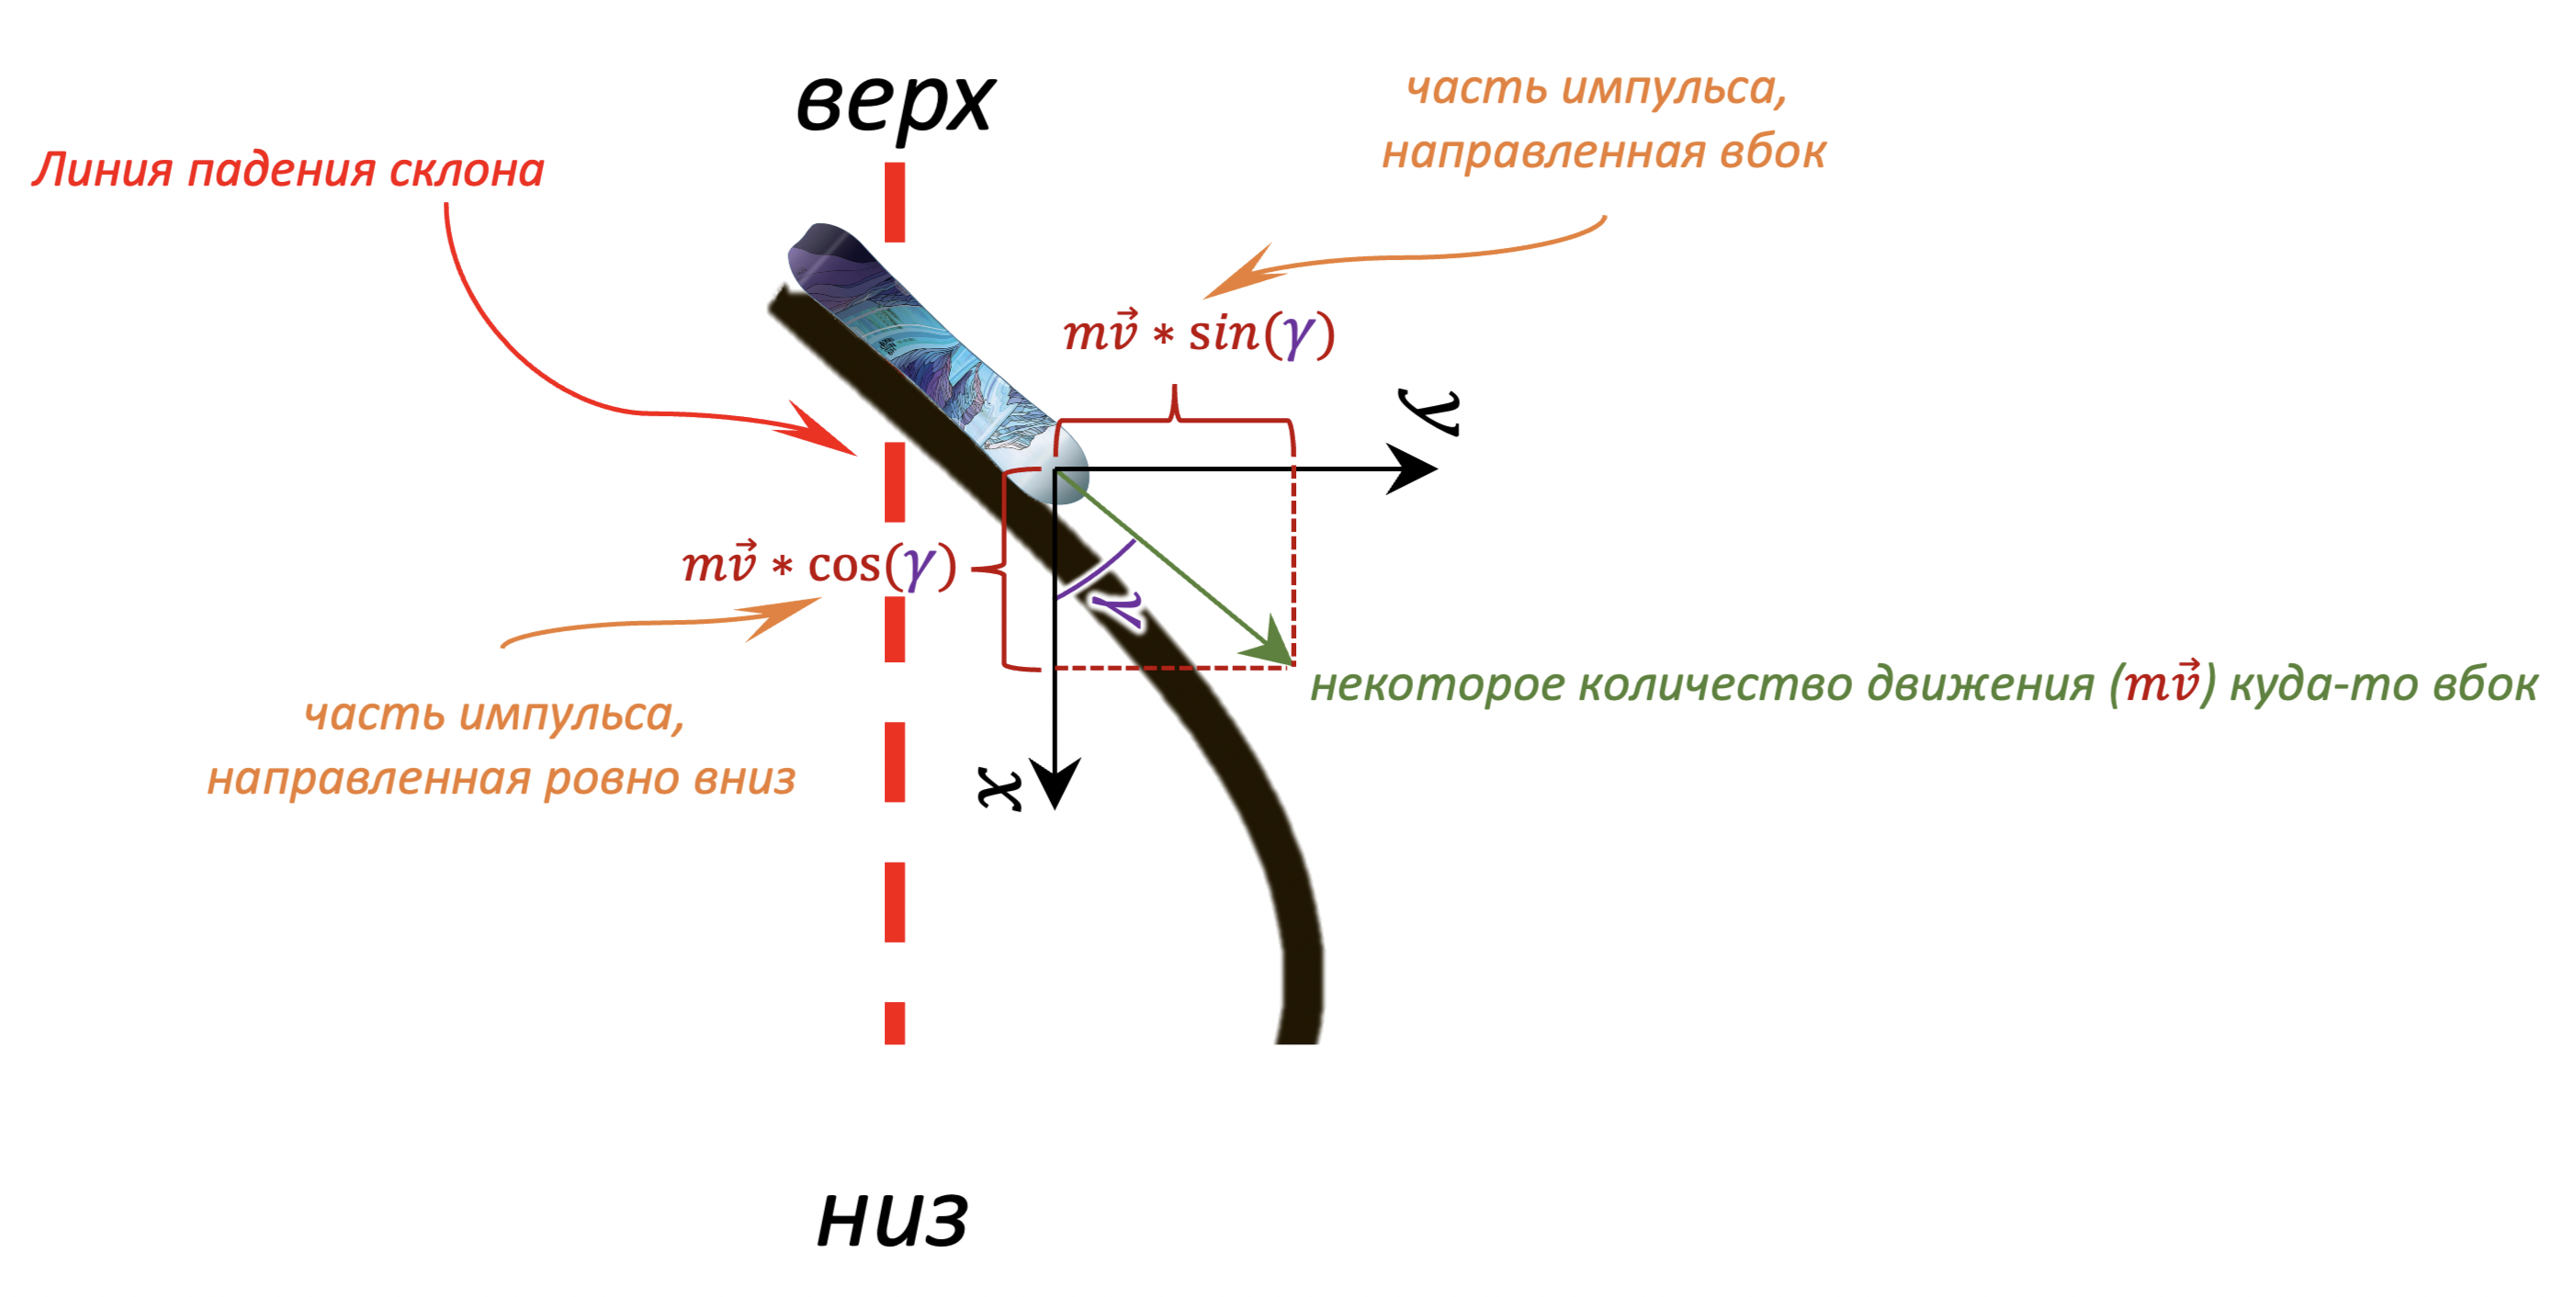
Figure 2. Decomposing the movement vector into two components, directed downward and sideways respectively. The coordinate system is rotated so that the x-axis coincides with the fall line. The system is adopted for convenience in measuring the board’s direction of travel at some angle to the fall line, so that an angle of 0 degrees corresponds to the board pointing “straight down the slope.”
Movement in arcs can be decomposed into component parts, where the part of the momentum (old term: quantity of motion) directed sideways will change depending on the direction of the turn, whereas the part of the momentum directed straight down will always be present, as long as we are not moving in a traverse — i.e. across the slope — which is generally dangerous and therefore incorrect (see Chapter 2). For example, when the board points and rides straight down the slope, it has no sideways displacement => all of its movement is directed straight down the slope. The body on the snowboard has exactly the same components of movement, because, as we know from Chapter 2, the body and the snowboard must move in the same direction while riding; if that is not the case, it is called braking.
Why do we need to know this?
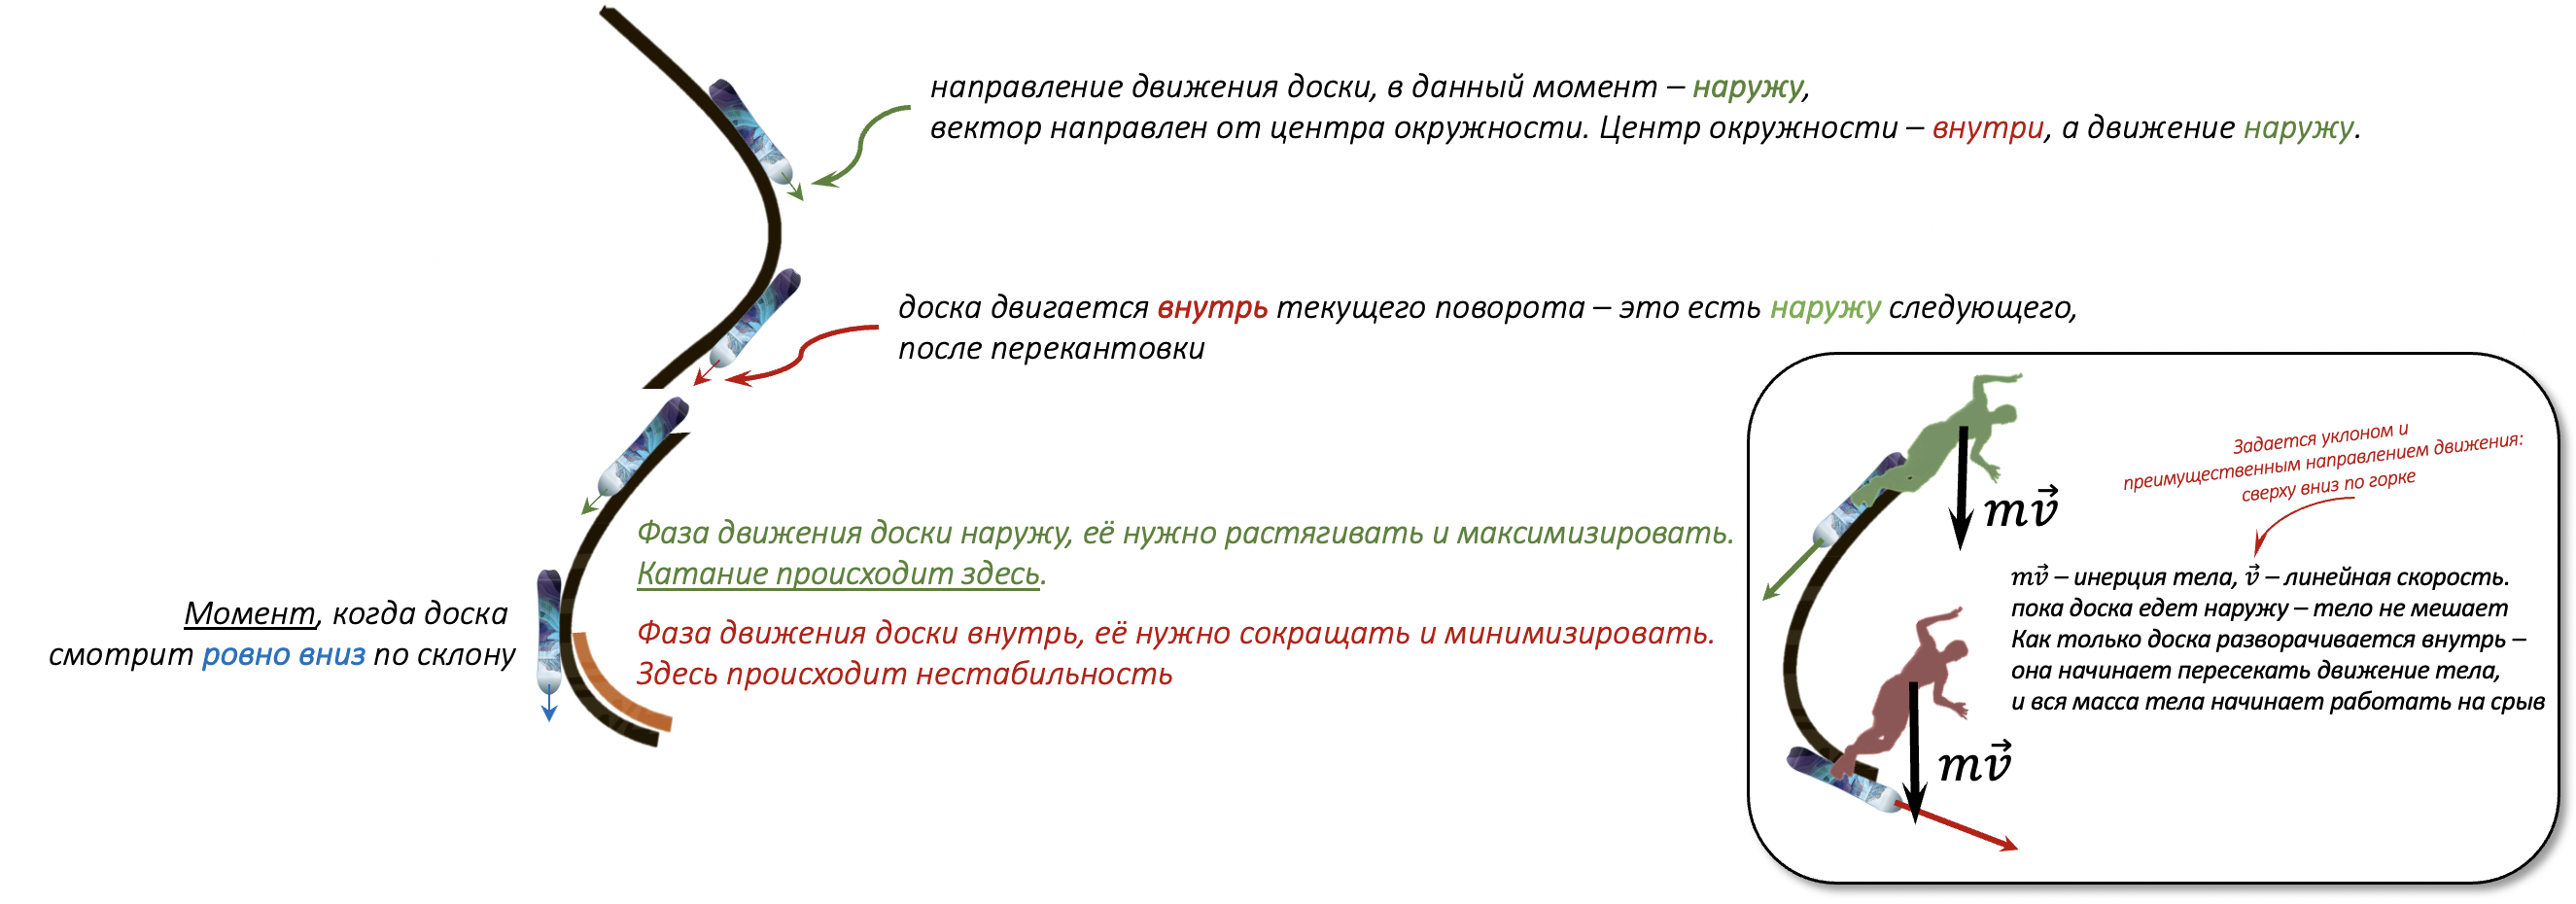
Figure 3. The differences when the board moves toward the outside and toward the inside of the current turn
The body riding down the hill on the board also, because of that movement, has momentum directed from top to bottom. While the board moves toward the outside of the turn, the body’s movement does not interfere with the board’s travel. As soon as the board passes the “straight down the slope” position and turns toward the inside of the turn, the whole mass of the body, multiplied by its speed, starts trying to tear the board off its edge. At that same moment the greatest spray of snow comes out from under the edge (see Video 1), because the body is trying to displace the board off the arc further down the slope; and it is because of this same fact that learners get instability of the board and most of their falls.
Video 1. The snow starts flying up in a fountain from under the edge when the board begins to ride toward the inside of the turn. The first second is real speed. Then the same clip at 0.1 of real speed. At second 6 the board looked down and began to ride toward the inside of the turn; at second 7 the snow fountain begins. This is not a mistake here. The video is given simply to illustrate the phenomenon being discussed in the text. A snow fountain from under a cut-in edge is always the result of a mismatch between the movement of the body and the board; the only question is whether it is a controlled technique of the rider or an uncontrolled mistake.
That is why, while riding, this phase of the arc needs to be minimised. At the moment of the edge change, the body is thrown over to the inside of the next turn, and the board’s movement, which a moment ago was “inward,” becomes movement “outward”; once again the body does not interfere with the board’s travel.
6.2. Angular acceleration and angular momentum
(material taken from an article on ski.ru)
Consider a person moving along a circle — for example, riding a carousel.
Figure 4. A carousel
Say the person sat in a seat at position 1 and made a revolution to position 2 through an angle of 180 degrees in the direction shown by the arrow. Then it is completely obvious that, for an outside observer, the body of this person sitting in the carousel seat also made a revolution of 180 degrees about the vertical axis passing, for example, through the person’s centre of mass, and in the same direction. That is, at position 1 we saw the person’s left side, and at position 2 we started to see the right side => the body also performed a rotation.
So for an outside observer, the person in the carousel seat moves “as a whole” along an arc of a circle (1–2), while at the same time this outside observer sees that the person’s body is rotating about the said vertical axis. And these two rotations happen with the same angular velocity.
If we imagine that during the carousel’s motion the seat with the person, for whatever reason, loses contact with the carousel, then for an outside observer looking at the carousel from above, the person with the seat “as a whole” will fly off in a straight line, directed tangent to the arc of the circle along which the seat with the person was moving just before the moment of losing contact with the carousel. This fact is known to everyone since school, and there is no difficulty perceiving it.
It is harder to perceive another obvious fact — namely, that the rotation of the person’s body about the vertical axis mentioned above will persist throughout that whole flight of the person “as a whole.” And this rotation will be observed by an outside observer looking at the carousel from above.
Both facts are consequences of the laws of conservation of momentum and of angular momentum.
Why do we need to know this?
As we will learn when we discuss carving technique directly, the person has to move ahead of the board, keeping the “minus stance” or “shoulders along the board” position. But it is not enough to take that position once at the arc entry and freeze. Maintaining such a position in the arc is an active action. If you start the arc with the “shoulders along the board” body position and freeze, the board will complete the turn and at the arc exit the shoulders will already be across the board. Why this matters you can read further on in the technique description, or here, or here.
Angular momentum can also be used for 180 or 360 jumps off the arc.
6.3. Centrifugal and centripetal forces
(text based on an article on ski.ru; the illustrations are taken from there too)
If you pour some water into a bucket and, with a sharp movement, make it rotate, the water will not spill out of the bucket thanks to the centrifugal force, which “presses” the water toward the bottom of the bucket. So centrifugal force acts toward the outside of the turn, throwing us out of it.
Many instructors love to talk about centripetal force, but that doesn’t add much clarity; it is more understandable to adopt an inertial reference frame centred on the body and to speak of balancing the centrifugal force by “casting out” the centre of mass — i.e. by the force of gravity (mg), which is what tries to topple us onto the slope (Figure 5).
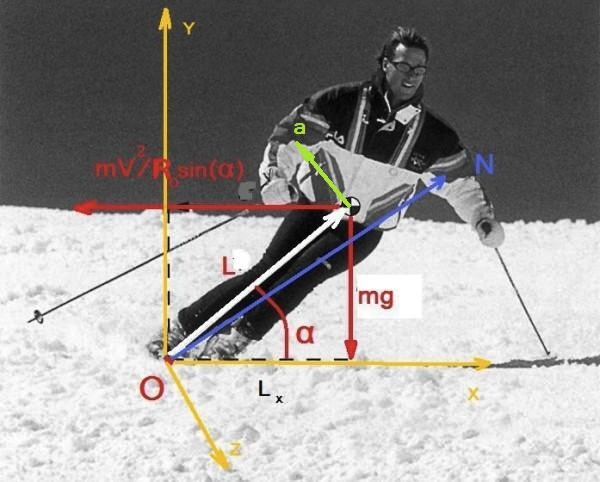
Figure 5. Forces acting on a skier in a carved turn. For a snowboarder the diagram will be the same, up to the body position in space that sets the angulation.
In the chosen reference frame, three forces act on the skier:
the force of gravity — mg;
the slope reaction force — N, whose approximate direction for high skier speeds is shown in the figure. It is precisely this force that gives the “feeling of support” in the legs, which will often be discussed during learning;
the inertial force, which strictly breaks down into three components, but we will just call it the centrifugal force; in the figure it is denoted as:
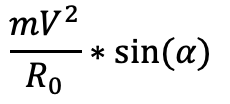
Centrifugal force
Of more theoretical interest is understanding where exactly the “play with centrifugal force” happens. For this, let us redraw Figure 5 slightly into Diagram 1 (together with the explanations, taken from here):
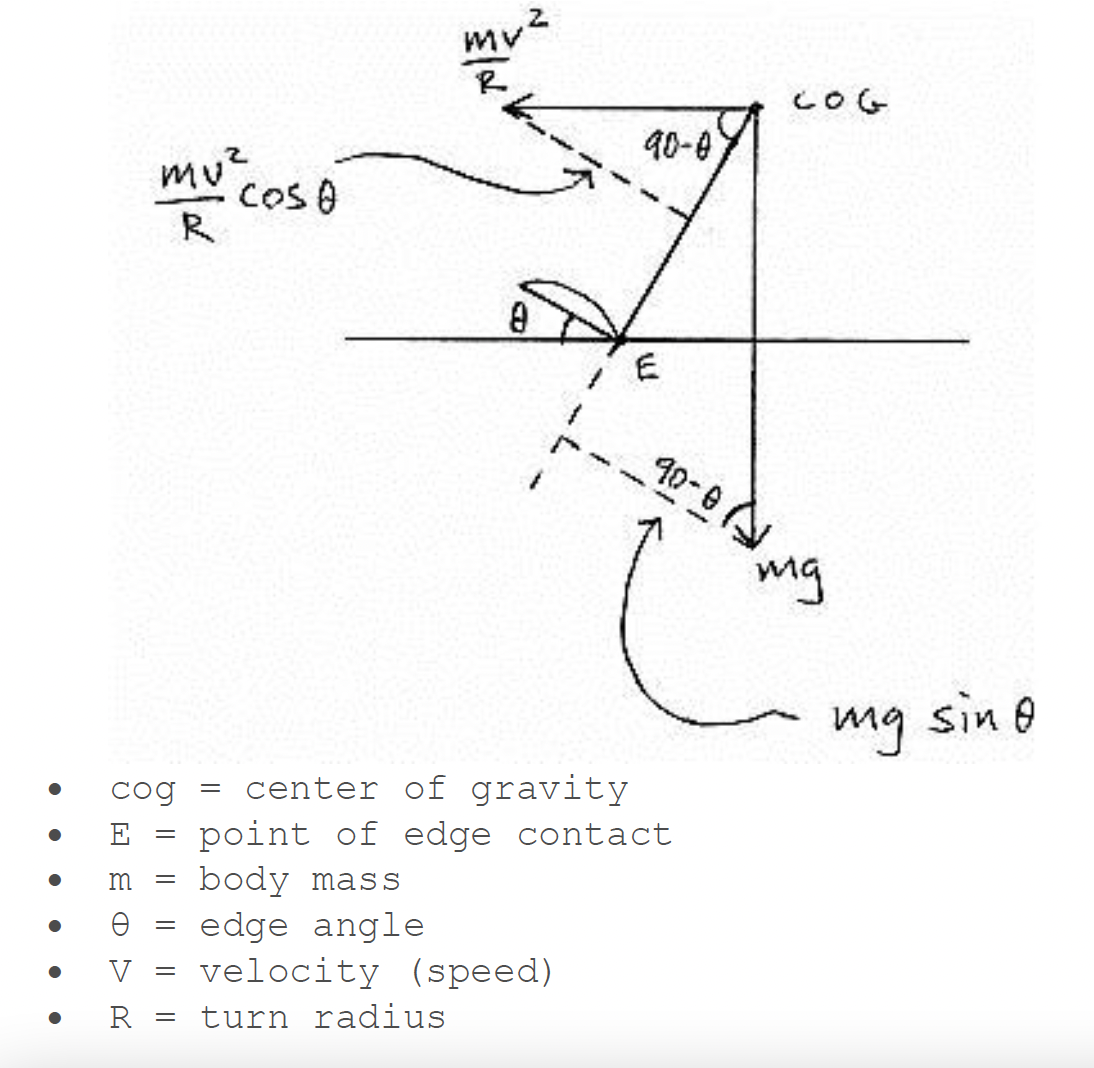
Diagram 1. An illustration of the equilibrium of the centre of mass (cog) and the centrifugal force.
From Diagram 1 you can see the balance equation:
![Balancing the centrifugal force by casting out the centre of mass, the magnitude of which [the cast-out] is regulated by means of angulation](assets/1c21c5378f268429e4270.png)
Balancing the centrifugal force by casting out the centre of mass, the magnitude of which [the cast-out] is regulated by means of angulation
So “play with centrifugal force” happens by moving the centre of mass — it is roughly like carrying a heavy suitcase and shifting it from one hand to the other. You take the suitcase in your right hand and lean to the left to shift your centre of mass to the side opposite the suitcase. When riding a snowboard, the centre of mass is moved by casting out the pelvis, and following it the straight/vertical torso, past the boundary of the back edge (backside turn) or the front edge (frontside turn).
It is worth clarifying the following two terms here:
Angulation — a term for creating angles in the body. For example, in a turn on the back edge in the “minus” stance — i.e. with the shoulders and the whole torso turned along the board — leaning the torso at the hip joint, i.e. decreasing the angle between the straight/vertical torso and the thighs, will be angulation. A person standing/lying flat has no angulation. If we stretch out flat on a horizontal back-extension bench, that is no angulation; when we raise the body above horizontal by decreasing the angle between the thigh and the shin, i.e. bending the knees, that is angulation.
Inclination — a term for the tilt angle of our centre of mass, i.e. the angle by which the centre of mass has deviated from the vertical axis. The bigger this angle, the more the centre of mass is “cast out.”
So: if the centrifugal force is large, we have to lean hard into the turn, i.e. increase inclination, so that we are not thrown out of the turn before we want to be; if there is little centrifugal force, we have to increase angulation, to reduce the cast-out of the centre of mass, because if it is cast out too far, the centrifugal force cannot balance it and we fall onto the slope. This is explained by Diagram 2:
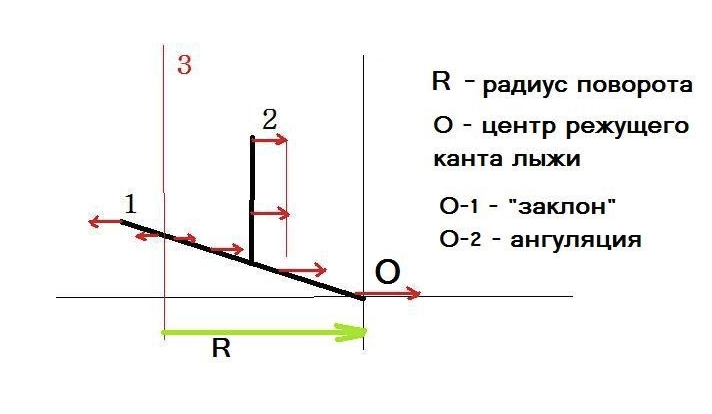
Diagram 2. A plot of the centrifugal force with (1) no angulation, (2) angulation present
Diagram 2 shows the direction and magnitude of the centrifugal force acting on the various parts of the snowboarder’s body (as they said in strength-of-materials class — a plot of the CF) for the case of the “lean” — 1 — and “classic angulation” — 2 — for a sufficiently large edge angle. The red line (3) is the instantaneous centre of the turn. As we discussed above (Figure 1 and Chapter 5), during the turn the edge angle increases up to the apex of the arc => the turn radius shrinks => at each successive moment the instantaneous centre of the turn moves closer and closer to us. On one hand this implies the need to increase angulation during the turn; on the other, we must also take into account the shrinking radius and the increasing speed, which lead to an increase in centrifugal force, so there is no universal solution here. But Diagram 2 perfectly illustrates why angulation is necessary, and why a lack of it leads to falls.
Why do we need to know this?
Playing with centrifugal force is the main thing people do in a carved turn. Using it correctly lets you exit a turn easily, without spending strength, change edges, do lay-downs, or a Dolphin Turn. All of this is possible largely thanks to centrifugal force, and it would not hurt to understand how we can “play” with it by means of our centre of mass.
6.4. On loading the nose of the board, weight on the front leg, and the “50-50” stance
The overwhelming majority of instructional videos talk about the need to maintain a “50-50” weight distribution in a carved turn. I suppose the root of this foolishness lies in the desire to load the edge evenly, which — roughly and in the abstract — is correct.
When demonstrating technique while standing on the flat, the natural conclusion is that to load the edge evenly you need to hold your weight “50-50.” But we don’t ride standing on the flat. Riding is movement, not standing. Riding a board happens on slopes and at speed…
First. Slope. Try strapping into the board with the tail propped up on 3–4 volumes of the Great Soviet Encyclopedia. The slope loads the nose; you feel more weight on the front leg. To load the nose and tail evenly on a slope, you will have to shift toward the tail. And we haven’t even added speed and an arc yet . . .
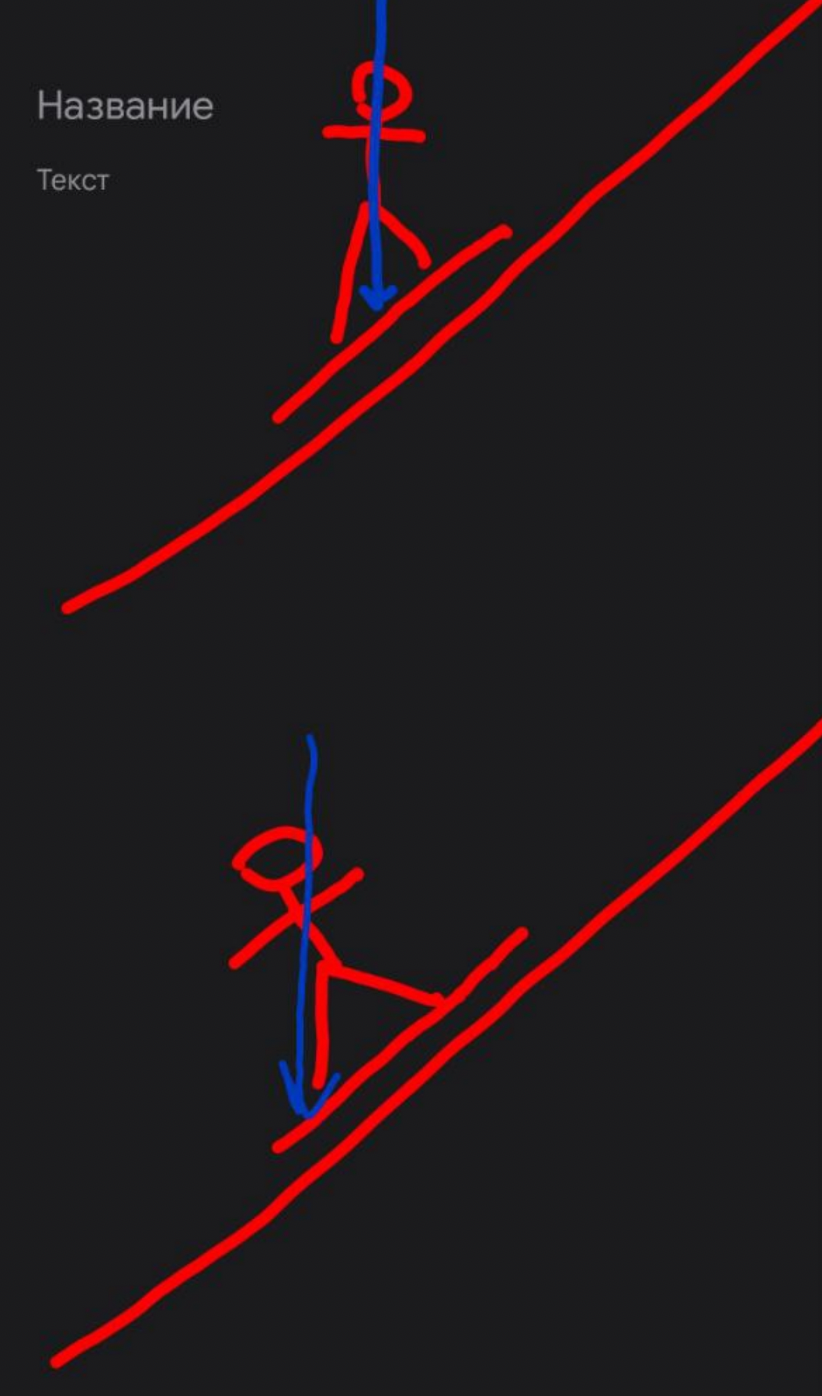
Figure 6. The nose of the board being loaded by the slope
Second. An arc is a turn. In a turn the edge cuts harder into the slope because of the edge angle, friction increases — and all of this loads the nose simply by the physics of the turn. Just as it happens in a car. If you drive straight and sharply crank the wheel to the left, the front right wheel gets loaded:
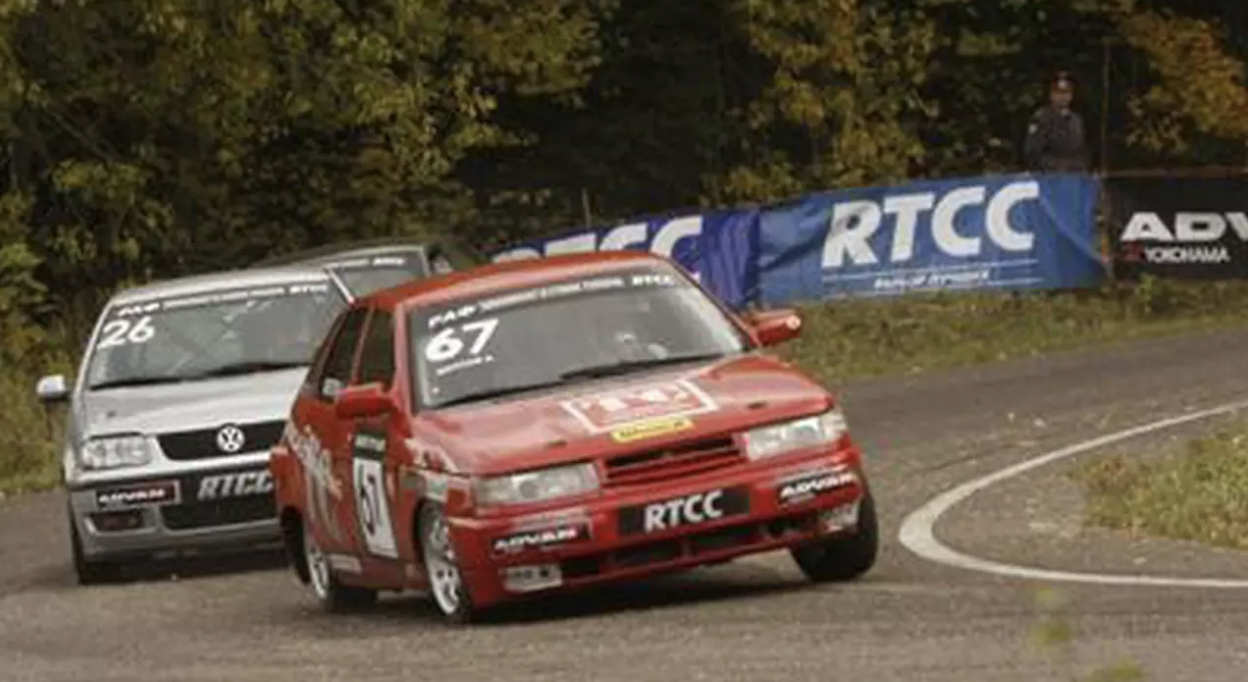
Figure 7. The front right wheel being loaded during a left turn
So the physics of the turn also loads the front leg and the nose of the board, and the greater the speed and edge angle, the more the front leg gets loaded -> you have to sit back onto the rear leg even harder, even just to achieve that abstract even loading of the edge.
Third. Braking. At every apex of the arc and after it, the board brakes. During braking, the existing inertia drags the rider onto the front leg, like flying into the windshield, and the more speed there is, the stronger the effect.
Figure 8. Flying into the windshield during braking
Fourth. State of the surface. The softer the slope, the harder the board cuts into the snow, the more friction increases, and the more braking increases -> points two and three start to work even harder. The harder the slope, the more aggressively you have to ride on it to keep stability — i.e. set the board at large edge angles, and that means speed and sharp turns, and that is the situation of point two.
Summary. While riding there are no problems at all with loading the nose and with weight on the front leg, but there are big problems with under-loading the tail. The physics of the turn and the slope will load the nose of the board by themselves; the main task and the frequent problem is to load the tail and, for that, to move the maximum weight onto the rear leg.
Most of the problems that arise in riding — washouts, hard sets, sticking, instability, loss of control — all of them arise from under-loading the rear leg. The “50-50” stance is a borderline weight position, from which it is very easy to slip onto the front leg as a result of one factor or another. As soon as the weight moves onto the front leg, something happens — in the best case, an abrupt shrinking of the arc radius; in the worst case, getting stuck in the arc and flying off the run… and then, whatever happens — maybe it will be soft, or maybe it will be a tree.
The causes of getting stuck in the arc. On the back, first and foremost -> lack of weight on the rear leg. The harder the slope, the greater the speed -> the bigger the edge angles -> the more you need to shift onto the rear leg; the steeper the slope -> the more onto the rear leg.
The indicator that you are standing on the rear leg is that you can exit the arc at any moment. Literally any. If that is not the case -> more shift onto the rear leg.
6.5. What else to read on the physics of the carved turn?
Three excellent articles on ski.ru about the physics of the carved turn, which formed the basis for writing this text (one, two, three). A description of the physics of the carved turn on bomberonline.com, which was also used to create this section. John Howe’s book “Skiing Mechanics.” The channel of Alexander Rivlin — a ski channel, but it has a lot of material on the physics of the turn, which, as we know, is the same.
Chapter 7. Summary
Stable control of the movement trajectory is what comes first in riding. If you put a child behind the wheel of a sports car, their driving will undoubtedly be a blast, but not for long. Trajectory control means building a safe descent route down the mountain that you actually want, one that takes into account all the factors present on the hill and any that suddenly appear — including the skier flying at your back like a battering ram (Chapter 1, Chapter 2).
A person rides a board, the board moves down the slope. The person, the board, and the slope are a single system, and none of its components can be considered separately from one another when assessing or building technique. The board is chosen for the skill, the surface, and the tasks; the slope angle and surface are chosen for the skill and the tasks; the person makes movements matched to the tasks, the board, the slope angle, and the speed; the tasks are chosen for the skill and the goals; achievable goals are set based on physical conditioning, current skill, and resources. Everything is interconnected.
Learning to ride is a sequence of steps aimed at embedding a system of knowledge and motor programs. Without theoretical preparation it is hard to carry anything out in practice, because what can you carry out if you don’t even understand in theory what it is you are going to carry out (Chapter 3).
From everyday life we have a multitude of reflexes that are often harmful in riding (section 3.1 of Chapter 3). They have to be got rid of consistently and methodically, excluding them completely from any riding, even when you are just cruising down to the base.
Everything harmful grooves in fast; everything useful has to be worked on methodically and consciously (section 3.5 of Chapter 3).
However, consciousness alone is not enough; without external monitoring, including through video, you will have not the slightest idea of what you are actually doing on the hill (section 3.6 of Chapter 3). All your notions about your movements come from the experience of moving over a flat plane, and here you tie your feet to a board and ride down some slope, in arcs no less. These are radically different conditions that radically change the rules of the game and the role of the movements you are used to (section 3.1 of Chapter 3) — to the point of complete opposition. Thus, the movements that lead to falling on the flat lead to stability on the hill, and vice versa. You have to teach your brain all of this and rebuild your motor programs.
Starting from this Summary, the literary passages end. Learning to ride is rebuilding motor programs. You try a movement, look at the result, re-read the text, and understand it differently, because when you read it the first time you had not yet made these movements on the hill, you did not know their result, you did not feel these sensations (section 3.1 of Chapter 3).
To learn to ride from a text, you have to work with the text.
First, re-read it enough times to form a theoretical picture, where every word becomes crystal clear (Chapter 3, section 3.3, section 3.4). Then re-read it after riding, because as experience grows, the perception of information changes.
Any text on the subject of riding will reveal itself in new colours, and any video of riding in new small details, which you will start to see as your experience grows. If you can do nothing, then in a video of riding you will see nothing. You cannot understand how a person rides whose level of technique exceeds yours; you can only enjoy their riding or not (Chapter 3, section 3.1).
In a carved turn the board turns because of a change in the edge angle (Chapter 5). If you need a fast, sharp turn, you have to set the board at a large edge angle straight away, and then the board turns sharply. Setting the board on edge happens by changing the position of the centre of mass relative to the board, and in the arc a multitude of forces arise that act on the body and the board (Chapter 6). It is precisely this that you will have to learn for stable riding — namely, to control the position of your centre of mass in space and to handle the physical forces that arise in the arc.
Terms and definitions
This is more of a little glossary than a standalone section. You can look in here now and then, if you have forgotten or not understood something.
Carved turn — a turn without skidding. More formally, a turn without linear displacement in the direction of movement that preceded the turn. More formally still, a turn whose radius is set exclusively by the physical characteristics of the board, the speed, and the board’s edge angle; i.e. control of the turn happens exclusively by changing the edge angle. For more detail see Chapter 1, Chapter 5, Chapter 6, and the illustrative diagram below.
Carving — a sequence of linked carved turns, whose number and radius are determined by the rider’s wishes.
Toward the outside of the turn — we cut a circle into two parts with a vertical line. We remove one half and the line we cut it with. We ride the remaining piece of the circle from top to bottom — that is an arc; first it goes outward (the first half of the arc), then inward (the second half of the arc). For an illustrative diagram, see the figure below and Chapter 6, section 6.1.
Apex of the arc — the top of the arc, where the board points straight down the slope, the moment that separates the first and second halves of the arc. See the illustrative diagram below.
The body outrunning the board — a situation in which the angular velocity of the body’s movement (of the centre of mass) is higher than the angular velocity of the board’s movement. It is achieved because the body’s centre of mass moves along an arc of smaller radius than the board — i.e. the body is displaced relative to the board toward the inside of the turn. Since the board and the body are connected but move along different radii, their angular velocities will be different: the board’s is smaller (it travels along a larger radius), the body’s is larger (it travels along a smaller radius).
Edge change in a carved turn — the change of edge at the moment one arc finishes and the next begins. It happens without a change in the board’s direction of travel. The change in the board’s direction of travel is a result of the edge change, not of turning the board with the legs. For more detail see the illustrative diagram below, and also Chapter 2, Chapter 5, Chapter 6.
Pushing the board, or pushing off the board — If you try to keep the position of the centre of mass unchanged in space and extend the knees, that pushes the board away; if while extending the knees you shift the centre of mass, then you push off the board. If you push off the board, you extend away from the board toward the inside of the turn; if you push the board, it is enough to extend the legs actively. Obviously, in either case both things happen, because the force of action equals the force of reaction, but in the first case you resist the reaction impulse from the board, and in the second you use it.
Fall line — where a snowball would roll if you let it go downhill. If the slope has no counter-slopes, the fall line is traced by the netting along the sides.
Angle of entry into the arc (coordinate system) —
Let us set a coordinate system. The X-axis points straight down the slope, the Y-axis across the slope. If the board points straight down the slope, we call that position “the board’s direction at an angle of zero degrees to the fall line,” or, for brevity, “put the board at zero.” If the board is across the slope, we call that position “the board’s direction at an angle of 90 degrees to the fall line,” or, for brevity, “put the board at 90.”
So:
90 degrees — the board points across the fall line;
0 degrees — the board points straight down the slope.
Body-along-the-board position (minus) — shoulders along the board, pelvis along the board, the front shoulder pointing toward the nose, the rear one toward the tail; it helps to bring the shoulder blades together — that gives a single line of the shoulders, which you have to keep parallel to the board. The snowboard turns — the shoulders turn, the pelvis turns. The shoulders and pelvis should turn slightly faster than the board, working ahead of it.
Body-across-the-board position (plus) — the shoulders across the board, the face turned toward the nose, the back of the head toward the tail, the torso twisted.
To release the board — in the general case, to let the board go where it is going on the edge it is on; most often it means toward the outside of the turn. This can happen through passive work at the knees (extending them), or through a change in the body’s position in space: the body has leaned — the board has moved away. If you bend the knees on entering the arc, then afterwards you can extend them, releasing the board toward the outside (a short bend and a smooth, long extension). “Releasing the board” and “working at the knees” are, in the general case, two different actions.
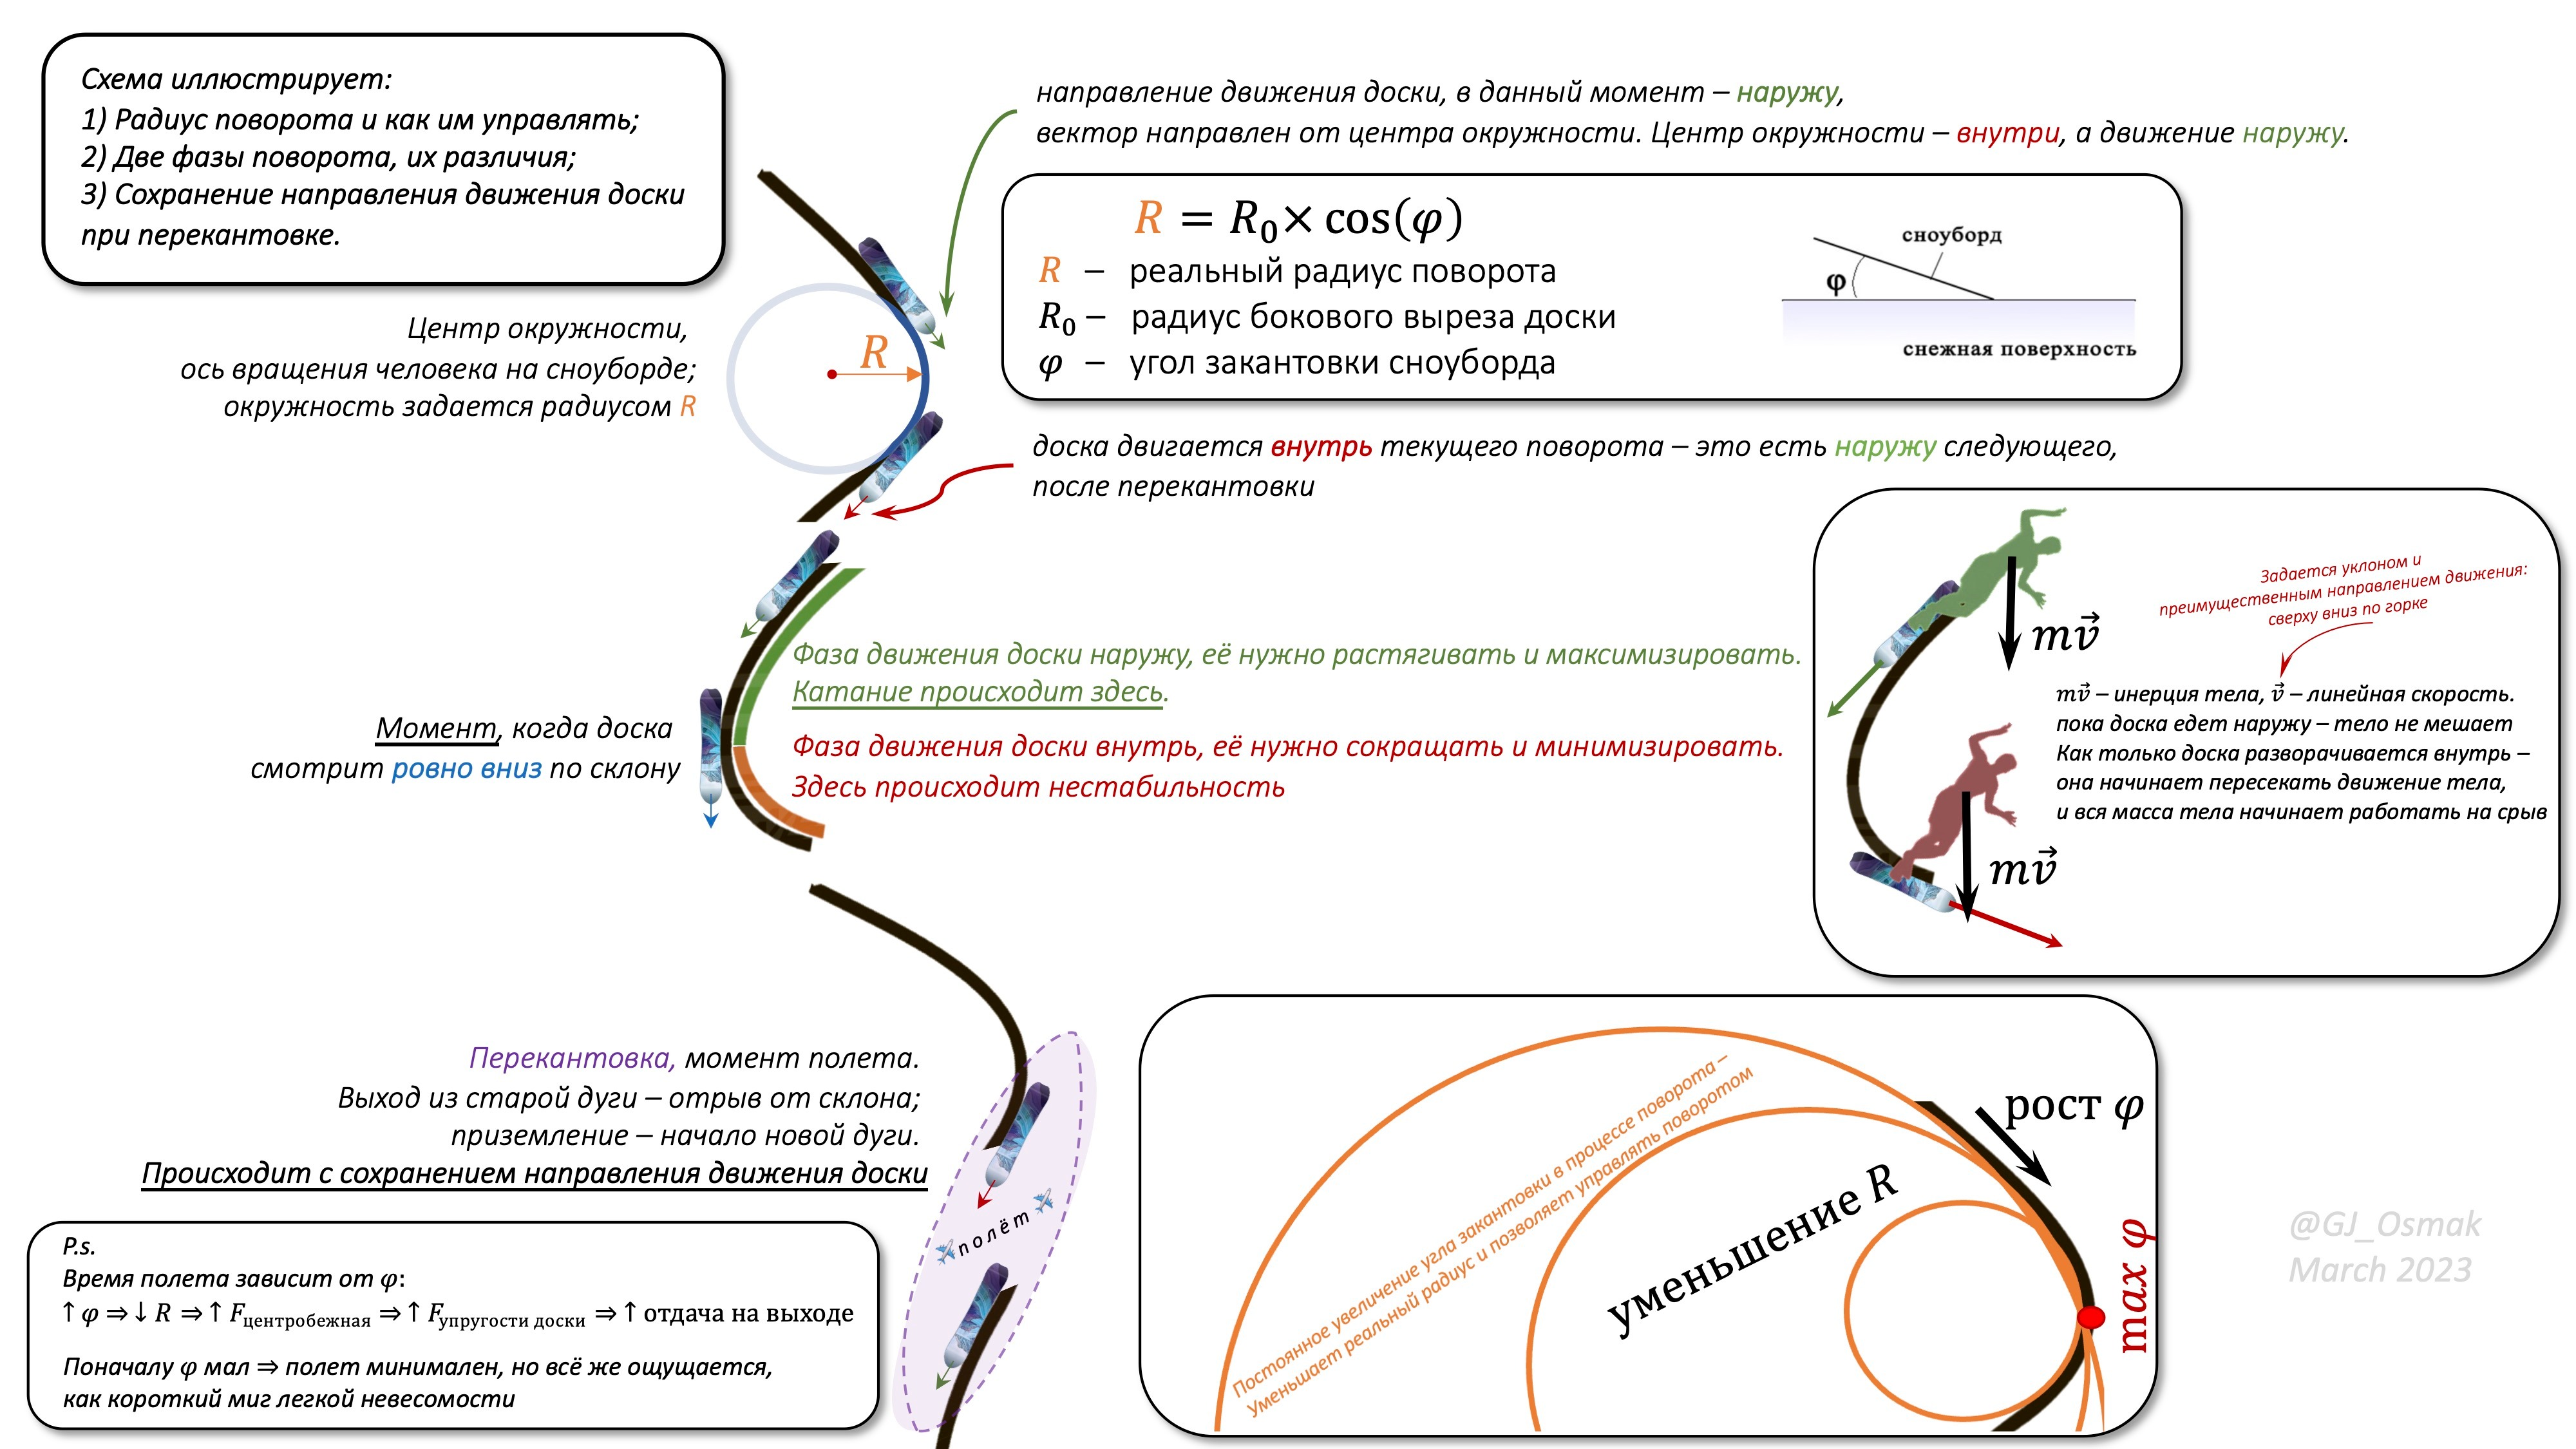
Useful quotes
These are things you can print out and stick on a wall, a door, or as stickers on your snowboard :)
🔷🔷🔷
The trajectory comes first. The trajectory includes not only the abstract arc, but also the people on the slope, the width of the slope, … — i.e. absolutely everything that can be brought under the word “trajectory.” You cannot cut an arc where you cannot cut an arc. If you are riding along the edge of the slope, you will not put the board to the outside, because the brain knows that this is suicide against the pine tree beyond that edge.
🔷🔷🔷
If it seems to you that you are going fast, you left the zone where you fully control the situation a LONG time ago. ALWAYS brake.
🔷🔷🔷
Wet snow breaks boards, legs, and sometimes both at once.
🔷🔷🔷
Riding across the slope, a skier in the spine is only a matter of time.
🔷🔷🔷
“He who thinks clearly, states clearly.” If a person cannot describe in detail and correctly what he is about to do, then what can he actually do?!?!!!
🔷🔷🔷
A snowboard is like a swing: body to the inside on the left, board to the outside on the right; body to the inside on the right, board to the outside on the left. The main thing is to catch the rhythm.
🔷🔷🔷
If you feel some area of your foot, it means you are standing on it, your weight is on that side of the board; for example, if it’s the heels -> it’s behind your back, past the back edge.
🔷🔷🔷
You should not have the feeling that you are riding on a snowboard. You are “juggling” it around yourself. The body flies forward, and you just put the snowboard under it in time.
🔷🔷🔷
Chapter 8. A word to the learner
Learning to ride is the step-by-step building of a system of knowledge and motor programs. You cannot skip any steps in that sequence without damaging the effectiveness of your learning later on.
You can learn “from scratch” — i.e. when the person has never once stood on a board — or “from some level.” Each of these two options has its advantages and disadvantages.
As follows from all the preceding chapters, and especially from Chapter 1 — you can learn carving from scratch. From complete scratch. This material is built that way, for learning from scratch. There is no need to wait seasons, learn something else, and only then carving, as though it were some crown of riding mastery. That is all nonsense. You can learn carving straight away. That is far from meaning carving will come off straight away. No. But from the very beginning, from the moment you acquire the board, every action can be a brick in your future technique, or it can be a crooked nail that later has to be pried out before you can hang the wallpaper.
8.0. What is the “carving base”?
It is:
- (Chapters 9–13) eradicating superfluous / parasitic movements / body positions;
- (Chapter 11) understanding how the trajectory is built in the broad sense of that word — in particular, where the arc’s entry/exit points are;
- (Chapter 12) understanding and being able to execute the main control movement of setting the board on the front edge;
- (Chapter 13) understanding and being able to execute the main control movement of setting the board on the back edge;
- (Chapters 12–14) understanding the principle of, and being able to control, the edge angle in the range from zero to 50–60 degrees;
- a+b+c+d+e = linking arcs with correct movements at the right timing, without skidding and without dumps, but with control of speed and trajectory.
Chapters 9 through 15 will be devoted to this.
The text below is meant to give the reader the right frame of mind and to explain how to approach self-teaching. If something isn’t working for you, it may be worth re-reading this Chapter :)
Note: mastering the carving base may let you raise your speed, but you must NOT do this. Increasing speed without mileage = formed reflexes for controlling the board — can lead to injury. Speed can be raised when there are no problems at all with controlling the edge angle in the range from zero to 80 degrees and all movements are well grooved in — i.e. performed automatically in any circumstances, including emergencies, 100% of the time.
Speed must be comfortable. If it SEEMS to you, or you have a vague feeling, that you are going fast — not even too fast, just fast — then you have NOT been controlling anything FOR A LONG TIME, scrub off speed immediately.
8.1. Learning “from scratch” and “from some level”
When learning “from scratch,” the person may be afraid of the board and the slope. Fear naturally arises from finding yourself in new conditions that can cause injury and that the person does not know how to control (see section 3.1 and section 3.5 of Chapter 3 for more). Getting used to the board and resolving fears takes some time — maybe a couple of hours, maybe a couple of days (what you need to do for this is described in later chapters). That time has to be found in full. The smoother and more thoughtful the “start,” the faster subsequent progress will go.
When learning “from some level,” there are often already some “grooved-in mistakes.” The difficulty is in rolling technique back to where those mistakes are not present. This is psychologically hard — the person is already riding somehow, and here they are being made, for example, to ride the snowboard with one foot strapped in on flat ground. Yes, it is psychologically hard, but most likely, if you approach the process methodically, these steps will take far less time than for a person “starting from scratch.” Almost like making a second-semester first-year maths student work through school-level trigonometry — some of it they’ll solve quickly, some they’ll recall, and somewhere they’ll learn something new.
It is much harder when it comes to re-learning from some old technique. Here you have to fight not with “grooved-in mistakes,” but with an already built and grooved-in system of movements. Depending on how effective it is, it may not even be worth re-learning… But those are already special cases, not examined in detail here.
Regardless of your current riding level, it makes sense to go through all the stages / exercises from beginning to end, checking that they are performed correctly and without mistakes. If mistakes come up somewhere, they need to be fixed, and only then do you move on.
8.2. Working with the text
Reading instructional texts the way you read fiction makes no sense at all. You have to work with the text, and the more diligent that work, the faster the learning will go.
To begin with, the text has to be understood with the mind — namely, understand only the piece / part you are working on right now, and what comes immediately after. Reading ahead and everything at once makes no sense; it can only lead to chaos and mush. Some movements from the future are simply impermissible at the early stages of learning. Most movements from the future are impossible to understand while your level is far below what is needed (why? see section 3.1 of Chapter 3). Some movements from the current level will be modified in the future. If you try to make a movement that belongs to a higher riding level, in the best case nothing comes of it, and in the worst case something wrong comes of it, and that “wrong thing” can lead to injury.
So: you are studying some section, and every written word should be clear to you (what “clear” means, see Chapter 3, section 3.3) — this is the stage of building the system of knowledge. Next, since we are talking about riding, and riding is built from a person’s movements on the board, the text has to be understood with the body (how to do this, see Chapter 3, section 3.4) — this is the stage of embedding the motor programs. When the text becomes crystal clear to the mind and to the body (what “crystal clear” means, see Chapter 3, section 3.4), you can try to carry this knowledge over to the hill (how? see Chapter 3, section 3.5). Some things will come off straight away, some won’t, but either way new sensations will arise, and there will be video of your attempts to do something (how to tell what worked and what didn’t, see Chapter 3, section 3.6). Taking that video and your sensations, you have to go back to the text and re-read it, watching your video frame by frame, to understand how your movements and sensations relate to what is actually happening on the hill — all of that together with your understanding of the text and the text itself. Ideally there will be a person nearby (or online) who already knows what you are learning and can analyse your video (who is that person? see Chapter 3, section 3.7).
That is how, gradually, new motor programs get built — i.e. when you know which movement should be made at which moment, what that movement will lead to, and what sensations you will feel when the movement is correct or when it is wrong.
You cannot make a movement that you don’t even theoretically understand how to make. Filming yourself lets you connect your real actions on the hill with your sensations of those actions. Sensations will often deceive you — for example, it may seem to you that you are standing along the board (the “minus” stance) when you are actually turned across it (the “plus” stance); of course, you should trust the video image and not argue with it. As your experience grows and you accumulate new sensations from movements, the text will take on new meanings. So until a certain level is passed, you have to keep returning to the text again and again.
8.3. The difference between learning to ride and riding
Riding is movement, not a set of static poses. As soon as you “freeze” on the board, it will take you wherever it sees fit. When a child rides a swing, they don’t freeze in a static pose. At every moment the tilt of their torso and legs changes depending on the tilt of the swing; and when the body and the swing rock in sync, in one rhythm — that is riding: light, smooth, and pleasant. Otherwise it is jerky and/or energy-consuming.
During learning we will be haunted by a large number of parasitic movements (where from? see Chapter 3, section 3.1). So the first task in learning is to get rid of all the parasitic movements. If after that no movements are left at all, then that is exactly the level to start from, gradually grooving in more and more correct movements.
So, in learning — unlike in riding — it is permissible to “immobilise” some (or all) parts of the body; you shouldn’t ride like that for long, these should only be temporary “crutches” to work out the needed movement with another part of the body.
In essence, fast learning is a set of life-hacks / fixes that let the body take the correct position in space at the right moment. Finding such life-hacks is either the instructor’s task or yours. Later, by grooving in correct movements step by step in various parts of the body, a single, whole riding will be built.
8.4. On the speed of progress and the overall picture of riding
Progress can be, and most likely will be, non-linear. It may be that day after day you battle a problem and it won’t yield, and the next day you suddenly start riding and jump to the next level.
Learning is a series of small, successive improvements to your current riding level. In each single descent you can try to fix one mistake. If you’re lucky, you’ll fix one mistake per descent, but that is unlikely. It is better to work by the scheme “fixed–grooved in.” One descent to fix, two or three descents to groove it in. “Grooved in” means the correct execution is present in at least half the arcs (see Chapter 3, section 3.5 for more). Over time, quantity turns into quality, in an abrupt jump in riding level. That qualitative jump will be visible on video and will reveal itself in a gamut of new sensations from the ride.
If a problem isn’t solved in two descents, you should try approaching its solution differently. Change the foci of attention, try to do the movement another way. If there is an instructor, they should run a quick search through the possible options; if there is no instructor, all that is left is to experiment… For example, the movement “bend the knees” can be perceived as “knees moving forward,” “knees moving forward and down,” “pelvis moving forward,” “decreasing the angle between the shin and the thigh,” “butt moving toward the heels” — these are all slightly different movements, slightly different foci of attention; a general recommendation is written in the methodical text below, but what specifically will work on you is known only to you.
Sometimes, for progress, it is enough to ride for a while not trying to do anything new, but fully focusing on a cleaner execution of what you already know how to do.
8.5. On a universal system of learning
There is no universal system. There is a general plan — like how, before solving quadratic equations, it would be good to first learn to add, subtract, multiply, divide, and raise to a power. But how to explain the essence of the operation of “addition,” “multiplication,” or “division” to a particular student — there is no universal path there.
All people are different, with different stores of knowledge and skills, different physiology, different physical conditioning, different tightness in the body, different joint mobility, different degrees of control over their body, and so on. For each particular person you can find what will work on them fastest, and a proper instructor should have a large arsenal of “life-hacks” from which they pick what will work in a particular situation — i.e. on this person, on this board, on this slope, to solve this task.
The methodical text that follows is, in essence, a general plan with the most common ways of solving the most common problems. But, as Captain Hector Barbossa said: “The Code is more what you’d call guidelines than actual rules.”
8.6. Why doesn’t what I’m learning look like the riding I see?
You can’t just take up the correct body position and start moving correctly from that position straight away. Riding is a person moving on a board, not a set of static poses. To learn to ride, you have to ride. Taking a pose requires attention and “consumes RAM”; movement requires even more attention. There is very little chance that a “correct position” you’ve taken up can be held once movement begins. On the other hand, there is little chance that while holding the correct position you’ll also manage to move somehow correctly. The Solomonic solution here is to take up the most correct body position possible and try to move as correctly as possible.
Learning to ride is somewhat like learning to write. At first children work on copybook strokes, then start forming letters, then writing words. A child’s writing is nothing like the developed handwriting of an adult. Riding, too, at first only distantly resembles the final picture, but over time it gets closer and closer to it.
8.6.1. The basic stance that doesn’t exist
Based on conversation(s) in the chat, which can be found under #основная_стойка
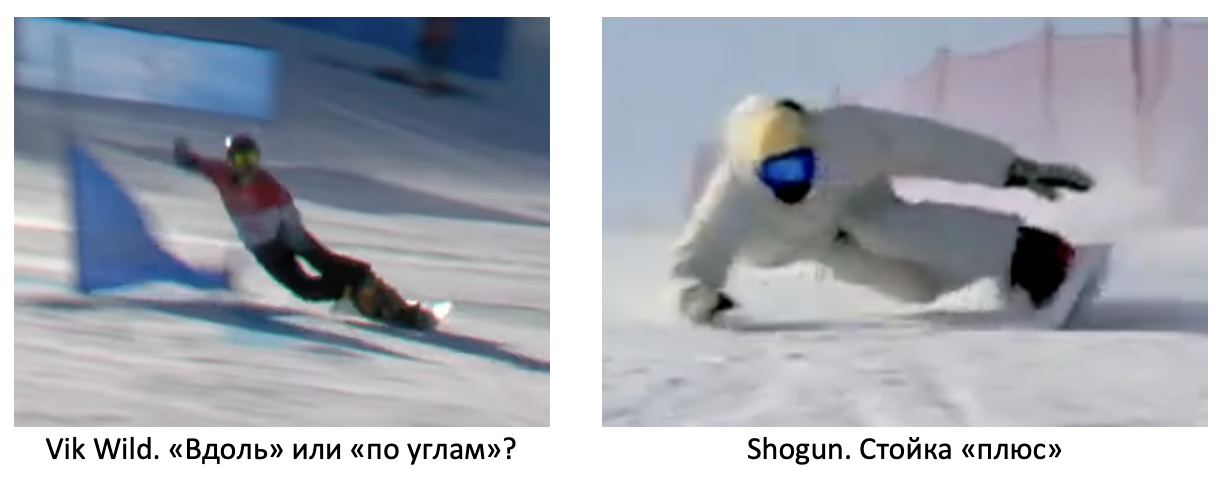
Riding is a person moving on a board, not a set of static poses => and the “basic stance” is a dynamic concept. It has boundaries and points of emphasis, it has correct and incorrect weight distribution, but you cannot take it up and freeze in that position forever. ALL the specific parameters of the stance at any given moment depend on speed, slope angle, edge angles, the phase of the arc, and the tasks. What would be an impermissible fold at small edge angles will be the norm at large edge angles; sometimes you can load the nose of the board, sometimes doing that is categorically forbidden, and so on for every joint.
There is an approach in which the person is first put into an abstractly correct body position and then taught to move from that position. Such an approach can work, but it unambiguously needs an external monitor — a coach or instructor — who will correct the actions in real time and be ready to change the approach or abandon the idea altogether.
This text is meant to help you learn on your own. So it has its own specific way of telling the story.
For these reasons the first task is: eliminate all incorrect movements and, where possible, take up the simplest, most correct position needed to master one movement or another.
The basic stance is a complex concept. And a descent can have one task! ONE! Taking up the correct stance means controlling the knees, the pelvis, the weight, the torso, the gaze, the arms, and the movement of all this junk in space. If you put a person into an abstractly correct position and make them keep track of all this stuff, how are they going to move? There isn’t enough RAM. One descent — one task (more on the multitasking that doesn’t exist in section 3.3.1). So —
the simplest and most correct position,
and not the “basic stance.” This position cannot be called the “basic stance” in the sense that you’ll ride that way forever. It is the position you need here and now. The most correct and the simplest at this stage. After that, step by step, the correct stance will be formed. The way a sculptor takes a stone of the most suitable shape and starts carving a figure out of it.
Throughout the whole “Base part” there will be a requirement of “along the board” or the “minus stance.” Because the “plus” stance is an instinctively pleasant position; everyone wants to, and successfully does, “wind up” into plus. So it is important to learn to ride “along.” When this position raises no questions at all and becomes comfortable, then and only then can you start looking for some options. Yes, “across the angles” is more correct, but
if you keep “across the angles” in your head, you’ll ride “across”; and if you keep “along,” you’ll end up “across the angles.”
If you end up not “across the angles” but “along” — great! Turning more into the direction of travel is always easier and more pleasant than learning to ride shoulder-first, and the “across the angles” stance is still “shoulder-first.”
In the picture above is Vic Wild, the moment of exiting the arc. This body position is closer to “along” than to “across.” In the arc everything happens fast. And at the start of learning you won’t manage to do the right things at the right moment. If you start winding around chaotically, you’ll make it worse. The correct arc exit is the hardest thing, and it is the key to a correct start of the next arc. So the most correct exit position is taken up “in advance” — that way you definitely won’t be late. When setting the base, the main thing is to master a MINIMAL set of movements in order to understand the correct timing of entering and exiting the arc, and to understand how to build the trajectory.
The text deliberately does not focus on “options” — for example, when can you deviate from the text? The answer is simple. When you are 100% certain of what you are doing, why you are doing it, what it will lead to, why it will lead to that, what it looks like in theory, what it might look like in reality, what you expect to see on YOUR videos, when and in what situations it works and when it doesn’t, and why the text said exactly what it said. Until you can write a justification essay for why you have the right to deviate from the text, it is better not to deviate from it. If you deviated and things didn’t get better — then it was 100500% a wrong step, and even if things aren’t worse now, they may be worse later.
The base lays the foundation for the future house. If you lay it wrong, the house will fall. Are you sure you have exhaustive blueprints of the house and that you are making permissible changes to the foundation?
Why “the basic stance that doesn’t exist”? Most often, when people say “take up the basic stance,” they mean “take it up” and “hold it.” And that is wrong. Because riding is movement, not a set of static poses.
8.7. On lead-up exercises
To learn to ride, you have to ride and improve your riding level. Lead-up exercises are aimed at demonstrating or explaining a body position, but as follows from Chapter 3, section 3.1, Chapter 6, and Chapter 7, considering a body position apart from the phase of the arc, the slope angle, the board’s edge angle, the board’s characteristics, and so on, makes little sense — unless we are talking about some very gross early mistakes. So the most optimal path seems to be one in which the person is brought to a state where they can descend from top to bottom somehow with a minimal number of mistakes — i.e. some kind of riding appears. Then this riding is gradually polished, mistakes are removed from it, and correct movements are added to it. Sometimes you won’t manage to add the correct movement or body position straight away, but you’ll manage it through intermediate stages, the way the pupa precedes the imago in the life cycle of a butterfly. In other words, we can speak of “lead-up movements / positions” rather than “lead-up exercises.”
So, unlike “lead-up exercises,” which focus attention on some one detail, we will focus attention on improving the riding as a whole system, into which more and more correct movements are added at each step and from which mistakes are removed.
Riding is not a simple sum of technical elements collected from “lead-up exercises,” but a coordinated system of movements that depend on the tasks, speed, slope angle, surface, board, and so on. Roughly like comparing a box of spare parts with an assembled, working engine.
For these same reasons, riding at the learning stage may look visually different from the final picture, but it must certainly get closer to it with every step.
8.8. On unloading, overloading, and other fascinating terms
European instructors, and their domestic colleagues after them, have learned to sell people terms instead of riding effectively. For example, “up-unweighting,” “down-unweighting,” “short-turn-this-kind,” “short-turn-that-kind,” “beinspielwunsch-something-or-other”… and others.
You can, of course, use these terms with flair: “Here, look! At this point on the video, I’m doing an up-unweighting. Not to be confused with a down-unweighting. Because this is an up-unweighting.” . . . And how the quality of the riding picture on the video suddenly rises! After all, a moment ago, without the commentary, the video showed a sprawled body over a board, doing some strange squats, crawling down the slope a little faster than a turtle; and now the body has instantly become a Snowboarder performing a complex technical element, “unweighting.”
As a free bonus that optimises cash flow, this terminological muddle acts as a generator of pseudo-diversity of techniques and an abundance of opportunities to teach them. All of this makes it possible to build, extremely effectively, illusions of skill development in learners.
Every season people learn a bundle of new terms and/or ways to do the same thing, only differently. In theory, of course. It is naturally more convenient for the instructor to get money for instruction and immersion in fascinating terminological stories than for the student’s real result.
And progress in riding . . . Well, you have to groove that in, that’s for later. You’ve got the principle broadly, so off you go. What “well, broadly clear” is is defined in section 3.4 of Chapter 3, and it is far from what many instructors proclaim to be “broadly clear.”
A bundle of memes to catch your breath

Hey, take your hat off! That’s an up-unweighting! … or a down one
Unweightings as many instructors imagine them
This video also contains unweightings, among other things. You can tell because the board comes off the slope at the moment of the edge change, thanks to that very unweighting. But to unweight something, you first have to load something somehow . . . All of this is a far more complex topic than just squatting over the board.
Certainly, at one time useful techniques were hidden behind the terms — techniques that work excellently in the hands of those who command them. But in the hands of instructors they [the techniques] have degenerated into their simulacra. On the whole, this is one of the natural routes of a concept’s life in society, as Jean Baudrillard wrote in his treatise “Simulacra and Simulation”:
<<…>> Such are the successive phases of the image [of a thought / term / idea]: • it is the reflection of a profound reality; • it masks and denatures a profound reality; • it masks the absence of a profound reality; • it has no relation to any reality whatsoever: it is its own pure simulacrum. In the first case, the image is a good appearance: the representation is of the order of the sacrament. In the second, it is an evil appearance: of the order of maleficence. In the third, it plays at being an appearance: it is of the order of sorcery. In the fourth, it is no longer of the order of appearance at all, but of simulation. The transition from signs that dissimulate something to signs that dissimulate that there is nothing marks a decisive turning point. <<…>>
Simulacra have entered snowboarding life so densely and thoroughly that sometimes inclination is called angulation, and squatting over the board — unloading or loading. Because of this kind of cluttering of language and concepts, here and onward I will try to avoid many terms, favouring a lower-level description instead. For example: “bend the knees,” “extend the knees.” If, as the text goes on, questions arise about where the unweightings that everyone teaches are here, why they aren’t here, and how to ride without them — that means it is still too early for answers. When the board is properly loaded in the arc and the recoil is then taken off it, that moment will give a gamut of new sensations, and at that same moment the realisation of what “unweighting” is will come.
For now, here is a fragment of the poem “The Last Glass Bead Game Master” from Hermann Hesse’s novel “The Glass Bead Game,” which anticipated Jean Baudrillard’s Simulacra by less than half a century:
<<…>> Gone are the schools, the books, the temples. He sits on the ashes. In his hand the beads, Once the cipher of a many-minded science, And now just little coloured pieces of glass, They slip soundlessly from his decrepit hands Onto the ground and are lost in the sand…
Search the chat for messages on this chapter’s topic under the hashtag: #Глава_8
Chapter 9. First steps on the board. Stance
(original text here)
Before reading, you are strongly advised to read Chapter 8.
!!!!
A condensed version of the chapter at this link (!!!!!LEARN BY HEART!!!!!)
!!!!
9.0. Introduction
This chapter is about how to set up a basic minimal stance on flat ground with no hill. However you do it, that is how it will be with you for the coming months. So it is better to devote 1–2 days to it in front of your house than 5–10 minutes in front of the hill. One day to understand everything. A second day to check that it has all sunk in. If it hasn’t — understand it again and repeat the check on the third day. And so on until it sinks in. On the hill you will be learning movements, not the stance. A more detailed return to the elements of dynamic posture (the stance) will happen only in Chapter 17.
That is why this chapter is very important.
The fewer mistakes made at the very start, the faster progress will go afterwards. There is no need to rush anywhere. This stage should be given as much time as it takes to perform it confidently. This can and should be worked on thoughtfully in front of your own house, not on the hill, where your buddies are hurrying you along.
The biggest problem beginners groove into themselves through wrong learning is the bent, hunched pose over the board (Figure 1).
Figure 1. The bent, hunched pose over the board
This pose arises from the natural desire to lower the centre of mass over the points of support in order to increase stability. Done correctly, this technique is performed by bending the knees (which tilt the thighs and lower the pelvis, rather than tilting the shins and bending the boot — more on this in detail in section 10.2); done incorrectly, it is performed by rounding the back in all its regions, and first of all in the lower back.
A rounded back (or “a fold in the lower back”) is a parasitic movement; it has to be completely excluded from riding.
9.1. An exercise on flat ground with no slope
Goal:
Get to know the board, learn correct balance, and don’t bend.
Tasks:
don’t bend, don’t bend, and once more don’t bend. Don’t bend at the lower back, don’t bend at the hips, don’t bend at the shoulders, don’t bend at the neck. Don’t bend.
learn to move with one foot strapped in, pushing off with the other from different sides of the snowboard;
learn to fully straighten up while standing on the board with both feet;
get yourself used to moving sideways / shoulder-first;
Execution:
So, the first thing to learn is to move over a flat plane with one foot strapped in and to fully straighten up over the board without any tension in the body.
- We strap the front foot into the snowboard; (b) we push off with the rear foot to build some minimal speed; (c) we place the rear foot on the board between the front and rear binding, and at that same moment we fully straighten up over the board — the back must be fully straight in all its regions; (d) while straightening up, we take up the position along the board, i.e. shoulders along the board and parallel to it (see Figure 2), torso along the board. We ride like this, shoulder-first, as long as there is enough speed.
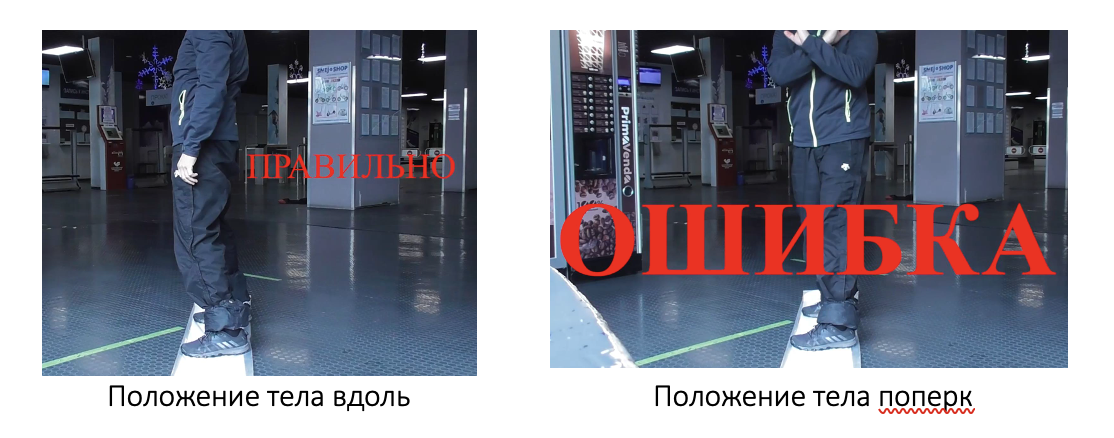
Figure 2. The body-along position, or the “minus” stance; and the body-across position, or the “plus” stance
9.2. Why torso along the board?
Turning the torso to face the direction of travel (across the board, the plus stance) is a natural desire and position. But at the early stages of building riding (the first seasons) it leads to riding in a straight line and a total absence of turns.
Thought #1
The correct neutral position of the torso is between “along” and “across,” and closer to “along.” If the “along” position has not been mastered and is not available, it will be impossible to reach the correct position.
Thought #2
The first turn to be learned is the front, because at the early stages of learning it is simpler. Success in learning this turn will be determined by how well the skill of keeping the torso along the board is grooved in, because over the course of this turn the board turns and tries to twist you into the “across” position, and as soon as it succeeds, the turn ends one way or another — but ends wrong, and possibly with a fall.
Thought #3
It is very important to learn to build the stance and the movements relative to an object (the board) that is moving and turning in space:
The simplest position of the TORSO that you can learn to maintain relative to the moving board is the “along the board” position. It does not have to be your predominant way of riding, but it is learning the basic skill of holding a certain position relative to a moving, turning object. A rigid link between the body and the board. Until that link exists, there will be no stable riding, because the body will move out of sync with the board, and the board out of sync with the body.
9.3. What does “straighten up” mean in snowboarding? The basic stance
I
You have to understand that snowboard boots set a certain forward tilt of the shin (the part between the knee and the foot). This tilt is compensated by bending the knees => tilting the thighs (the part between the knee and the butt) back.
There are no perfectly straight legs in snowboarding.
“Straight legs” in snowboarding are legs slightly bent at the knees. SLIGHTLY! This is the natural bend set by the boots; you don’t need to bend anything anywhere on purpose.
You should straighten the legs exactly as much as the boots let you.
II
Slightly bent knees should pre-move the pelvis back, toward the tail — that is good. But the body often tries to compensate for this with an excessive forward tilt of the torso, toward the nose — that is bad. On a slope, the torso tries to topple backward like the Leaning Tower of Pisa — that is also bad.
The torso should be positioned so that the shoulders, on one hand, don’t go back past the projection of the pelvis, and on the other hand, the head doesn’t go forward past the projection of the front knee (or better, the front heel). In other words, so that there is no excessive reclining or tilting of the torso.
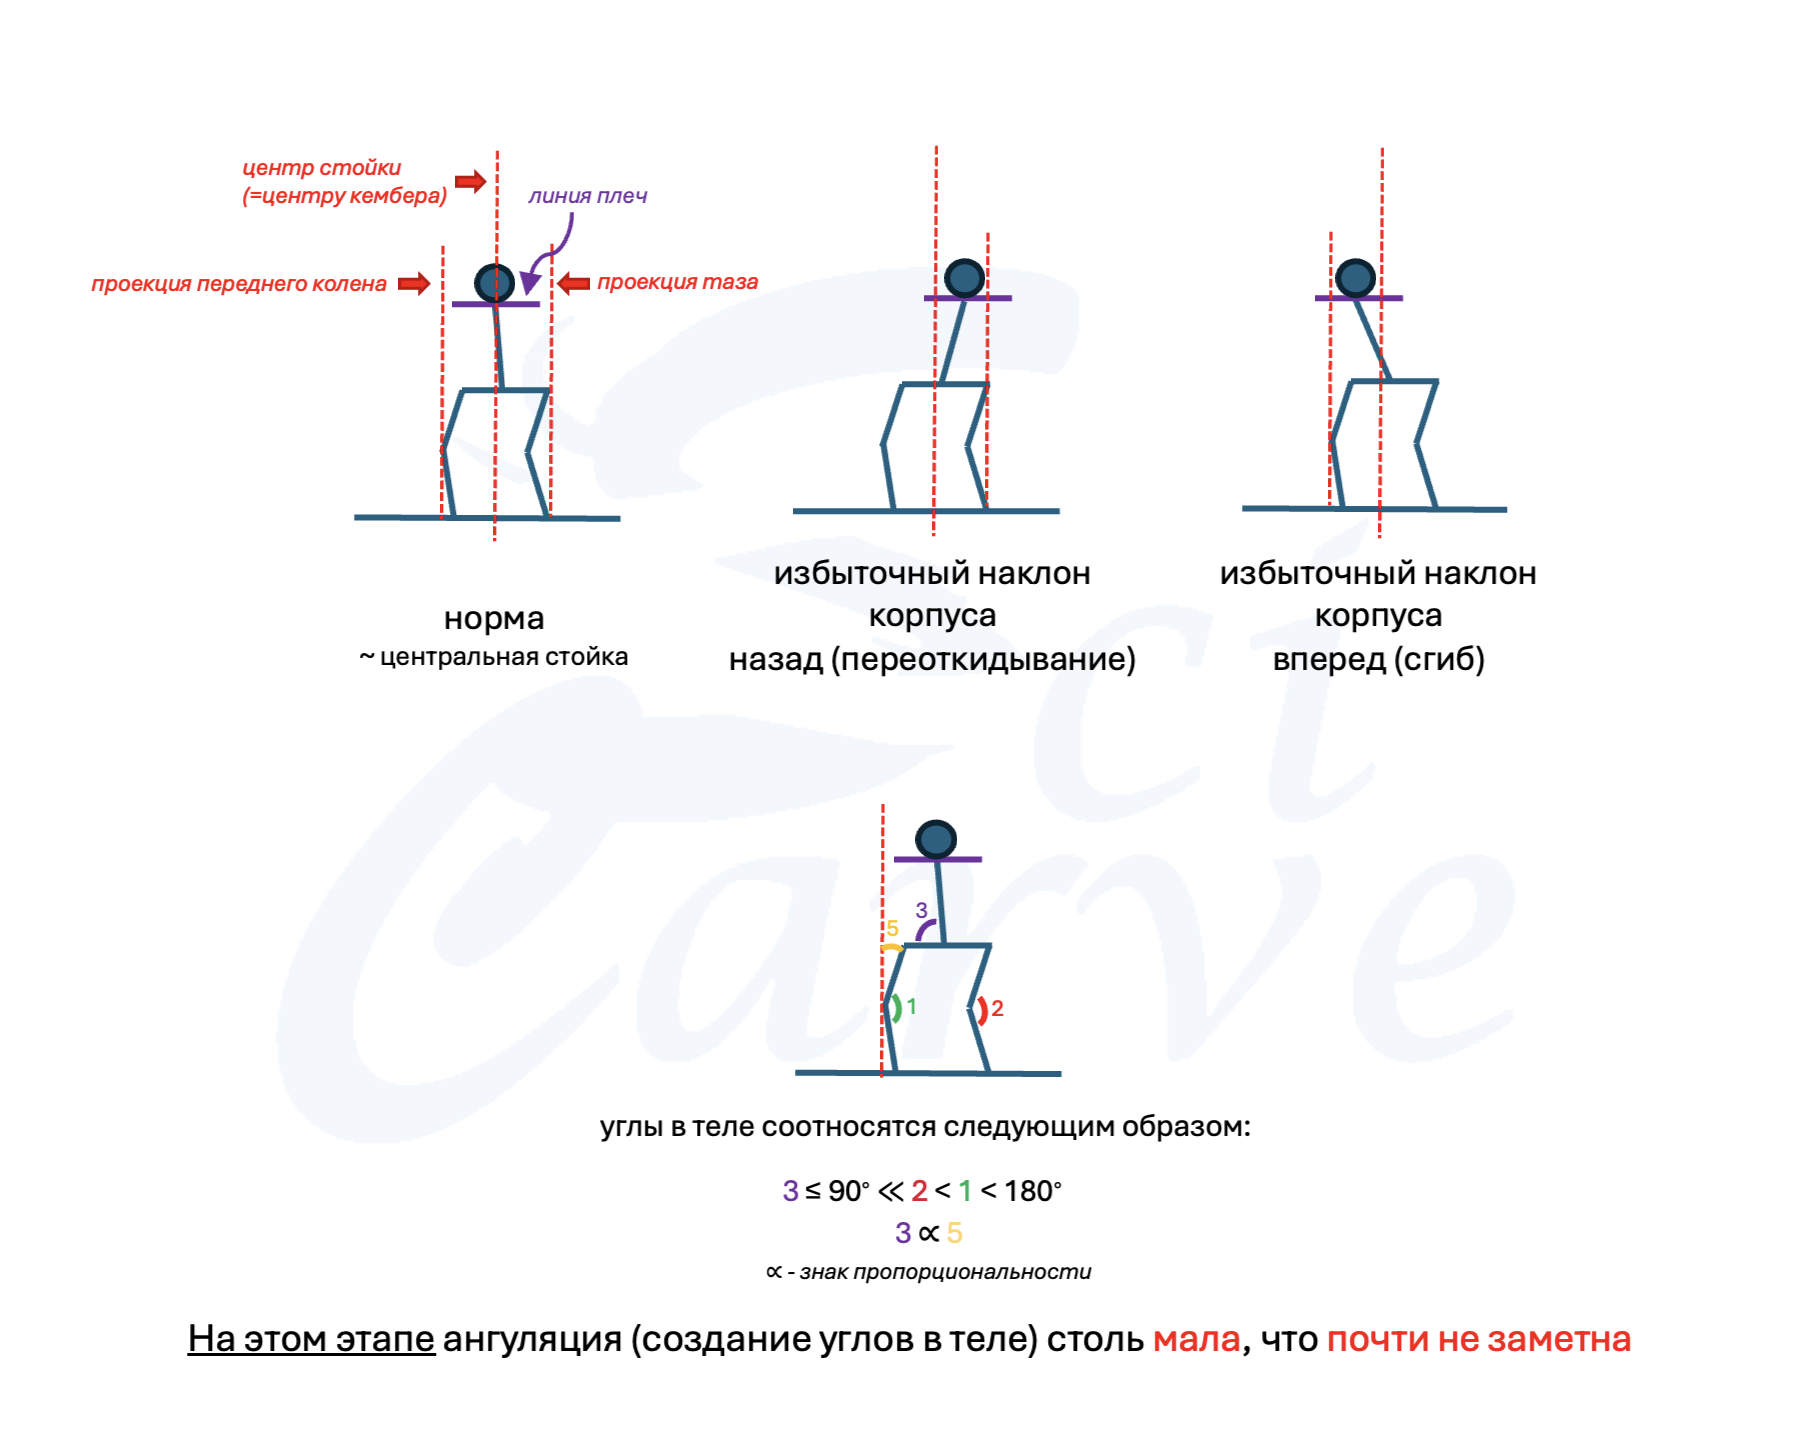
Figure 3. Variants of the stance, “straight” and not so much. All the angles in this basic variant of the stance can and should be so small that they are barely visible under clothing, especially if it is baggy. However, these angles should be felt as a light but present muscle tension. Muscle tone. The stance is an active object, not passive standing on bones and ligaments. The stance is a dynamically changing object, not a statue cast in plaster. It must allow movement and expresses readiness for movement that begins at the start and continues to the finish. It is not a frozen pose held for the whole descent. See section 8.6.1 of Chapter 8 for more.
III
The position must be as natural and comfortable as possible. This may take time to groove in.
More on “straightness,” see mistakes #7 and #8 below.
9.4. Problems and mistakes in the first steps
While moving:
The gaze is directed down at the board. This provokes bending and slouching. Rounding the back is IMPERMISSIBLE. You must look straight ahead, past the horizon line, or in the direction of travel while keeping the torso turned along the board — i.e. head turned and gaze over the shoulder; or, being turned along the board, look where the head is pointing. Get used to moving shoulder-first.
Turning across the board, into the “plus” stance, facing the direction of travel, the line of the shoulders perpendicular to the line of the board. Most freecarving (not sport) is riding with the body along the board, which lets you get stable control with minimal effort. The “plus” stance can be seen in sport, but that is a different technique, where stability requires burning a lot of energy: all for the win over the stopwatch. Turning across, facing the direction of travel, is a natural position from everyday life that we want to take up, but for learning and riding a snowboard it is harmful, and from the very start you have to get yourself used to the torso “along” the board.
Catching / losing balance. You have to repeat the exercise until it starts coming off stably and at any speed of movement.
Slouching in the shoulders. To remove it and additionally straighten the back, the movement “chest forward, bring the shoulder blades together” helps — and lock that position. It also gives a single line of the shoulders, which you have to keep parallel to the snowboard, i.e. the “minus” stance, a.k.a. the “along the board” position.
Excessive forward tilt of the torso (in any “forward” direction, including in the direction of the board, toward the nose). The head and shoulders must not go past the projection of the front foot’s heel.
Toppling / slanting the shoulders back, with the pelvis moving forward. A sure road to the board sliding out from the tail.
Toppling / slanting the shoulders forward. A sure road to overloading the nose of the board and flying over it.
The shoulders should be set parallel to the surface you are moving over. The pelvis no further than the centre of the stance, and better closer to the tail.
If you can fully straighten your legs on the snowboard (into a line, angles (1) or (2) = 180 degrees in Figure 3) => the binding stance is too narrow, or the boots are too soft, or the boot’s play in the binding is too great, or you are bending your legs at the ankle joint.
You can fully straighten the front leg by bending the rear leg at the ankle joint. This is a mistake that in riding will lead to overloading the nose. At higher riding levels there are movement variants where this stops being a mistake. But that is so far from here that it is better not to think about it at all.
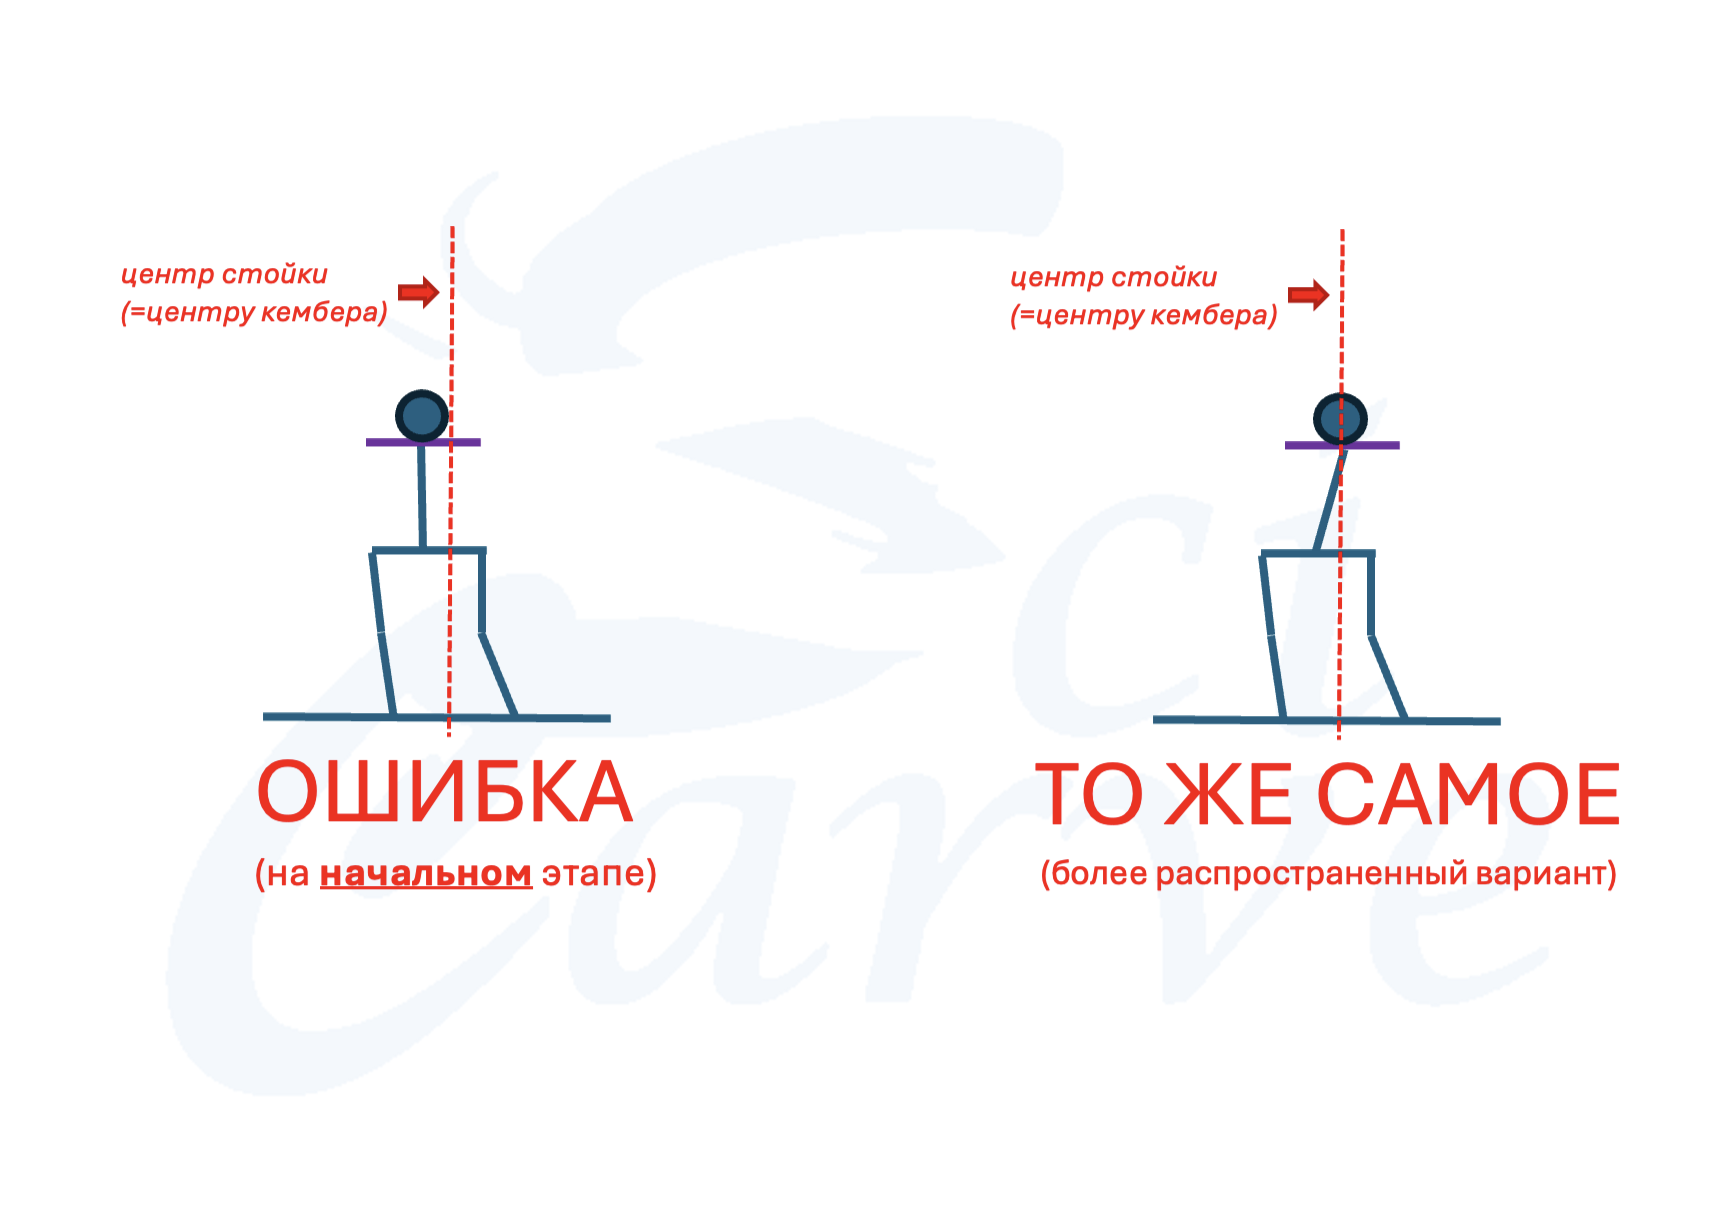
Fully straightening the front leg at the expense of bending the rear one (tilting the shin). A common variation appears on slopes and at speed. At far and late stages of learning, such a body position has the right to arise during an intense extension of the rear leg on exiting a low arc with a subsequent jump of some degree, and also with certain variants of actively accelerating the board. The position comes out the same, but its causes are completely different. Now and in the near future, it is a mistake.
9.5. Harder variations of the exercises
We add arbitrary head turns during movement while keeping the body position you’ve taken up. For riding it is important to learn to turn the head independently of movements in the rest of the body. This is needed so that at any moment you can look at any part of the slope and control the space around you.
The board must not change its trajectory when you turn your head. If the board responds to a head turn, then you are turning not only the head but the body.
9.6. Conclusion
This stage should be given as much time as is needed for its stable and confident execution. If it takes 5 days of 4 hours a day, then it is 5 days of 4 hours a day. Since it doesn’t require a slope and you can practise in front of your house, there should be no problems with this. You have to get to the point where moving over a flat plane and standing up on a sliding board causes no discomfort at all. At first, being unaccustomed to it, this will seem heavy and hard. That’s fine. The main thing is to hit the start and end of the movement, and the vertical body position, exactly right when the rear foot is placed on the board.
Video 1. Execution mistakes: 1) you have to be able to push off with your foot from both sides of the board, not just one; 2) slight slouching in the shoulders; 3) periodic turning away from the along-the-board position; 4) the gaze is sometimes directed down; 5) toppling the shoulders back, over-reclining.
Search the chat for messages on this chapter’s topic under the hashtag: #Глава_9
Chapter 10. First descents on the slope. Step 1
(the original text is here)
!!!!
A condensed version of the chapter at this link (!!!!!LEARN BY HEART!!!!!)
!!!!
Introduction
So, we already know how to handle the board on flat ground confidently and with ease. It is time to try it on the hill.
Theory before the first session:
Video 1. Theory
The most important thing is the vertical position of the torso — the part of the body above the waist. A fold in the lower back produces no effect on the board whatsoever. It is a parasitic movement that you shouldn’t even learn, so that you don’t have to un-learn it later. All the effect on the board is the KNEES for the front (turn on the front edge) and moving the PELVIS a little past the back edge, keeping the body vertical, for the back (turn on the back edge). In both cases the body must be exactly vertical (relative to the horizon). No fold at the waist. None at all.
! ! ! A FOLD AT THE WAIST IS EVIL ! ! !
10.1. The back edge
Problems:
- The most common problem is folding over the board. The fold keeps / returns the upper torso over the board. It is a reflex we got from moving over a flat plane; we try to keep the weight over the points of support = over the board. But to effectively edge the back edge, stop, and not move, we have to move the weight past the back edge — i.e. past the points of support. On a flat plane that would lead to a fall; on the hill it is braking and stopping.
Figure 1. Folding over the board. An impermissible body position.
Figure 2. A vertical torso moved past the back edge
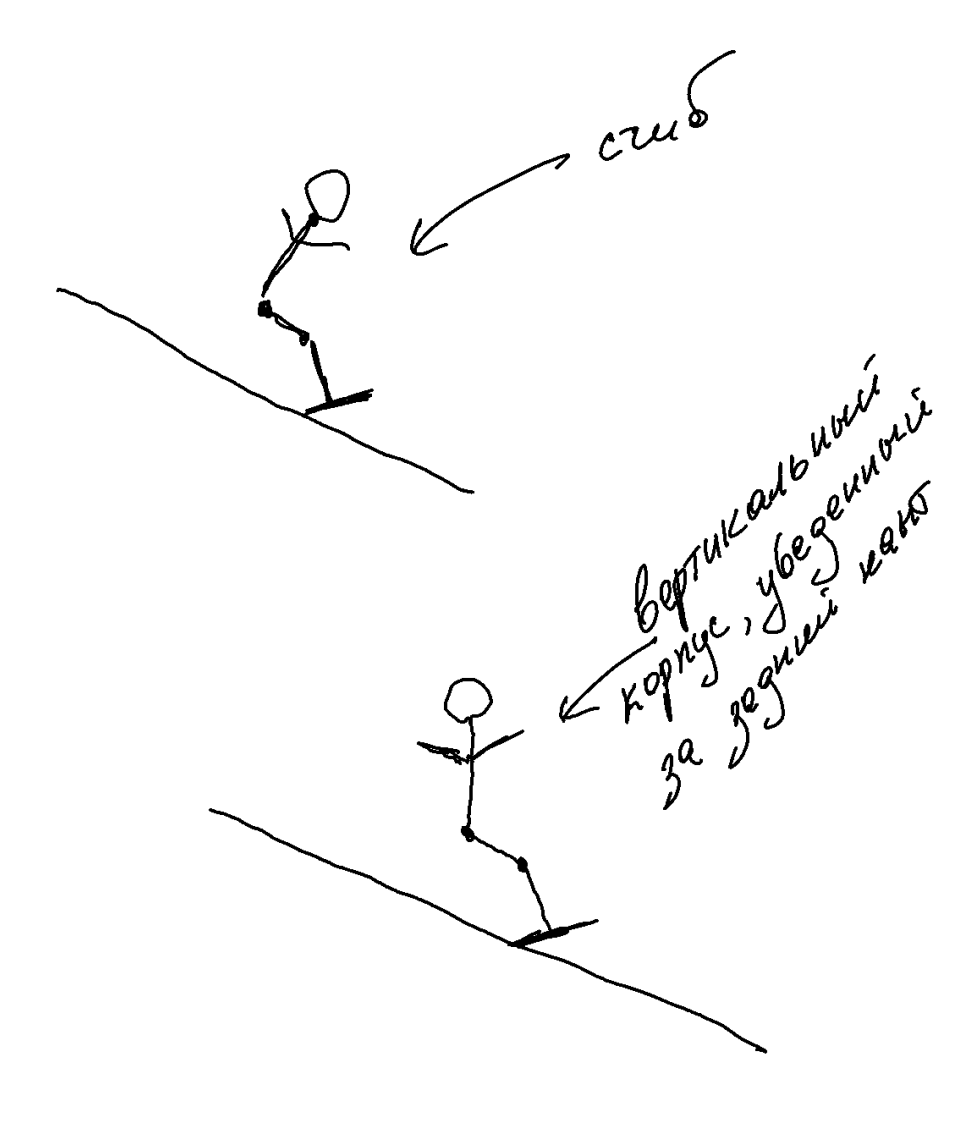
Diagram 1. The fold and its absence on the back edge
Falling backward. Arises as a result of leaning / reclining back too far.
Falling forward, over the front edge — this is a direct result of the fold. The left photo in Figure 1 is exactly the position from which you can easily fly over the front edge.
Complications:
You can build a little more speed and brake, reclining a bit harder toward the slope. To build speed it is enough to bring the board off edge, returning the centre of mass onto it or keeping it over it. A board that is off edge will turn to the fall line on its own and ride down. For it to go on edge, you have to move the centre of mass past the back edge.
If it seems to you that the board is going fast — it has been going too fast for a long time already. Brake.
At first it is better not to let the board turn straight down the slope. It turned a little. Enough. Edge the back edge. And so, gradually get used to speed and to different positions of the board relative to the fall line.
10.2. The front edge
10.2.1. The arch in the lower back
The arch in the lower back is the opposite of the fold. It is the state of the lower back that you maintain during squats in the gym:
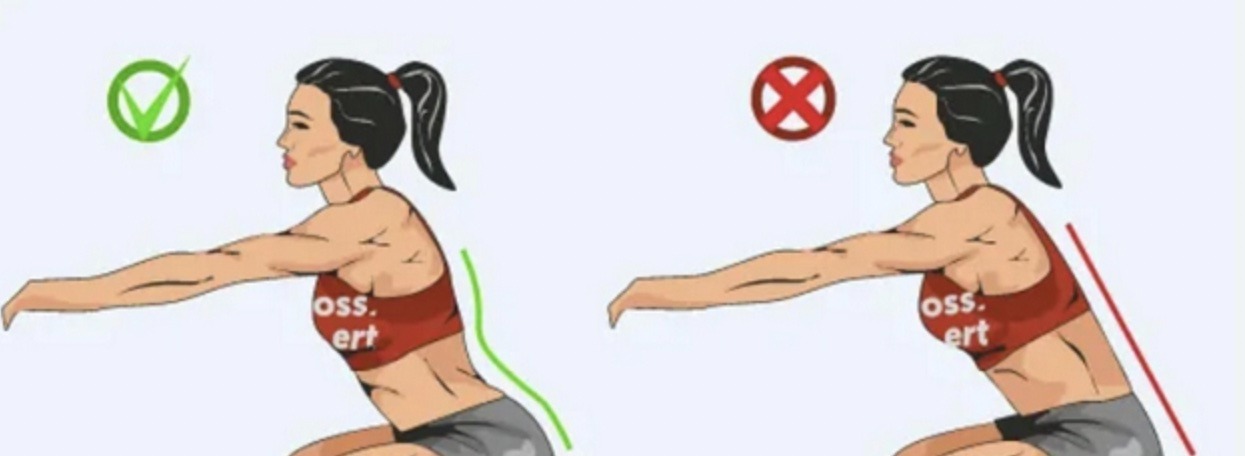
The arch in the lower back and its absence
Maintaining a straight back and a vertical torso in the front can be helped with the rear hand: bring the shoulder blades together, place the rear hand over the tail of the snowboard, bend it at the elbow, and raise the hand above shoulder level. Keep this position always.
An arch in the lower back is NOT bending backward. Physiologically it is lordosis = a straight back.
10.2.2. Knees toward the slope
“Knees toward the slope” means “push the knees toward the slope with the pelvis.” Legs bent -> thighs tilted -> pelvis is BEHIND the knees. From the pelvis, through the thighs, push the knees toward the slope WITHOUT extending the legs. Knees can be bent correctly and incorrectly. An INcorrect knee bend does NOT move the pelvis (and the CoM) toward the tail.
Video 2. How to bend the knees correctly and incorrectly. An incorrect bend crushes the boots. A correct bend moves the pelvis past the front edge. Description below. Find all 4 variants in the video. Repeat them at home and understand the difference between them.
If we are standing on the floor strapped to the snowboard, then there are three ways to bend the knees and keep the weight over the board:
Bend the knees = squat down, without changing the shin’s tilt, i.e. with the pelvis moving back, the shoulders “covering” the knees, the way people usually do it in a barbell squat. In this case the centre of gravity (CoG) stays over the points of support (the legs), which is what lets weightlifters not fall. This variant of the knee bend is incorrect.
Bend the knees = squat down, changing the shin’s tilt (bending the ankle), i.e. pushing the knees forward but keeping the pelvis and torso over the points of support. In this case, when the knees bend, the feet also stay entirely on the floor. The centre of gravity (CoG) stays over the board, and the boot is crushed by the shin. This variant of the knee bend is incorrect.
A modification of (2). Move the pelvis slightly forward, tilt the structure, and bend the knees at the expense of bending the ankle. I.e. repeat variant 2, but in a different position of the whole structure. This variant of the knee bend is incorrect.
For the knees to bend correctly and the boots not to be crushed, the ankle joint must be fixed — i.e. the shin’s tilt relative to the board does not change. That is, the shin can tilt ONLY together with the board. If you had plastic boots, they would help you with this; but since you chose a soft setup — do the work yourself 😉
10.2.3. Pelvis forward
The pelvis is the point that has to be moved forward, tipping the board onto its edge and tilting the knees toward the slope. All of this while keeping the torso vertical. See also Video 1 at the start of the chapter for more.
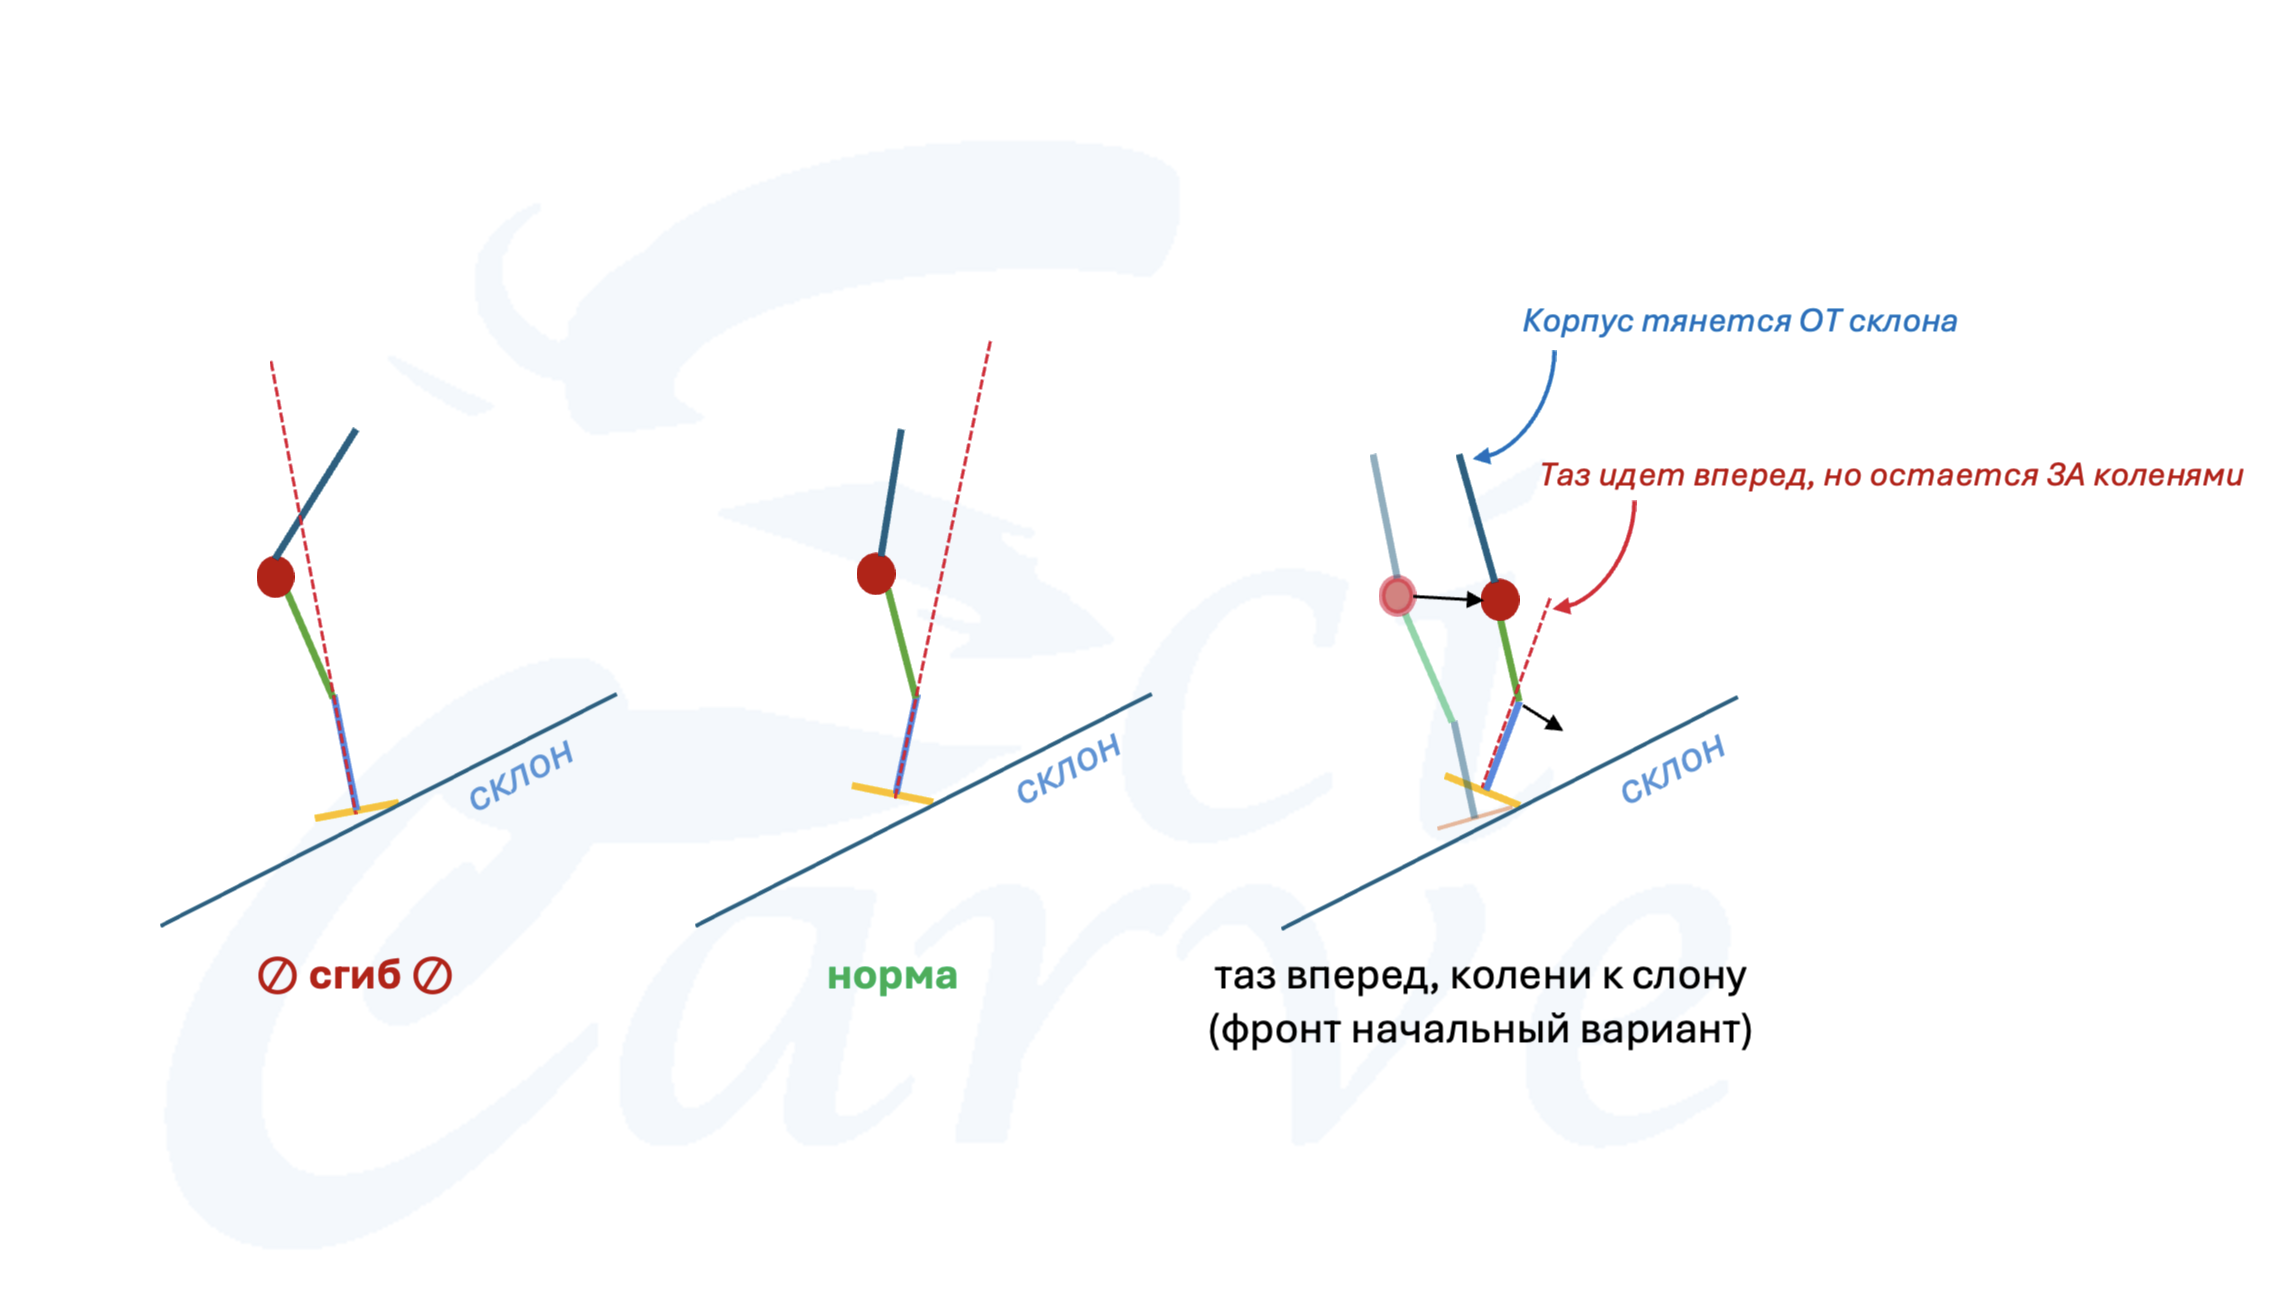
The main mistake and the main movement on the front edge
Problems:
The most common problem, as on the back edge, is the fold at the waist. Here it leads to falling onto the slope. If you feel instability, you must not try to catch yourself with your hands by reaching toward the slope; on the contrary, you have to reach with your hands away from the slope, and above all with the torso, the chest — AWAY FROM THE SLOPE, returning the torso to a vertical state. Vertical is set by the board, not by the surface of the earth or the slope. Chest to the sky. If on the front edge you feel that you are about to fall into the slope, then you are already too bent and leaned over, like the Leaning Tower of Pisa => you have to return the body to vertical, not try to catch yourself with your hands, which will lead to further bending, and then you will definitely fall. Both arms up, hands above the shoulder, stretch yourself into vertical, collarbones to the sky, gaze up.
To keep from bending, you have to look up, along the hill, at the horizon. As soon as you see the slope => most likely there’s a fold.
Conclusion:
This stage should be given as much time as is needed for its stable and confident execution. Most often that is at least one day. It may take more — then you need more.
The back edge is a mirror image of the front, and the front of the back.
If the torso deviates from vertical “toward the slope,” that is a fall; on the back edge it will be “over-reclining,” and on the front edge “the fold.”
If the torso deviates from vertical “onto the board,” that does not edge the board. On the back edge it will be “the fold,” and on the front edge an excessive arch, or an attempt to “go into a bridge.”
At this stage it is important to learn to keep a straight back and a vertical torso, edging the board by shifting the centre of mass past the projection of the needed edge; on the front edge — at the expense of the knees; on the back edge — at the expense of moving the pelvis and lightly reclining a STRAIGHT torso past the back edge.
Until you can confidently keep the torso vertical, the back straight, and descend on the back and front edges without falls, you cannot leave this stage.
10.3. Getting used to speed, the traverse, and the basic side-slip
The theoretical and practical minimum
It is assumed that you have acquired the skill of standing on the front and back edges (sections 10.1 and 10.2). These positions are stopping positions.
And also the skill of ELIMINATING FOLDS and straightening up over the board (section 9.2 of Chapter 9).
Slope 8–12 degrees, green, but not flat.
Goal:
Learn to point the board down the fall line and get used to some minimal speed that the board will build.
Motivation:
In every turn there is a phase where the board accelerates down the fall line. If that acceleration is unfamiliar and frightening, there will be no turn. You have to get used to the minimal speed before you start studying turns.
Starting position
It is easier to start from the back edge. So, you are standing on the back edge. The pelvis is moved back, past the back edge => the straight torso is reclined slightly back => the centre of mass is moved off the board past the back edge => the board is edged across the fall line. There is no fold in the lower back. The position is comfortable, you are not sliding or going anywhere. This requires some balance, but it has already been developed at the stage of the preceding sections (10.1 and 10.2).
Beginning the movement
Start slowly returning the torso onto the board. For this you have to bring the pelvis forward, and the torso after it.
An exercise on flat ground that should prompt some thoughts about what “move the pelvis back” or “bring the pelvis forward” means. The discussion is here: https://t.me/oes_snowboards/99285
As the torso and centre of mass return onto the board, it will start coming off edge. If the weight is at the centre of the board and you stand firmly on both feet, the board will slide down in the “across the fall line” position. For it to turn nose-down, you have to bring the pelvis (and the weight) slightly forward, toward the nose, and load it (recall the analogy with the scales from section 10.1). As soon as the board begins to turn nose-down (i.e. has turned by at least one degree), you must immediately return the pelvis to the centre of the board, or better slightly harder onto the rear leg (you should have acquired this skill in section 9.2 of Chapter 9). If the board has begun to turn down the slope and the weight is over the board, then, being off edge, it will continue to do so. The more the board turns down the slope, the more the front foot is lower on the slope than the rear one => if you stand straight, there will be more weight on the front foot because of the slope (see section 6.4 for more) => for the board to be loaded evenly, you need to move more onto the rear leg, but not past the rear binding (see Problem #2 below). A board that is off edge will start building speed. As soon as the speed becomes uncomfortable — return to the starting position, i.e. move the pelvis back, past the back edge = recline the torso slightly, the thing you did in section 10.1. Then the board turns back, across the fall line, edges, and stops. The more speed you’ve built — the harder you have to recline the torso back.
When the speed starts building, to find the amount of “reclining back” that leads to effective braking, it is better to fall a bit, to sit down on your butt — i.e. to “over-recline”; it is precisely for this that protective shorts are needed. It is easier to search for the needed degrees of torso “reclining” by starting from the state of “falling,” because the needed degrees are on the edge of a fall — you are not falling yet, but a bit more and there would be a fall. That is the ideal balance of moving the centre of mass for the most effective stop.
So, you have to gradually get used to speed. Until, on the slope you are learning on — hopefully green, no more than 12 degrees — you become comfortable moving straight down the fall line for at least 2–3 seconds. I.e. when the board turns straight down and that causes you no panic and horror, and after 2–3 seconds you return routinely and controllably to the starting position of “standing on the back edge.” If something isn’t working, you may need to find a gentler slope or practise on the runouts of the runs.
The same should be repeated with the front edge.
Problems
10.3.1. Problem #1. Catching an edge
To catch the front edge, from the “standing on the back edge” position you start sliding down and, without changing the board’s position, move the weight past the front edge. To catch the back edge, do the mirror procedure.
An edge is caught when our centre of mass ends up not where it should be.
If on the back edge there is a fold in the lower back and the board comes off edge not through the pelvis movement but through tilting the torso forward, then that is an unstable and poorly controlled position/movement, as a result of which you can misjudge and throw your centre of mass across the board before it has time to turn, and you catch the front edge.
5:21 how to fly nose-first into the slope when exiting the back edge
10.3.2. Problem #2. Reclining BEHIND the rear binding
If you force things, then at speed you will recline the torso behind the rear binding. This is a natural reflex that is absolutely superfluous in riding. It looks roughly like this:
The clip is taken from A. Sobolev’s video “top 20 mistakes of snowboarders”
Instructors often confuse this with overloading the rear leg and tell you to load the front one harder, but that is foolish. Here the mistake is in setting the torso in space. It is IMPOSSIBLE to overload the rear leg and the tail of the board if you do it with correct movements. The more the tail is loaded, the more stably the board will ride.
Don’t force things. And don’t recline the torso behind the rear binding. At this stage your torso and pelvis must not, in lengthwise movement, go past the projection of the bindings. That is, imagine there is a wall at the front and rear binding, and lengthwise you cannot shift past the front or rear binding. In other words,
be at the centre of the board.
Section 9.2 of Chapter 9 was devoted to getting rid of this bug. Maybe you left it too early… ¯\_(ツ)_/¯
10.3.3. Problem #3. Shifting weight onto the front leg
NO! At this stage you must not shift weight onto the front leg EVER, except at the start, and NO MORE than to initiate the board turning to the fall line. As soon as the nose of the board has turned by ONE DEGREE, you have to return the weight harder onto the rear leg. As learned in Chapter 9. Lengthwise work is not learned at this stage. At this stage all that is required is to get used to speed and to learn to stop by moving the centre of mass past the needed edge.
10.3.4. Problem #4. Catching an edge when the board is off edge and moving straight down the fall line
This can happen on a bump or some irregularity, but
this will never happen if you keep the centre of mass over the board.
The bump pushes the board, and through the board it rocks you; if you give in to the impulse and move the centre of mass off the board somewhere, then the corresponding edge will engage. If, while moving straight down the fall line, the front edge engages this way, you will catch it.
The secret of riding on the base (flat board) is that you have to keep the centre of mass over the board. Whatever happens — don’t move the centre of mass off the board; then the bump will kick the board, the board will play under you somehow, but it will not engage its edge.
10.3.5. Problem #5. Somersaults over the nose
This is overloading the front leg. On a slope and at speed there are many surrounding forces that load our front leg (see section 6.4 for more). To compensate for all these forces and load the board evenly, you have to move the weight more onto the rear leg, but NOT PAST the rear leg (see Problem #2).
Stay at the centre of the board, weight more on the rear leg.
10.3.6. Problem #6. The board “sliding out”
If you over-recline too far past the rear leg, the board will slide out from under you. Go back to Problem #2.
Improvements, if you got bored
It is less scary if the legs are slightly bent at the knees and relaxed — this lowers the centre of mass and gives the ability to absorb irregularities. DO NOT squat over the board. Knees slightly bent — just a little! This is nothing like squatting! What should be slightly bent is the legs at the KNEES, not the lower back or the pelvis. THE KNEES!!! It is important that someone monitors this from the side, because 9 out of 10 beginner snowboarders confuse the knees with the lower back. If there is no external monitoring, you shouldn’t even read the “improvements” further.
On how a snowboarder’s legs should work
The rear knee is bent SLIGHTLY more than the front one; this is physiological and will let you load the rear leg better.
When the knees are slightly bent, at the moment of braking, by extending the legs as if for a standing long jump, you can “squeeze” the board across your movement; as soon as the board has taken the across position, immediately bend the knees back. These are short movements. 1/5 of a second. The torso is meanwhile reclined past the edge you are braking on. The harder you want to brake — the harder you have to recline past the edge. The more speed there is — the bigger the hit to the legs at the moment of braking. But you should NOT build speed.
Braking is always putting the board across your movement and edging it. To edge the board onto the back edge, for example, you have to recline the torso back -> move the weight (centre of mass) off the board past the back edge. You can put the board across your movement in various ways. For example, you can swivel it with your legs. How? Simply turn the board with your legs at the moment of reclining the torso.
Free achievement: “the traverse”
If you didn’t force things and everything described above has been passed, then I suppose it should be no trouble for you to ride “sideways.” After all, riding “sideways” (a traverse), across the fall line, is when the board is pointed slightly down from the full-stop position, and so it goes sideways. That is, to go sideways from the full-stop position, you have to bring the board slightly off edge, it turns a little to the fall line, and then you have to edge it in that position, when it is slightly turned. It is a matter of balance and playing with reclining the torso 1–2 degrees past the edge. Explaining this procedure would take a page, but I am sure it should already come off on its own for you.
Free achievement: “skidded turns”
When the board has turned and is riding straight down the fall line, you can engage either edge by moving your centre of mass in the corresponding direction, and the board will turn. For this there must be no fear and everything must happen routinely.
Better to spend 1–2–3 days on the smooth turning of the board and getting used to speed than to force things. Forcing things leads to 100500 mistakes.
If you make such transitions quickly, then, roughly, this can be called “skidded turns.” The more the phase of “moving straight down the slope” shrinks, the more strongly and less roughly what is happening will resemble an actual turn.
For a turn to become a real turn, you must engage the next edge BEFORE the board has turned to the fall line. This fact does not depend on the nature of the turn.
That is: you’re riding straight down, the board moves down, the body moves down. You engage the back edge. The board moves aside from the downward movement, the body also starts moving aside and builds inertia and speed to the side. Within that sideways movement, you have to engage the front edge, swivelling the board more downward with your legs. Then the body, already having some sideways inertia, will for a while continue knocking the board to the side (skidding), but the board will also strive to ride off along its radius (the turn). When the structure has stabilised, the board has ridden off along its radius, and the body has built speed the other way, we repeat the procedure. In effect, as soon as the skid has ended and the board has ridden off to the other side, after 2 metres (= 1.5 board lengths) you have to repeat the manoeuvre. That is a skidded turn. And they are possible ONLY on condition that the rear leg is loaded. Because to engage the next edge, you have to jump off the previous one. That jump happens from the tail, by means of an intense extension of the rear leg.
But you shouldn’t linger long on this stage and hone or polish anything here. More technical skidded turns will come off on their own while you study carved turns. You’ll still have to fight with them, because making a soft mass-market snowboard not skid is not as easy as it may seem.
Chapter 11. A pre-arc primer
!!!!
A condensed version of the chapter at this link (!!!!!LEARN BY HEART!!!!!)
!!!!
Below is theory that was already partly spoken of in Chapters 5 and 6, but here it takes a more concrete form. If something is unclear, refer back to the preceding chapters or to the Definitions section.
If we are not going straight, then we are riding in arcs, making turns and moving left or right. If we are not riding in arcs, then we are going straight.
So, we are riding in arcs. In a rough approximation, each arc is half a circle. The centre of a circle is inside the circle. Moving along a circle, we move around its centre. Moving on the board along an arc, we move around the centre of a circle whose radius is less than or equal to the board’s sidecut radius. Shrinking the arc radius (= increasing the speed of the turn) happens by increasing the edge angle.
Edge angle — the angle formed between the base / “bottom of the board” and the slope when the board is set on its edge.
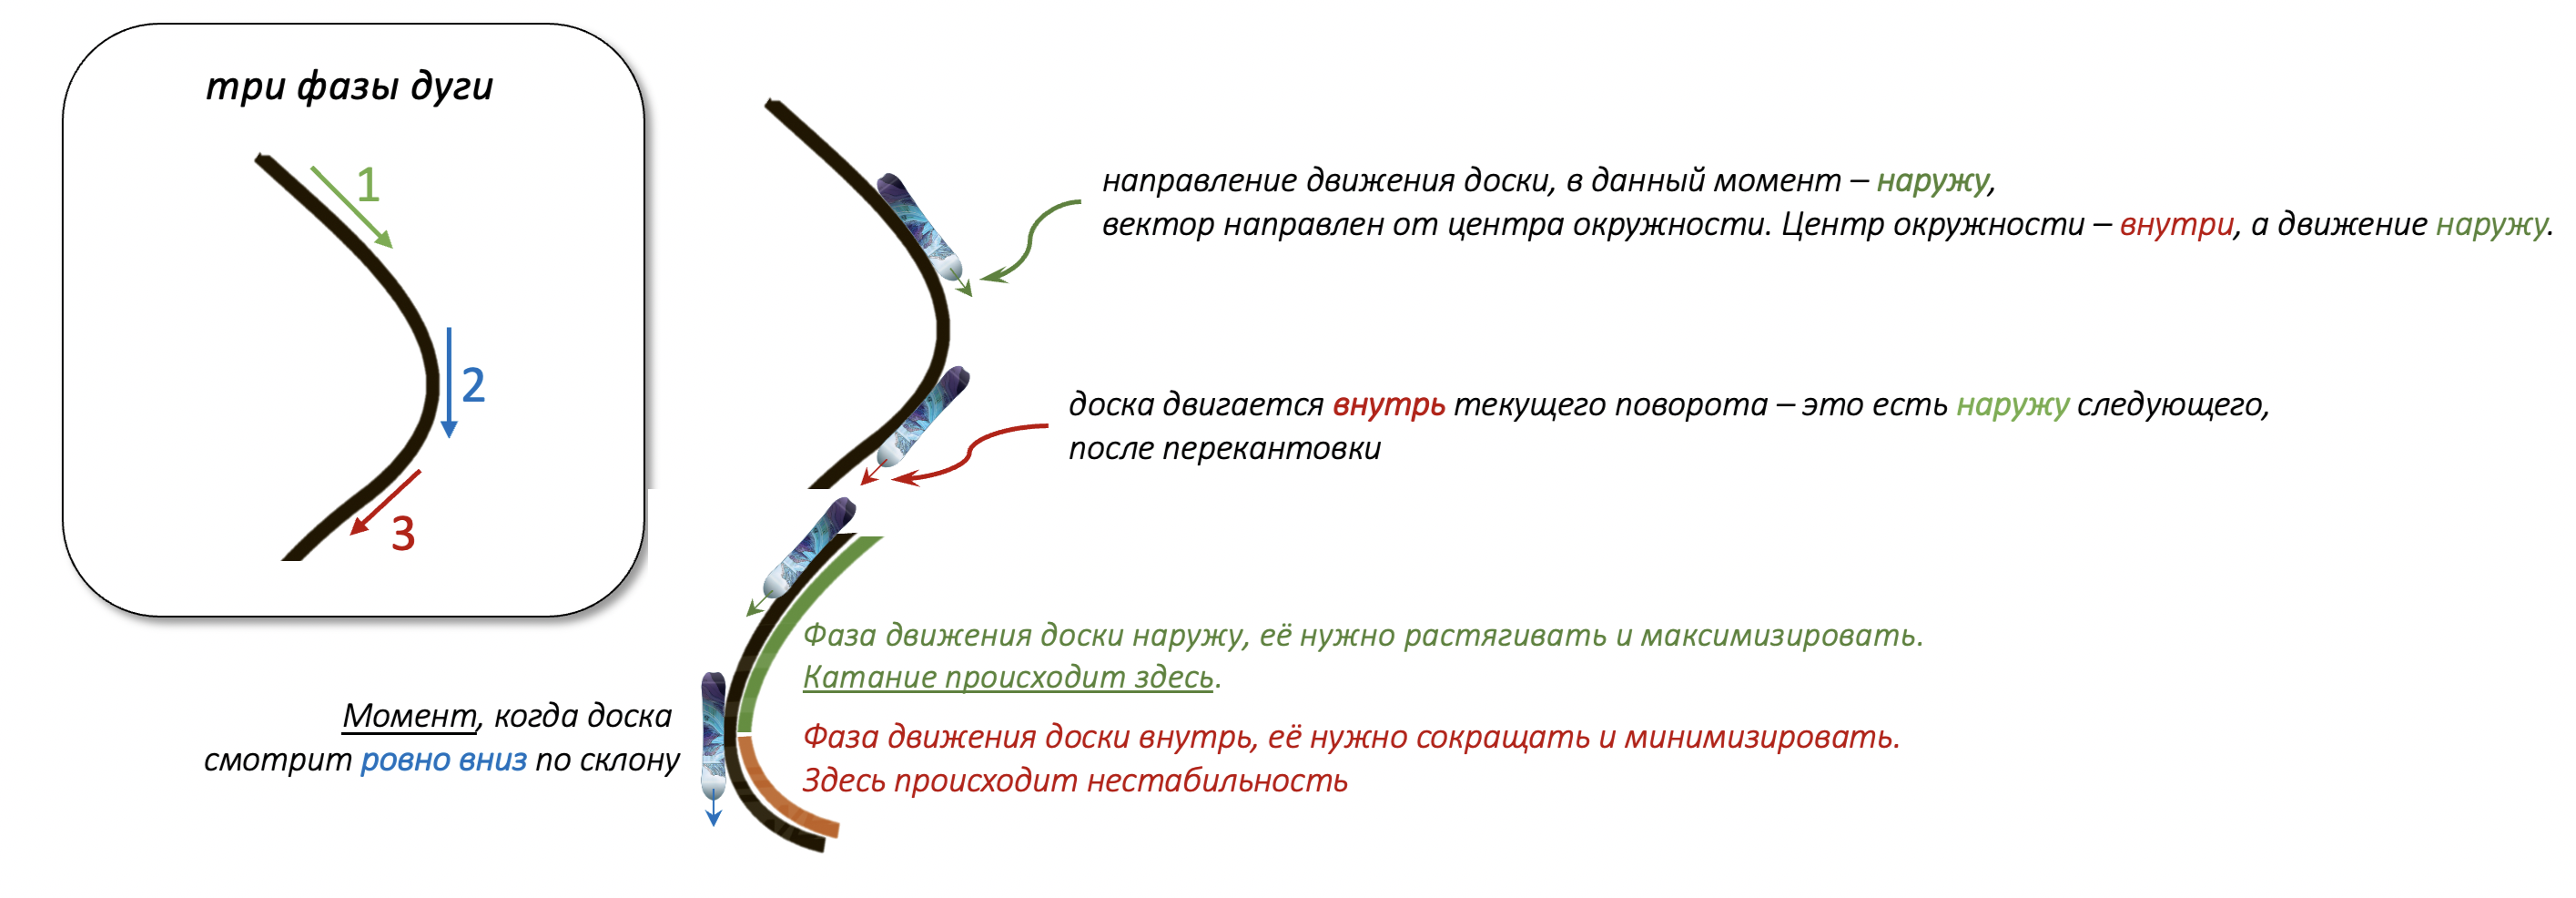
Figure 1. The three phases of the arc
So, while riding in arcs from top to bottom, in each arc the board will successively pass through three principal phases, which can be tracked by the direction the nose is moving: toward the outside [of the circle] of the current turn (Fig. 1, phase 1), straight down the slope — the apex of the arc (Fig. 1, phase 2, or more precisely the tangent point), toward the inside [of the circle] of the current turn (Fig. 1, phase 3).
If something is unclear at this point, you should re-read Chapter 5 and Chapter 6.
11.1. Scene one. The board
Here it is very important to understand the “outward” direction of movement, because it is precisely in this phase that carving and all of riding happen, and it is precisely this phase that learners most often lack at the early stage. Once again: we ride the board in arcs, from top to bottom. In a correctly built arc, at its start the board points outward (Fig. 1, phase 1), moving toward the side of the run, from its centre to its edge — NOT down (NOT Fig. 1, phase 2). Then the board, set on its edge, on its own (you don’t need to swivel it with your legs, it does it itself) passes through the following three phases:
Having travelled some distance to the side (Fig. 1, phase 1 of outward movement), which depends on the board’s sidecut radius and the edge angle, the board will start to turn actively.
The nose turns straight down the slope (Fig. 1, phase 2), i.e. the board rides parallel to the slope. This is a very brief instant, 1/50 of a second.
The board turns toward the inside of the current turn (Fig. 1, phase 3); if at this moment you change the board’s edge without changing its movement (!!!), the board will continue that movement along the correct trajectory — toward the outside of the future turn. The more “outward” you need, the more the board has to travel “inward.” BUT the board goes inward after the apex. At the apex the edge angle is maximal => the radius is minimal => after the apex the board will travel along the arc many times faster than before it. So phase 3 has to be short. And to manage to act “in time” in this phase, you have to act “ahead of time.”
So, the “toward the inside of the current turn” position of the board (Fig. 1, phase 3) at the end of the arc is exactly the correct position for the start of the next arc, i.e. “toward the outside of the next turn” (Fig. 1, phase 1); you just have to change the board’s edge at that moment, i.e. switch the edge without changing the direction of travel. To manage this at the right moment, you have to start doing it higher up the arc — most likely at the moment the board points straight down the slope. Our movements are very slow, you have to work ahead, and then you’ll be in time.
In total: we move in arcs, first outward, toward the side of the run from its centre to its edge. Then the board, set on its edge, on its own, along its radius, turns down the slope. Then, continuing to ride along its radius, the board starts pointing toward the inside of the current turn, now moving from the edge of the run toward the centre.
An edge change without a change in the board’s direction of travel turns movement “toward the inside of the current turn” into movement “toward the outside of the next turn.” 1 = 3
11.2. Scene two. The body
It is not only the board that moves down the slope — the body also moves somehow down the slope, and that movement has to be coordinated somehow with the board’s movement. More correctly, the board should be set under the body’s movement, not the other way around. A person rides on a board, the board does not carry the person. But for the smoothness of the narrative, the text is built the other way around.
The board rides in arcs => the body also moves in arcs. The body’s position on the snowboard is along the board. To look where you’re going, you have to turn your head to the side. If you want to be turned to face the direction of travel — that’s skis; on a snowboard you ride front-shoulder-first. You’ve already made some number of arcs somehow, and here comes another one. At the start of the arc the body moves to the side, not straight down the slope but to the side, and the board’s direction of travel should be set to the same place the body is moving. If you put the board across the body’s movement with your legs, that is braking. For example, if in the first phase of the arc (Fig. 1, phase 1), when the body is moving to the side, you swivel your legs to put the board not outward but straight down — i.e. skipping phase 1 and putting the board straight into phase 2 — the body will still have some inertia toward the outside, to the side, while you’ve put the board straight down, the board is across the body’s movement => all the inertia and acceleration the body has is directed at tearing the board off its edge (see Chapter 6, section 6.1 for more).
Conclusion: the board must move in the same direction as the body. On a snowboard we ride sideways (shoulder-first); for this you have to be able to tear your gaze away from the fall line — you don’t need it, because you’re about to go to the side, better to look up. Yes, there is a way to ride the board while constantly looking down and making arcs with the board around a body moving almost straight down and not even always along the board, but those are higher levels of kung fu, and you cannot jump to them without grooving in correct basic technique. So, until you know why you should turn, where, and at what moment — you ride along.
11.3. Scene three. The trajectory
Building the trajectory comes first for carving. If the arc’s trajectory is built wrong — i.e. the edge change happens at the wrong moment, or in the wrong place; or the board is not set to the outside of the turn = the first phase of the arc is missing — then everything else loses meaning. The body’s position relative to the board loses meaning. Because if there is no outward movement, there is no apex. Where would it come from? If there is no apex, there is no turn. If there is no turn, what carving can we even talk about?
Let us set a coordinate system. The X-axis points straight down the slope, the Y-axis across the slope. If the board points straight down the slope, we call that position “the board’s direction at an angle of 0 degrees to the fall line,” or, for brevity, “put the board at 0.” If the board is across the slope, we call that position “the board’s direction at an angle of 90 degrees to the fall line,” or, for brevity, “put the board at 90.”
Let us build, as an example, the following trajectory of our arcs. The numbers are taken arbitrarily; they can be anything. So: symmetrical arcs, a left turn at 45 degrees, a right turn at 45 degrees. From here on we will be interested only in the movement on the front edge, i.e. in the front. The movement on the back edge we use to control speed, i.e. it doesn’t matter how correctly it happens.
So, we have braked somehow on the back edge and are moving down the slope somehow on the back edge. The following variants are possible:
First variant
We are already moving at 45 degrees on the back edge, the body is moving outward at 45 degrees, the board is moving outward at 45 degrees; all that is required of us is to change the board’s edge to the front edge without changing the board’s movement, and to keep the body along the board. The board will edge and ride into the turn. The body is attached to the board — it will ride into the turn too.
Second variant
We are moving across the slope, at 90 degrees. The body is moving at 90 degrees, the board is moving at 90 degrees, and here, wanting to start an arc at 45, we swivel the board with our legs for this. The body by inertia moves across, at 90 degrees; the board is turned to 45 degrees, i.e. the body’s trajectory is directed across the set board. The body is still moving across the slope, and the board is already pointing more down the slope. The body’s movement vector crosses the snowboard across. A board set across the body’s movement is braking. That is not riding on edge.
The board’s direction of travel must coincide with the body’s direction of travel. If the body is moving across the slope, at 90 degrees, then the arc has to be started across the slope, at 90 degrees, too. But putting the board across the slope is possible only in a very narrow range of the ratio of speed, slope angle, and surface state. I.e. it is very hard.
So, it is hard to get out of this variant, and to avoid having to get out of it, the body and the board must always, from the very start, move at some angle to the fall line — 15, 30, 45, 60 degrees, it doesn’t matter.
Third variant
For some reason we decided not to brake, and the board is moving straight down the slope — this is essentially the starting state, i.e. you have to point the board outward at the angle you want and start the arc you want. Edging the board while moving straight down the slope is movement from top to bottom with edge changes, but not in arcs.
11.4. How do you learn this?
You can’t learn everything at once. The final goal has to be broken into sub-tasks that are solved in sequence, building your technique step by step. One descent — one task. Try to do more and you’ll do nothing. If you can’t make arcs individually, then there’s no point trying to link them, let alone learning both at once. So we break learning to ride into 1) learning the front, the front edge; 2) learning the back, the back edge; 3) linking the turns.
Chapter 12. First frontside arcs
(the original text is here)
!!!!
A condensed version of the chapter at this link (!!!!!LEARN BY HEART!!!!!)
!!!!
Disclaimer
From every second iron, every third kettle screams that the front has to be started from the front leg. While transferring the weight onto the rear leg… This refers to lengthwise work on the board.
Yes, lengthwise work with initiating the turn from the front leg is abstractly correct, but in fact, without special preparation you have no chance at all of pulling it off. You will inevitably miss the moment to return to the rear leg, get stuck on the front leg, and fail to do anything at all. All of this leads to a sequence of mistakes that ends in a broken leg or a broken snowboard, or both. Many, many, many people have already done this — the count is in the thousands. You can try your luck in this lottery, but I would put money on you simply adding to the statistics of those who didn’t get lucky.
🔥
Modern boards let you initiate the turn from the rear leg and without lengthwise work.
🔥😮
Lengthwise work is a short action, less than 1/5 of a second long, with its own dedicated timing. Even without lengthwise work, a beginner will have plenty of room to make mistakes. Sometimes fatal ones.
What’s more, a beginner who can barely keep from falling off the board has NO CHANCE AT ALL of performing this element. ZERO.
At the learning stage and while riding, the absence of lengthwise work can be seen as one of the life-hacks. And you’d have to really not love yourself not to use it. You could also pour broken glass into your boots. Just to make sure it all works out.
For these reasons, in this chapter the front is learned WITHOUT lengthwise work. Because the goal is to learn, not to create a pile of problems for yourself out of nowhere.
Introduction
When you’re learning the front, you don’t care at all what happens in the back. The time when the back should be is used only to control speed, and to point the board and body at the needed angle to the fall line. That is, in the back you can dump the tail, you can traverse, you can do anything at all so that the entry into the front is at a comfortable speed and in the correct direction. Excess speed greatly slows progress. Speed must be thoroughly comfortable, but at the same time sufficient for there to be centrifugal force supporting the body in the arc.
If it seems to you that you might be going fast — you are already quite definitely going too fast. If it seems to you that you are going too fast, then you already quite definitely control nothing and it is long past time to brake.
12.1 The theoretical and practical minimum
It is assumed that Chapter 11 has been studied and is fully understood, i.e. the following statements raise no questions or bewilderment:
“toward the outside of the turn,” “toward the inside of the turn,” “put the board at 40 degrees,” “edge angle,” “edge change without a change in direction of travel,” “movement of the board and body in one direction,” “correct building of the trajectory,” “the three phases of the arc”
and about each of them at least a paragraph of text could be written, the size of the “Introduction” above. If not, then you may want to re-read Chapter 11, and also the related Chapters whose links can be found throughout the text.
It is assumed that the exercises from Chapter 9 and Chapter 10 cause no problems, i.e.
Chapter 8 sets the reference points for the course of learning and serves as a tuning fork for correctly perceiving the information. Don’t skip it.
(A) Skills present:
keeping the torso vertical;
edging the board by moving the centre of mass past the projection of the edge being engaged;
putting the board straight down the slope;
maintaining the body position along the board;
edging the board with the movement “pelvis forward, knees toward the slope, arch in the lower back.”
(B) Absent:
fear of green slopes;
fear of the board;
constant balance-catching with wide sweeping movements;
folds while side-slipping on the front or back edges.
If even one of the questions/points has an answer that doesn’t meet the requirements, you should go back to the previous chapters and/or exercises.
12.2. The first front
Goal:
Make an arc on the front edge, edging the board in the first phase of the arc, with maximum stretching of the board’s outward movement.
Execution:
An important point to emphasize while learning
The main emphasis while learning the front should be on maximally stretching the first phase of the arc, when the board rides toward the outside of the turn, to the side toward the edge of the slope. As soon as the board starts pointing straight down the slope — that is the moment the exit from the arc BEGINS, i.e. when you have to start changing the board’s edge. The exit takes some time; it lasts for a certain stretch of the turn. If you start changing the board’s edge when it points straight down the slope, you may manage to do it exactly when needed — namely in phase 3 of the arc (more on the phases of the arc in Chapter 11). If you START changing the edge when the board is already riding toward the inside of the current turn, then the actual edge change will be either up the slope or across the slope, which is very uncomfortable, or you’ll ride off into a traverse, and in a traverse centrifugal force won’t help you, because in a traverse there is no turn.
The moment when the board points straight down the slope (phase 2 of the arc) is very short, less than a second; if you dawdle, the board will turn too far toward the inside, the body will start moving strongly across the slope, at a large angle to the fall line, and the next arc will be impossible to start without a dump (see Chapter 11 for more). It is important to cut arcs off on time, to exit them. They are very short. You don’t even have time to think “Oh! The front has begun!” — you have to be exiting at “Oh! T…”-edge-change.
(A) Body position before the start of the arc
• Body along the board
• Shoulders along the board
• The line of the shoulders parallel to the board, always (at this level)
• Rear hand over the tail
• Front hand slightly inside the future front
The position of the hands is a marker of the position of the shoulders and torso => the hand position is set by the shoulders, and the shoulder position by the torso. Isolated work with the hands does not affect the board in any way. The hands help position the shoulders and torso. If the shoulders are not along, then the whole torso is not along.
(B) The board’s direction at the moment the arc begins
The direction of entry into the front is 30–45 degrees from the fall line. Whatever-there-is-instead-of-the-back should be finished in this direction. It is the direction the board should point in during the descent on the back edge, i.e. the body and board move toward the outside of the future front, to the side, toward the edge of the slope. The edge change has to be made with full preservation of the direction of this movement. Phase 1 = phase 3.
Very important!!! THERE IS NO BACK! Instead of it, anything at all in which a) speed is controlled and b) the board is put outward. It can be tail-sweeping with a traverse, whatever. This turn DOES NOT EXIST! The main thing: the entry trajectory into the front and a comfortable speed for the front.
(C) Initiating the arc
So, the starting position is taken up. Back straight, shoulders along the board, rear hand raised over the tail (bent at the elbow, elbow over the tail, hand above the shoulder) and helping to keep the back straight, front hand slightly inside the turn, relaxed. Torso position “along the board” or “minus position.”
Don’t bend the torso, don’t topple it into the inside of the turn.
Don’t reach anywhere with the hands.
Don’t dive with the torso/head/hand/shoulders into the inside of the turn.
Don’t bend at the waist.
Then push the knees toward the slope with the pelvis [forward]. The knees go toward the slope; the pelvis follows them; the rear hand and shoulders away from the slope; the front hand inside the turn, so the torso doesn’t turn across the board. All of this immediately gives some arch in the lower back. But you don’t need to bow your back into an arc. An arch in the lower back = no fold = physiological lordosis, nothing more. With this movement the board is tipped and goes onto its edge. The board is the ship, the body is the mast. The board tips — the whole structure tips, the torso topples too, but it is important to stretch it away from the slope with the shoulders, so as not to topple over. All of this casts the centre of gravity past the front edge, and the board rides along the arc.
Good — the presence of a slight shift onto the rear leg. Better to shift onto the rear leg more than less. With too strong a shift onto the rear leg, the board will start “sliding out” / “jumping out” forward — that means too much on the rear leg. If there is a lot of weight on the front leg -> the nose gets loaded, this initiates the board’s lengthwise bend and a shrinking of the radius -> a fast turn. On a soft or spring slope, loading the front leg can lead to a hard set and a fly-over the nose. You have to find a balance between the front and rear leg, but the front leg definitely should not be loaded with more weight than 50-50. “50-50” is loading the front leg to the limit; you shouldn’t ride that way, especially while you’re learning (see section 6.4 of Chapter 6 “On loading the nose of the board, weight on the front leg, and the ‘50-50’ stance” for more, and also the post in the channel).
(D) Body position in the arc
If you freeze at the moment the arc begins, the board, riding along the arc, will turn, and the body will end up across. The board and body rotate around the centre of the circle set by the board’s sidecut radius and the size of the edge angle — i.e. the board and body have angular acceleration (see Chapter 6 for more). For the body to stay along the board, a small vertical rotation about its own axis is needed, ahead of the board. But this is not a turn by rotation. This rotation must not twist the board! It must keep the body along the board, so that the rear hand is always over the tail. This is an active action!! The body’s angular acceleration must be slightly higher than the board’s angular acceleration. The hands are a marker of the shoulders’ position => if you’re along, the front hand stays inside the turn; as soon as it crosses the board, you’re across the board, in the “plus” position. The torso position comes first. The hands are only markers of the torso’s position.
The body position over the board is bad. Strongly to the side is bad. Optimally, the torso is brought out roughly by a shin’s length (the distance from the knees to the board). How do you do this? Imagine: the board lies on the snow, a straight body stands vertically over the board. If you tilt the board, the body tilts too. If you set the board vertical, on its edge, then the body attached to it will lie on the slope. The board is the ship, the body is the mast. The board leaned — the body leaned. Too strong a lean -> a strong cast-out of the centre of mass -> an increase of the forces toward a fall (see Chapter 6 for more). To compensate for this, you need a knee bend and to stretch the torso away from the slope. Bending the torso into the inside of the turn is IMPERMISSIBLE. Knees toward the slope bring the pelvis forward, and on it the straight torso forward, away from the board, exactly as much as needed. The more vertical (by feel) the torso is kept relative to the horizon, the more the centrifugal force helps it in this. A fold at the waist (through tilting the torso forward at the hip joint, or through a fold in the lower back) kills this.
As soon as you’ve bent, you’ve lost the front.
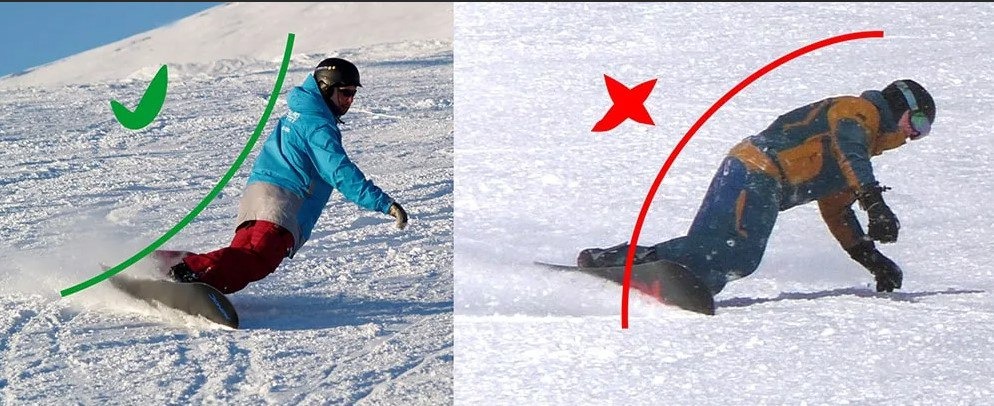
Arch on the left, fold on the right. The picture is taken from somewhere on the internet and most likely belongs to the “Petelki Pro” school.
Problems:
The fold. Any forward fold at the waist in the front is impermissible. In other words, keeping the “along” position, moving the shoulders and body along the arc ahead of the board, you must not lose the straight, concrete-set lower back that was there from the start and will always be there. As soon as the lower back starts to bend, you get a fold — the upper torso starts toppling into the inside of the turn, the centrifugal force will not be enough to stabilise the structure, followed by an inevitable fall or a hard set with an overloaded nose. In addition, any bump, instability in the arc, or an abrupt shrinking of the turn radius works to break the fold and leads to a fall.
Body position across the board = the board outrunning the body.
12.2.1 Solving the problems and the work of the rear hand
Both problems are helped by correct work of the torso in positioning the rear hand/shoulder. The front hand meanwhile must not get in the way of the rear hand; it can passively help it, but not hinder it.
The hands are only a marker of the shoulders’ position, i.e. you set the hands with a movement of the torso, not with the hands in isolation.
First
Bring the shoulder blades together and lock that feeling for the whole descent. This a) gives a single line of the shoulders, which is convenient to position parallel to the board, corresponding to the “body along the board” position; b) it is harder to bend the back this way. The childhood movement “shoulder blades together, chest forward” = a straight back.
Second
The movement “rear hand back and up.” The movement must not be performed by the rear hand in isolation; the rear hand and the line of the shoulders must be set into the needed places by a movement of the whole torso as a whole — the chest, the back, the abdominal muscles… the whole torso is engaged in positioning the hand and the line of the shoulders, which are only markers of the torso’s position.
Rear hand back (return the hand to the tail with the torso = set the shoulder position along the board, line of the shoulders parallel to the board) and up (movement away from the slope, out of the turn).
Often, instability in the front is a result either of the body turning across the board, or of a fold at the waist. Moving the rear hand back and up with the torso, we return the torso to the position along the board and help the torso NOT to topple into the inside = we eliminate the fold. You should understand and feel how the movement of the rear shoulder/hand “back and up” helps you arch in the lower back. It is one movement, not two different ones.
With instability in the front, you get toppled toward the slope, and your reflexes make you put your hands out to catch the fall, but that only makes it worse, because the hands are additional mass that will pull you toward the slope, whereas you have to reach away from the slope with all your might. The way you reach away from the floor in the “boat” exercise, so too in the front — away from the slope. You have to restore the torso’s vertical to make better use of centrifugal force. Hence “rear hand back and up” — it helps return the body to the “along the board position,” makes the torso “more vertical,” helps to “arch” or remove the fold.
In case of instability in the front — you have to reach AWAY from the slope with the rear hand as much as you can, “back and up.”
Only the rear hand! Not both hands together. If you yank both hands back and up, you can tip yourself into the back — that would be an emergency exit from the arc, and if you’re not ready for it, you’ll smack your head against the slope.
A useful mental image
You can picture it like this. At the centre of the turn there is a virtual post (the red line (3) in Diagram 2, Chapter 6) that moves quickly toward your rear shoulder, and your task is not to let the post touch your shoulder. With all your might you pull the rear shoulder/hand back and up, keeping the torso’s vertical against toppling into the inside of the turn.
12.3. On stability in the arc
For the board to ride stably in the arc, some force has to be applied to it that presses it against the slope. That force can only be the weight of the person riding the board. Weight is the only thing you can control a snowboard with, by changing its [the weight’s] position relative to the board. There is nothing else.
When a board set vertically on its edge rides onto a bump, it cannot bend to “absorb” that bump. It is riding on its edge. It doesn’t bend in that direction. The board will either fly up over that bump as a whole, or cut through it. If at the moment of hitting the bump the body’s weight is over the board, the bump, having tossed the board slightly up, will also toss up the whole body, which is over the board. If the body’s weight and torso are moved to the side away from the board, then the knees play the role of shock absorbers and the body either doesn’t notice the bump at all, or notices it but doesn’t change its position in space or direction of travel. This is why a high edge angle is always preferable, and why the body’s weight should be not over the board but to the side of it.
12.4. Changing the edge angle over the course of the arc
As said above, the goal is to stretch the part of the arc when the board rides toward the outside of the turn. To stretch it as long as possible. The higher the edge angle, the smaller the real turn radius on the slope. A small edge angle brings the real turn radius closer to the board’s sidecut radius. If you immediately set the board at a large edge angle, the arc will have a very small radius, which contradicts the goal — to stretch the arc outward as far as possible.
So, to maximally stretch the arc outward, the board at the very start must be set at a relatively small edge angle, which will increase up to the apex of the arc (when the board points straight down the slope). Increasing the edge angle has to begin immediately, without any pause. The rate of increase of the edge angle is non-linear. At the moment before the apex of the arc (when the board points straight down the slope), the non-linearity of the angle’s increase turns into a jerk, which immediately sets the board at the maximum angle. The edge angle sharply increases -> the real turn radius sharply shrinks -> the centrifugal force sharply increases (see Chapter 6 for more). Centrifugal force strives to throw your body out of the turn, outward. If at the moment of its sharp increase you extend your legs, you get an easy and pleasant edge change, with a feeling of weightlessness, practically without much muscular work. If you sleep through that moment, then in an instant you’ll have to extract yourself from the turn entirely by your own strength.
Increasing the edge angle over the course of the arc is necessary to increase / obtain the centrifugal force that will help you exit the arc at the right moment. Whereas if you immediately set the board at a large edge angle, you won’t manage to stretch the phase of the arc when the board rides outward, and that is the first-priority goal at this stage of learning.
12.5. J-turns. An exercise that makes no sense
In teaching turns of this type, the emphasis is on the 3rd phase of the arc and on carrying it across the slope (more on the phases of the arc in Chapter 11, and on the harmfulness of riding across the slope in Chapter 2).
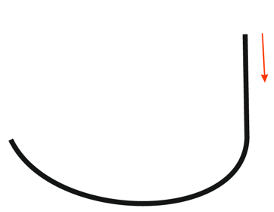
J-turn
Why is this bad and pointless? The short answer: because the wrong phase of the arc gets grooved in -> incorrect sensations of riding get grooved in as regards the body’s position relative to the slope.
At more length: in the third phase of the arc we are turned facing up the slope, with our back to the incline, and it is precisely this phase of the arc that dominates in the J-turn. The first phase of the arc is completely absent in the J-turn.
Suppose we change from the back edge to the front. Then, in the first phase of the arc we are facing the incline, with our back to the top of the slope; the edge change goes through “falling face-down the slope, past the board” — the board above, the body falling down, slightly past the board. Whereas in the third phase of the arc, the board is already below, lower on the incline, and the body stands on it above, higher on the incline, the face looking up the slope.
So, there is nothing correct in a J-turn. The wrong phase of the arc, the wrong body position. When after a J-turn we want to link arcs, it turns out that a first phase of the arc has appeared, where you have to move onto the front edge while looking down the fall line, pointing the board to the side, outward, and toppling the body past the board, down the slope. That is a completely different body position relative to the fall line. A completely counter-intuitive action that contradicts all your accumulated instincts that you must not move your body weight toward the edge of a cliff. You have to learn it again.
So, the J-turn contributed nothing to our riding technique.
The argument that a J-turn is needed to “feel riding on the edge” is foolishness, for the reasons described above. Why the feeling of riding on the edge in the phase of the arc and with the body position in which you should not be riding on the edge? The feeling of the edge and the board in different phases of the arc is di-ffer-ent. The board’s behaviour in different phases of the arc is di-ffer-ent. The same movements on the board in different phases of the arc give different results. The arc before the apex and the arc after the apex differ from one another like heaven and earth; and the feeling of riding on the edges after the apex will give nothing for progress in riding.
12.6. Summary
The trajectory of building the arc comes first. If at the start of the arc the board is not set outward, coordinated with the direction of the body’s movement (the direction of the end of the “before” arc), then everything else loses meaning. The start of the arc is necessarily toward the OUTSIDE of the turn, and stretch this phase as long as possible.
Torso along the board, a slight shift onto the rear leg. The hands are markers of the position of the shoulders and torso. The position of the shoulders and torso comes first. By changing the position of the shoulders and torso, we position the rear hand over the tail and the front hand slightly inside the turn.
Front: pelvis forward, knees toward the slope, while preserving the board’s preceding OUTWARD movement, toward the edge of the slope, which it naturally has from the end of the previous turn.
The edge angle at the start of the arc is relatively small, to stretch the board’s movement toward the outside of the turn, and then it starts to grow with acceleration (toward the end of the arc, closer to the apex, in a jerk) to obtain the centrifugal force needed for an easy exit from the arc.
In case of instability in the front — you have to reach AWAY from the slope with the rear hand as hard as you can, “back and up.”
Riding across the slope is NOT NEEDED and not safe.
Chapter 13. First backside arcs
13.1. The theoretical and practical minimum
You are expected to have in your store of knowledge and skills everything listed in section 12.1 of Chapter 12, plus the following:
The process of holding the body position along the board throughout the entire front has been mastered;
In the front, the movement (or even the fall) of the pelvis forward, ahead of the board (past the board, over the front edge), has been felt. This is the movement we will mirror into the back;
The board’s movement toward the outside of the turn in the front has been felt. This is what has to be done in the back too, only less conveniently;
It has been felt how you can save the situation in the front (section 12.2.1) by positioning the rear hand. This is what we will mirror into the back.
As you can see, with this ordering of the learning sequence, the back is largely built on experience from the front. So if there are problems with the front, the chances of performing the back correctly are so small that you can consider them nil; and if even one of the questions/points has an answer that doesn’t meet the requirements, you should go back to the previous chapters and/or exercises.
13.2. The goal compared with the frontside turn
Goal: Make an arc on the back edge, edging the board in the first phase of the arc, with maximum stretching of the board’s outward movement. Feel the board’s movement toward the outside of the turn in the back.
ATTENTION! There is no task here to throw the body as low as possible, a.k.a. “put the hip on the slope” — that is the subject of Chapter 16. At this stage the main thing is the stable building of the back’s arc toward the outside of the turn, the absence of folds, and entering the arc more on the rear leg.
When learning the frontside turn, the counter-intuitive action was to move the pelvis past the board, into the inside of the next turn, facing down the slope. I.e. to build a trajectory toward the outside of the turn. But in the front, you fall a) facing forward, b) you have knees with which this fall can be regulated.
When learning the backside turn, you will have to fall into the inside of the next turn a) with your back, down the slope, and b) you have no knees, so you will really have to fall. Also c) you have no eyes in the back of your head, so you’ll have to fall blind. If everything is done right, the centrifugal force will catch you; if not, you’ll sit down on your butt, so it is better to get butt protection.
Here it has to be repeated once more (the first time was in Chapter 8) that the actions described in this chapter are not a way of riding, they are the substrate from which riding is made. Later the technique will be polished and altered (more on this concept of learning in section 8.6 of Chapter 8).
13.3. Four stages of mastering the back at home
You have to understand how to topple backward, without superfluous body movements, keeping the torso’s vertical. A wall helps a lot with this. Below we will assemble the needed movement stage by stage, which then has to be carried over to the hill. Each next stage layers on top of the previous one — i.e. the future must not break the past. Remember Chapters 3, 7, 8, and 11; if some part of the text causes difficulty, or there has been no progress for several days, it may be worth looking for answers in those chapters.
Stage 1. Learning to topple backward
Put on your snowboard boots. Stand next to a wall so that from your heels to the wall is about 10 cm. Foot stance as in your stance on the snowboard.
Then, with a movement from the pelvis, topple a vertical/straight torso onto the wall (back straight, shoulder blades together, torso vertical relative to the floor). Topple without twists, without over-rotations, just “recline” your back onto the wall. Leaning on the wall, i.e. moving the weight back. If there were no wall, this would be a fall. On the hill the role of the wall is played by centrifugal force, and it does it no worse — even more interestingly.
Task: touch the wall simultaneously with your butt and your shoulder blades => the torso arrived at the wall in a vertical position.
If the shoulder blades touch first and then the butt — that is over-reclining; on the hill it would be a fall. If the butt first and then the shoulder blades — that is a fold. The task is to move the centre of gravity (CoG) past the back edge; if you fold, you can touch the wall with your butt but continue to stand on your legs; if you stand firmly on your legs, then your CoG is over those two points of support => over the board. If the touch happens with the front half of your back / shoulder blade / side of the back — that is an over-rotation into the “body across the board” position.
Stage 2. Realising how the torso’s tilt at the hip joint is connected to the edge angle
Move further from the wall. Say, to 20 cm. Repeat the exercise. Move further still. Repeat the exercise.
Task: understand that the further you move from the wall, the more you have to tilt the torso toward the thighs for it [the torso] to remain vertical. = make the angle at the hip joint (between the torso and the thighs) more acute.
The further you move from the wall, the further and deeper you throw your CoG -> the larger the edge angle will be -> the greater the tilt of the torso toward the thighs.
Higher edge angle — stronger tilt of the torso toward the thighs.
Tilting the torso toward the thighs without an edge angle will not let you edge the board, because you won’t move the CoM; an insufficient tilt of the torso toward the thighs = over-reclining.
Stage 3. Watching that the backward throw of the body doesn’t get confused with squatting into “the toilet-sit”
Now, an important point. The parasitic movement in the frontside turn led to crushing the boots rather than to increasing the edge angle (see section 10.2 of Chapter 10). In the backside turn there is its analogue, when you sit down (bend the knees) over the board but don’t move the weight. Watch that your topples onto the wall lead to edging the virtual board. That is, the further the wall, the deeper/further you fall, the more the toe of the boots comes off the floor, and you set the virtual board on the back edge.
Task: watch that the torso arrives at the wall in a vertical state, and that the edge angle of the virtual board increases as you move further and further from the wall.
Stage 4. Controlling the weight on the rear leg
We add to this a focus on the weight being on the rear leg. This task is far harder than it seems at first glance and will get a comprehensive review later. At this stage, moving sufficiently onto the rear leg should be no trouble. For this you have to move the pelvis onto the rear leg, and the torso after the pelvis onto the rear leg.
- The pelvis should be closer to the projection of the rear binding, i.e. moved toward the tail. For this the thighs — the part between the knees and the pelvis — should be turned at an angle of at least 40 degrees to the snowboard. The thighs and knees point in one direction, at the angle of the front binding. The torso meanwhile should be more along (front shoulder in a closed position), so it doesn’t wind up across.
This video runs a bit ahead, but it also reveals the mechanics of loading the rear leg, so it is useful here too.
- The rear leg should be bent slightly more than the front, then the pelvis will be tilted toward the tail => more weight will be on the rear leg. If there is a problem loading the rear leg, an analogous tilt can be made with the shoulders, i.e. front shoulder higher, rear shoulder lower.
Video 1. An illustration of the “move onto the rear leg” movement. Author: Alexey OES Snowboards.
Task: feel how you topple onto the wall, torso vertical, the edge angle of the virtual board increasing as the amount of the body’s throw (the distance to the wall) increases, and all this time the weight predominantly on the rear leg , consider it “standing on the rear leg.”
You can even lift the front foot slightly off the floor, then the pelvis and torso will be where they need to be — over the rear leg. Then, of course, you have to lower the front foot; you need to learn to control the weight without lifting your feet off the floor.
13.4. Braking as a lead-up exercise (optional)
Task: feel the movement of the vertical torso off the board while moving on the hill.
The easiest way to do this is by practising braking on the back edge. To brake you have to put the board across the body’s movement and edge it (putting the board “across” the movement was discussed in section 11.3 of Chapter 11). To edge the back edge, you have to move the CoG back, past the back edge. So that if during braking there is a strong hit to the legs, the impulse and the movement of the butt will be directed to a point slightly past the back edge, not into the board. The principle of the body’s movement is similar to the one used when initiating the back.
Braking. A mistake in the video: you must not brake toward a person. The arc and the braking distance must be built behind the person, taking into account that they might still fall backward, having first done a somersault over their head.
When the speed starts building, to find the amount of “reclining back” that leads to effective braking, it is better to fall a bit, to sit down on your butt — i.e. to “over-recline”; it is precisely for this that protective shorts are needed. It is easier to search for the needed degrees of torso “reclining” by starting from the state of “falling,” because the needed degrees are on the edge of a fall — you are not falling yet, but a bit more and there would be a fall. That is the ideal balance of moving the centre of mass for the most effective stop.
13.4.1. Execution
We point the board straight down the slope. We accelerate to a comfortable speed. We swivel the board with our legs across our movement and recline back, as onto the wall. The main thing: don’t lose the torso’s vertical! The higher the speed, the harder you have to recline. A common beginner’s problem is an excessive fold, so at first it is better to over-recline back — this will lead to a sharper stop and the butt sitting down on the slope. From this position, gradually pick the torso’s tilt angle and the amount of the pelvis’s backward throw such that it’s “a bit more, one degree more and I’d have fallen,” but you didn’t fall. That is what you need. Try to throw not just past the back edge, but closer to the tail. To load the tail harder. So much so that you feel it bending from the braking.
13.4.2. Problems
Too little outward — you can add a traverse at the end of the front (= roll in more), so you are definitely sure the board is riding outward. BUT! It is important to understand that this traverse will have to be thrown out at the first opportunity.
Instability of the board during braking. The likely cause is straight legs.
A long braking distance — a fold over the board. You need to over-recline. In this case the marker of correctness is that when stopping, the butt sits down on the slope.
The butt sitting down on the slope after stopping — too strong an over-reclining back, the torso’s vertical is lost.
13.5. The first backside turn
13.5.1. The unforgivable mistake
Transferring the body’s weight onto the front leg at the start of the back is a mistake. Its severity depends on how strongly the weight is transferred. Modern boards have a smaller radius under the rear leg. They are made and designed for the back to be performed from the REAR leg — i.e. you don’t need to shift forward at the start of the back. In 9.5 cases out of 10 this will lead to losing the board and falling.
13.5.2. Execution
After the front, the body moves at some angle to the fall line, into the inside of that front. Let it be 30 degrees. It is exactly THERE that the board should be set (edged) in the back. “Into the inside of the front” is exactly “toward the outside of the back” (if this is unclear, you should re-read Chapter 11 and/or the Definitions).
If you swivel the board with your legs and set (edge) it down the fall line, then the divergence with the body will be 30 degrees, and then the body’s inertia will knock the board toward where they are moving, and they are moving at 30 degrees to the side, toward the outside of the future turn. Riding on edge won’t be physically possible. Time and most of the arc will pass before the system stabilises. If this paragraph raises a question, you should re-read Chapters 6 and 11.
So, we’ve set the board outward. The body is turned along the board. NOT ACROSS. From this position you topple the pelvis INTO THE SLOPE, to a point somewhere slightly past the rear binding. The back meanwhile is vertical, as onto a wall. The movement was practised above in section 13.3. You do nothing else. The board goes onto its edge and makes a stable, fast arc. At the end you will ALREADY be on the rear leg — a very simple and easy exit without any sticking. You only have to play with the moment of the pelvis’s throw into the slope and the speed of that throw, so it’s neither too much nor too little.
13.6. Important points to emphasize while learning
At the early stage of learning it is worth spending a LOT of time on:
- the board as far outward as possible.
- shifting onto the rear leg, and WITH your legs BRACED into the board you smoothly lower the pelvis ahead of the board.
- As soon as the board starts pointing down — that is the START OF THE EXIT from the arc. DON’T ROLL ACROSS THE SLOPE. While you’re making the exit, the board will travel far enough into the inside of the current turn for the next one to be outward. If you START exiting when the board has ALREADY turned inward — then the actual exit will be either across, or when you’ve already ridden up the slope, or from a traverse, where there is no centrifugal force to help you, because a traverse is not a turn.
Repeat this again, and again, and again.
More outward with the board, the start of the turn blind, back-first, harder brace into it with the legs, from this more pelvis down, back straight (as onto a wall) + shift onto the rear leg. It may be worth riding this for a day or two, to perform it stably and comfortably.
All of this is a good lead-up exercise for understanding how a correct back is done.
13.7. Getting used to working with centrifugal force
The back is not the front. The knees don’t bend toward the back. However you threw the body at the start, that’s how you flew toward the slope. When you’re learning, the speed of entry into the back should ALWAYS be the same. The angle at which the board is set outward relative to the fall line should also be the same.
Goal: so that the centrifugal force that supports you in the body’s throw is the SAME every time.
Then the brain will fairly quickly work out the ratio between the movement of throwing the pelvis onto the slope and the required speed of that movement. The same speed and the same setting of the board at the same angle to the fall line give the same centrifugal force. Then the brain can fairly easily pick, empirically, the force of throwing the body onto the slope to match it.
If the centrifugal force is different every time, the brain doesn’t understand how hard the body has to be thrown relative to the centrifugal force present at the moment. You did it, it didn’t work. Next time the centrifugal force is already different. How hard to throw now? More or less? A lottery.
The problem is that if the movement is made too strong (too deep down) — you’ll fly into the slope. Too weak — nothing will happen. You have to spend time understanding the ratio of speed = the centrifugal force that supports you, and the depth of the pelvis’s throw.
13.8. Problems
13.8.1. Under-loading the tail
ALL instability in the back is under-loading the tail (the rear leg). The problem is that the steeper the slope, the harder it is to load the tail (for the reasons described in Chapter 6). It seems you’ve moved the pelvis back, and slanted the shoulders (front up, rear down) — you watch the video — you’re on the front leg!
The trajectory comes first. To load the tail, the board at the start of the turn must move OUTWARD. If the back starts with the board pointing down the slope — nothing will come of it. Edge the board outward. Straighten the front leg a little. Raise the front shoulder up (slant of the shoulders; the steeper the slope, the stronger this slant should be; the direction of movement of the front shoulder is up over the head toward the tail of the board), but this shoulder movement must not move the pelvis forward!
13.8.2. Body position along or across the board
In the back the torso should be more along the board (minus stance). In that case it is very easy to send the hip toward the slope (see above, section 13.3, Stages 6 and 7). If the torso is across the board (plus stance) — you’ll have to topple the whole body, and that is unstable.
13.8.3. Getting stuck in the arc, and the front leg
The cause of getting stuck in the arc (the inability to exit in time, to change the board’s edge) is a lack of weight on the rear leg. The harder the slope, the more you need to shift onto the rear leg. The steeper the slope — the more onto the rear leg.
The indicator that you are standing on the rear leg is that you can exit the arc at any moment. Literally any. If that is not the case -> more shift onto the rear leg.
13.8.4. The gaze that twists the body
Probably this problem is already present at the end of the front. We cannot tear our gaze away from the bottom of the hill, and the whole body turns across the board so the head can conveniently look down the hill.
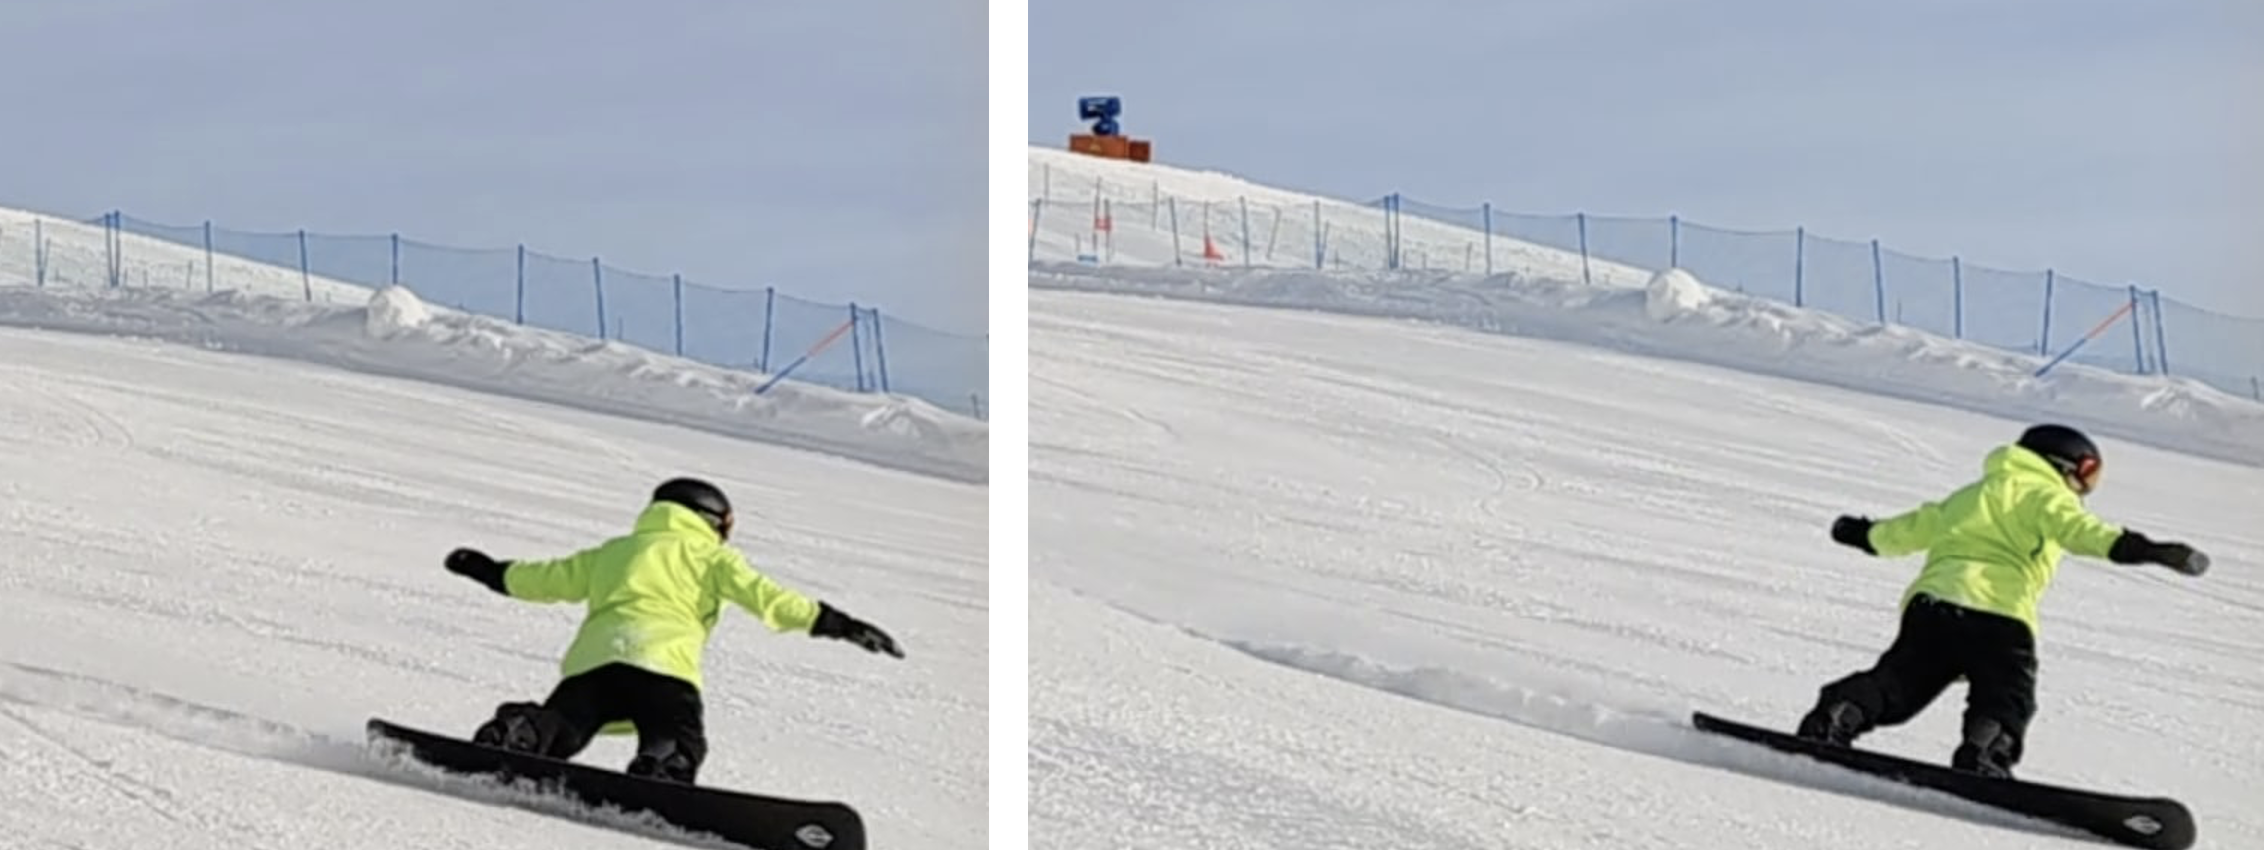
The body over-rotating following the gaze. Less on the left, more on the right, but it is present everywhere. The attempt to keep the hand over the tail has failed completely. The torso wants to help the head look down, rather than turn along to position the rear hand over the tail.
An experiment
We always want to see where you’re going to ride. Stand sideways. Imagine this is the end of the front, the bottom of the hill is behind your back, and you now have to ride there. Having thrown the pelvis into the inside of the next turn, which is behind your back. You turn your head to see what’s there behind your back — watch what happens to the body. It starts to twist. This is the CAUSE of all the over-rotations in the back, which leads to a million consequences and problems.
So, the problem is in the head. You have to remove the twist of the head, which is followed by the twist of the whole body with a million different mistakes.
The solution
Many options, you may want to try all of them:
Go to flat ground and ride shoulder / side / ear first. Of course, having first made sure there is nothing ahead and you won’t kill anyone.
You have to understand that a snowboard is a) riding sideways, b) you ride in arcs, and when you ride in arcs, you move left and right => at the end of the front it is far more useful to look up the slope, to check whether someone is coming across your path. Looking down makes no sense at all, you are not riding there right now. Right now you are riding sideways -> look up. This will help you turn along.
Go to a gentler slope. Where the direction toward the start of the back is more than comfortable and where you can keep your head pointed not in the direction of travel but toward the outside of the turn. This is cheating, but it works — it will let you FEEL the legs’ brace into the board in the back. The speed is low. The angle is small. The hill is wide. The surface is comfortable. You brace your legs into the board and, SYNCHRONOUSLY WITH BOTH LEGS, try to push it away from yourself in the arc. Slowly and smoothly. The gaze meanwhile is directed “where the navel looks,” the face looks “where the navel looks.” You get a back, you start blind, back-first (Video 2, below).
THIS IS NOT A WAY OF RIDING! It is a way to feel the correct body position.
Video 2. A cheat-fix for the back. Author: Alexey OES Snowboards.
More options for setting the base of the backside turn on:
the OnEdge forum (registration required to view)
Chapter 14. First linked arcs
In a link of arcs, the trajectory is very important. If the trajectory is wrong, nothing will happen. The board’s edge change must happen without a change in its direction of travel. That is, wherever the board was going at the end of the preceding arc — that is where it must continue going in the following arc. “Toward the inside of the current turn” is “toward the outside of the next” (discussed in Chapter 11). But to manage to exit on time, you have to act ahead of time, i.e. exit in advance. The moment when the board points straight down the slope is a brief instant, 1/10 of a second. If you start moving toward the exit at that moment, then the exit itself will happen when the board is riding inward. If you initiate the exit when the board is already riding inward, then the exit itself will happen when the board has rolled across.
Remark #1
Everyone has a different movement speed and different notions about that movement, as well as about the positions of their body in space. The point where the exit BEGINS has to be picked to suit yourself. It can be before the apex, if you move too slowly. It can be after the apex, if you move fast enough.
End of remark #1
Remark #2
In the arc the edge angle grows =>
=> near the apex the radius will be smaller than before the apex =>
=> the second phase of the arc, after the apex, must be shorter than before the apex =>
=> after the apex the board turns inward faster than before the apex =>
=> the “inward” movement must be shorter than the “outward” movement.
BUT
“inward” must also exist for there to be “outward.” Because “inward” of the current turn is “outward” of the next. If you have little “outward,” then you probably need, in the previous turn, to let the board travel more “inward” or, more correctly, to edge the board harder at the apex. Then the board itself will ride up under the body for the edge change.
When you understand that you’re at the apex of the front, then press the knees down toward the slope, like a taking-off Superman — this will increase the edge angle and the board ITSELF will ride up under the body and change your edge. It will do it quickly and end up in a sufficient position outward. If it’s not sufficient, you edge harder / more actively, but be ready for the board to ride up under you even faster too. The main thing here is not to trip over it, because it sharply steers up under the body and ends up across its movement.
End of remark #2
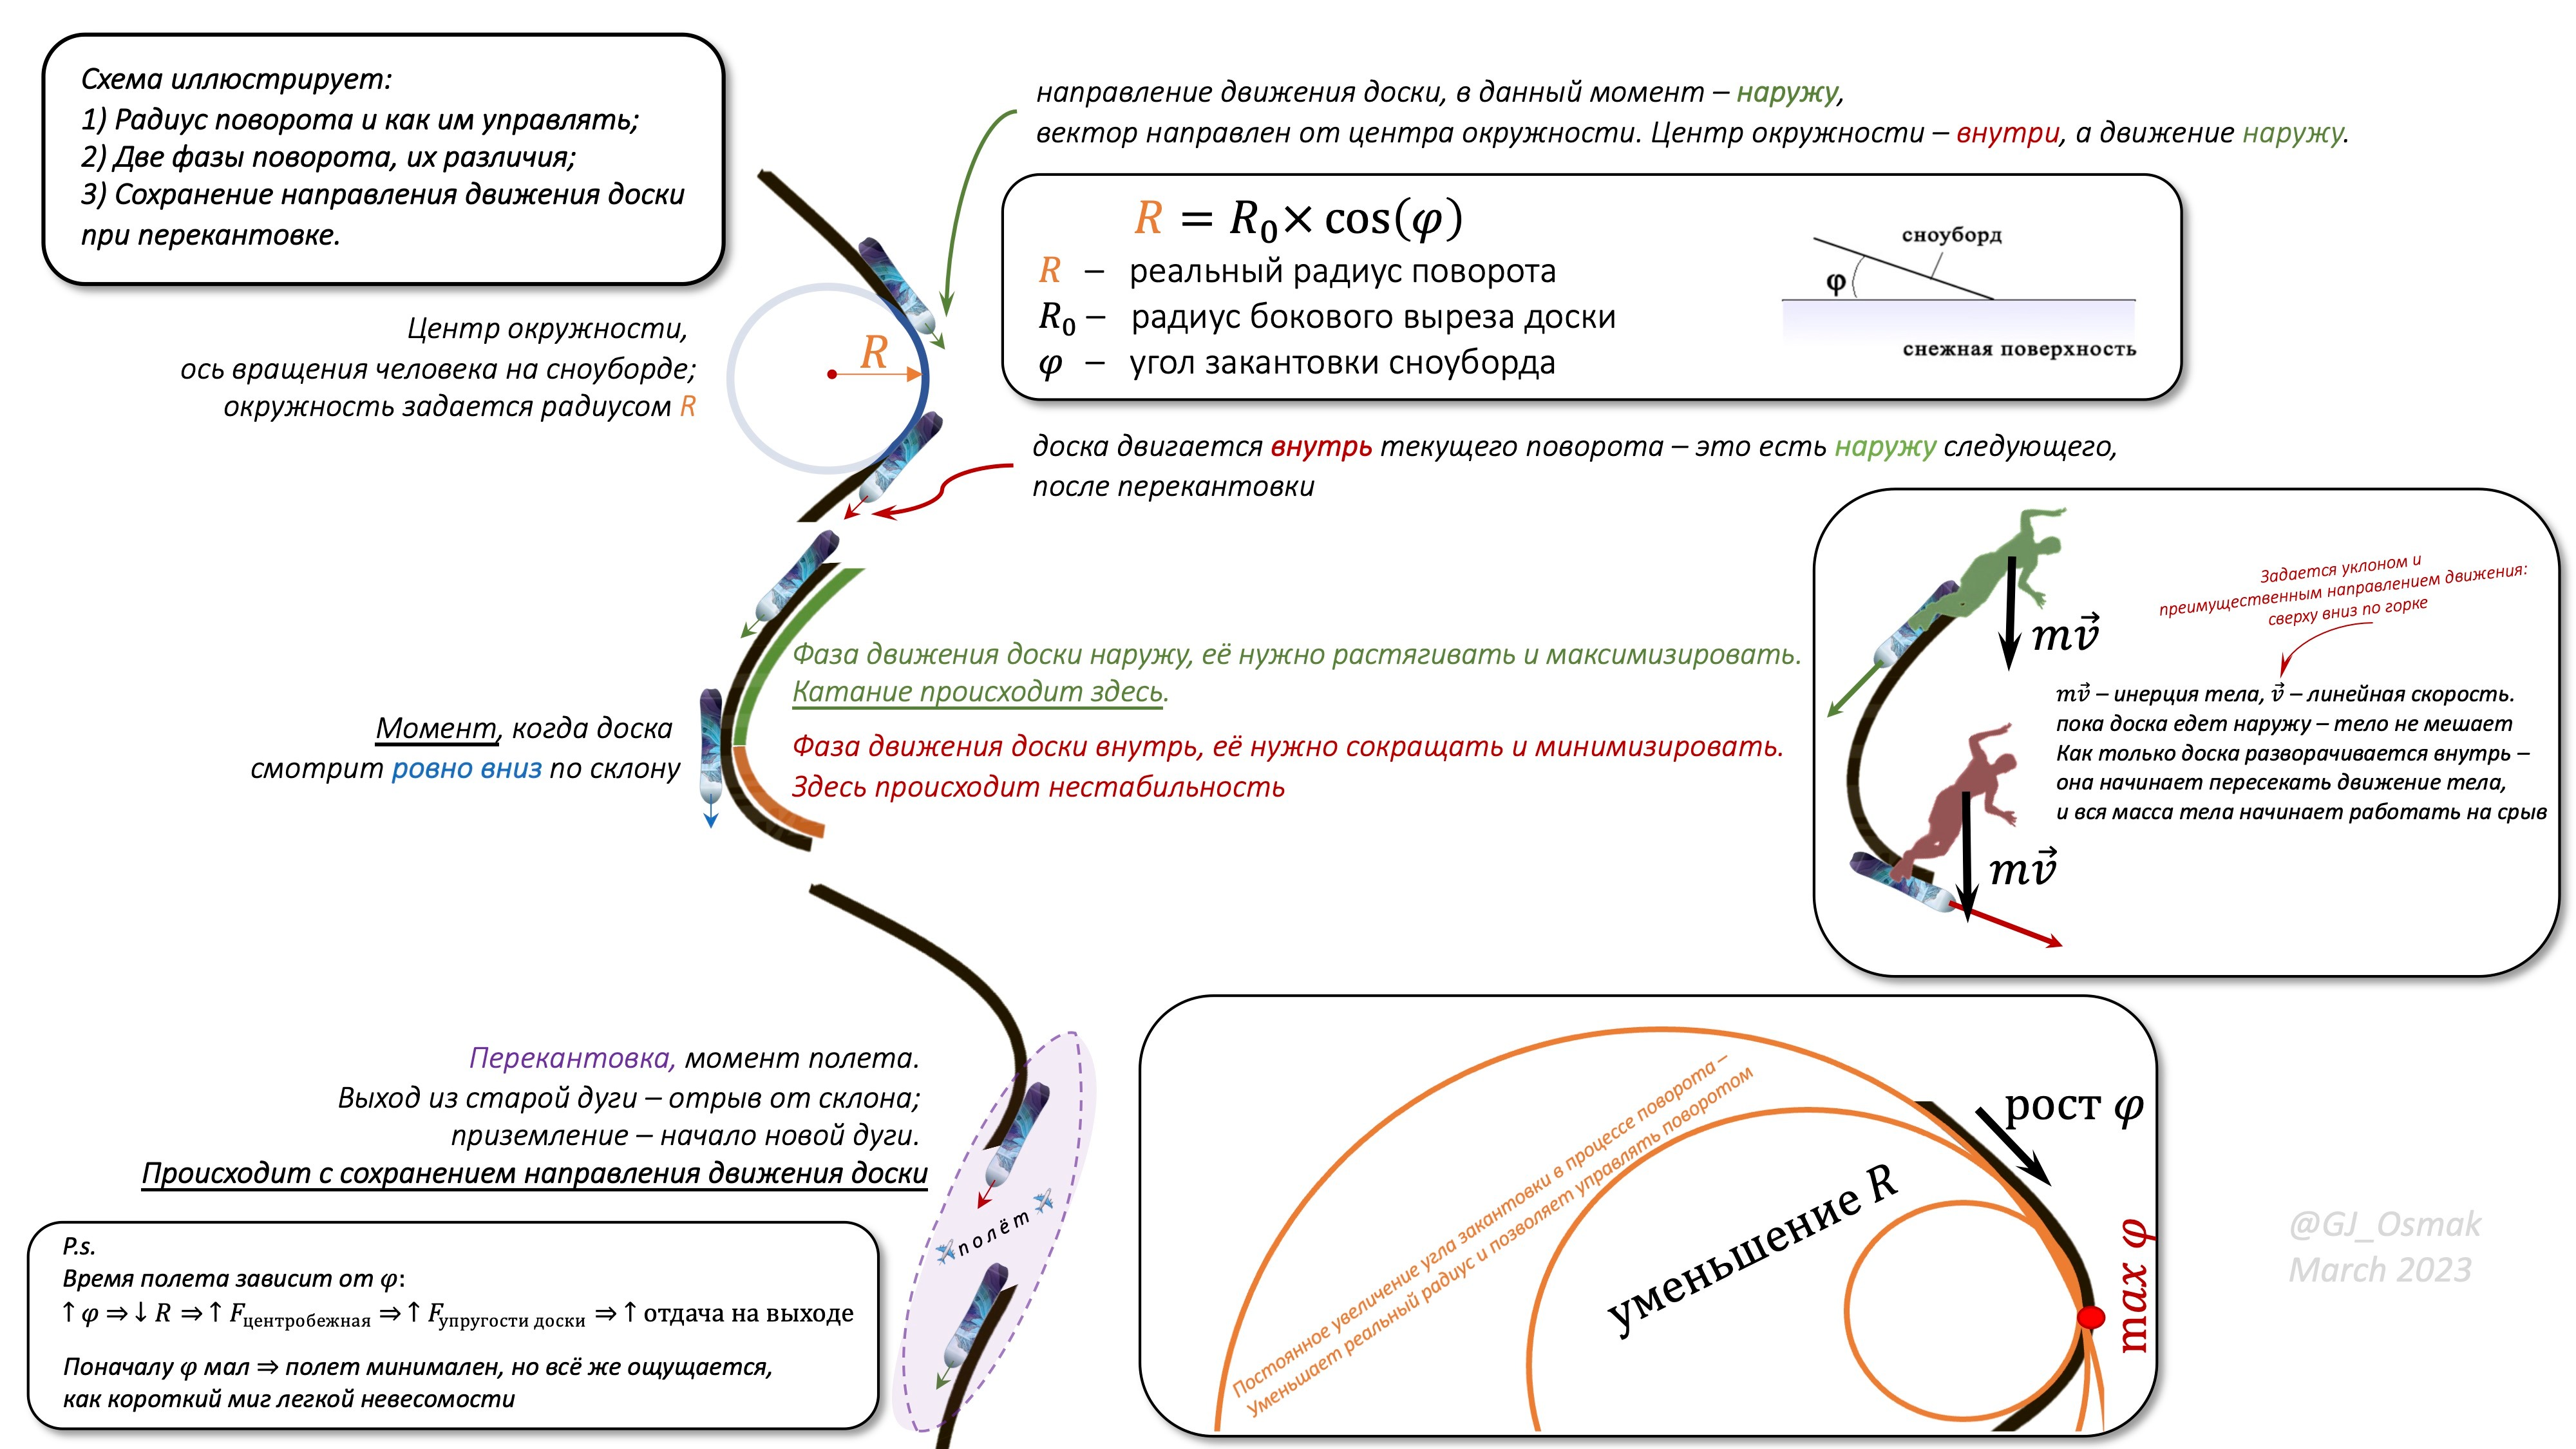
Figure 1. Apart from the question of initiating and regulating flight, everything in this picture should be clear by this point. The important thing is that the edge change happens with the direction of travel preserved. Wherever the board was moving “before,” it continues moving there “after.”
14.1. The theoretical and practical minimum
To link things to one another, you have to be able to perform the things you’re going to link individually, and then link them. So it is assumed that the material from Chapters 12 and 13 has been studied and fully worked through, both with the mind and with the body.
To test the depth of your work through the preceding material, this chapter is written in places “vaguely” and without decoding certain statements that have already come up repeatedly in the text before. If something is unclear, you should go back to the preceding Chapters or turn to the Definitions section.
14.2. The first link
Riding is links of arcs. Front–back and back–front. After studying individual arcs, you have to learn to make them into links. There are only two — “front–back” and “back–front.” The first arc of a link comes out incomplete because the speed is low and the arc is performed on balance, which is the most technically difficult moment. But the second is as it should be. In essence, this is studying a complete arc that comes from a complete ending of the preceding arc.
The points of emphasis are all the same as in the preceding chapters. Monitoring the slope is above all. Even if it’s Monday and there’s no one else on the slope. This action has to become a habit, when you don’t think about what needs to be done.
Then the first arc, where the emphasis is on the most correct timing of the entry (the start of the arc) and the most correct timing of the exit (the edge change). A correct entry will give an easy and correct carrying of the arc. If you did everything right at the entry, the rest becomes much easier.
The problems of one arc often lie in the ending of the preceding arc: the front’s problems — at the end of the back; the back’s problems — at the end of the front.
A correct exit from the first arc will give an easy and correct entry into the second arc. You must not roll across. To start the second arc where it needs to go — and that is not across the slope, but at some angle to the fall line — the “before” arc has to be finished in the correct direction, i.e. at that very angle to the fall line. If the board has rolled across the slope — that is a failure of the link.
###an aside on “what does ‘rolling across’ mean?” across is a long phase of “inward of the turn” movement, after the apex, up to a traverse. You scrub off speed with a strong inward movement — you’re riding across. Strongly inward is when you ride inward for as long as, or longer than, you rode outward.
Rolling across is permissible when practising individual arcs. But it is impermissible when PRACTISING a link of arcs. Riding, naturally, everyone can do however they want, even on their hands. ###end of aside
The third arc should not be made. The emphasis must be on the cleanest possible execution of a link of two arcs. When the link of two arcs starts coming off clean, you have to keep learning to make a link of two arcs: to complicate its execution. Choose for this the hardest possible pieces of slope: bumps, hollows, rollovers, steepness, patches scraped clean of snow.
Two arcs let the body mobilise fully for an extremely short and sharp sprint. This gives you bonus points to reaction, muscle strength, speed of action. Thanks to this, it is easier for you to do what you’re learning. Because from the fourth arc on, the fatigue accumulated “before” starts to work against you. Very occasionally you can try to do three arcs. Four is no longer needed, if the goal is to deliberately learn a link of arcs.
14.3. Cutting the arc off on time
The moment when the board points straight down the slope (phase 2 of the arc) is very short, less than 1/10 of a second; if you dawdle, the board will turn too far inward, the body will start moving strongly across the slope, at a large angle to the fall line, and the next arc will be impossible to start without a dump (see Chapter 11 for more). It is important to cut arcs off on time, to exit them. They are very short. You don’t have time to think “Oh! The front has begun!” — you have to be exiting at “Oh! T…”-edge-change… You don’t have time to throw the pelvis into the back before it ALREADY has to be raised into the front. There are no static positions. It’s like rocking on a swing. You’ve only just flown to the top, and you’re already flying back down. So too in arcs: the body has only just come down, and it’s immediately up.
If you’re short of time in the arc — you have to set the board more outward; that is the only way to get extra time. But whatever you do, you have no way to get time for a static pose — no freezing, you are always in motion.
However, don’t forget that the body also has to move in arcs together with the board. It must not turn out that the body moves in a straight line while the board rides around it at the maximum distance of your legs’ length.
14.3(1/2). Trajectory glitches
Glitch #1: Steering the board with your legs
Want carving? Ride in arcs! Make turns!
The flip side of the instruction “throw the body ahead of the board into the inside of the turn” is, in a sense, too “deep a throw,” which ends up degenerating into steering the board with your legs around a body that is essentially moving straight down the slope.
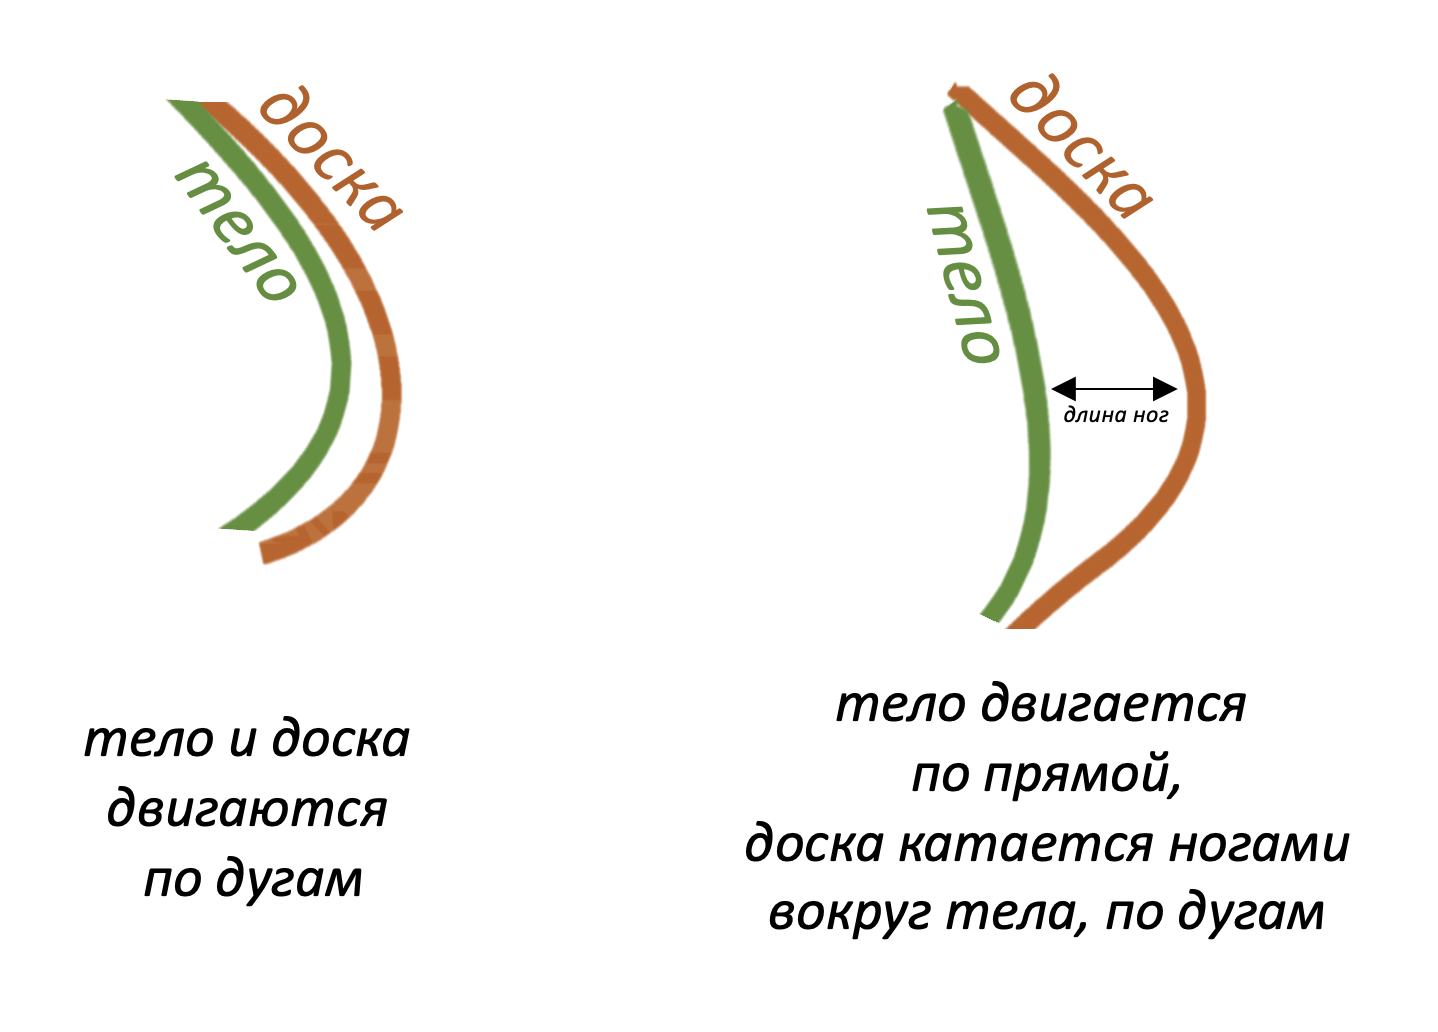
Figure 2. How the body can move relative to the board. In both cases the body moves ahead, because it moves along the inner radius of the turn = the board covers more distance. But in the left variant the body moves in arcs, and in the right variant — in a straight line.
In general, it is very hard to start moving in arcs and tear your gaze away from the bottom of the hill. This leads to the body moving in the direction of the gaze = from top to bottom. That is, the person themselves is not riding in arcs. The board tries to, but the person rides where they look. Straight down. There is no need at all to always look down. Carving is riding in arcs. You have to move in arcs, make turns. Let the board ride in arcs, and ride those arcs yourself, the ones the board carries you along. You have to build the arc with your gaze.
The gaze is the adaptive headlights, the body is the car, the board is the trailer.
You must not constantly look down — you’re riding in turns! Looking up is far more useful than looking down. What if up above a battering ram has already strapped in and is building speed to ram you into the surface.
Video 1. The board rides an arc, and the body doesn’t. The board is let out by a leg’s length, and that’s it. The board is let out by a leg’s length, and that’s it. The torso stays as it was. And it is for these same reasons that the front ends across.
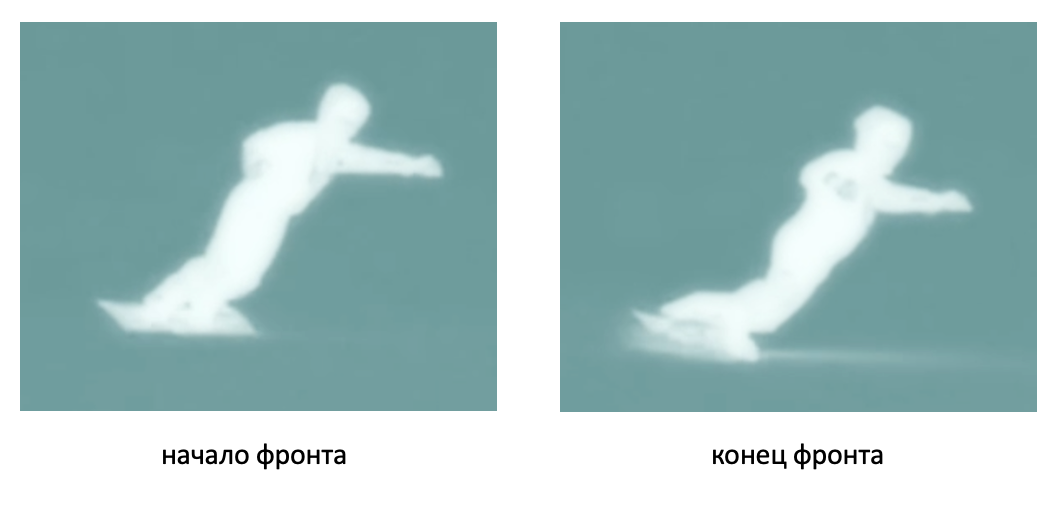
Figure 3. Frames from Video 1. The board made an arc, and the body didn’t. The torso stayed as it was at the start => the start was along, and the exit is across.
The person in Video 1 sets the board outward at the start of the front, but in their head they are not riding an arc. They ride from top to bottom. And the body moves from top to bottom. The torso makes minimal deviations from linear movement. Meanwhile the person lets the board ride around them in arcs, letting it out by a leg’s length. The board rides in arcs, and the body doesn’t.
Glitch #2: Picking at the edges while riding straight down
No “outward” -> no apex -> no turns -> no arcs
The flip side of the desire for “cutting arcs off on time” and the fear of “rolling across” leads to people not letting the board turn toward the inside of the current turn, so that the future turn starts outward.
Video 2. Glitch #2 taken to the point of absurdity. This is more a caricature than an example.
You have to let the board ride in arcs. For the board to ride outward in the future turn, there are two basic options:
First option: you have to sharply set it, at the apex of the current turn, at the maximum edge angle; then it will ride up (or even jump up) under the edge change faster, i.e. turn toward the inside of the current turn = toward the outside of the next. This is the correct way.
Second option: to ride further inward. You can do this, but you have to keep in mind that it is a phlegmatic meandering on the edge of riding across, and you shouldn’t do it.
In some universe you could say: “close the turns more.” But you have to understand that the goal should not be to increase the phase when you ride inward — that is “riding across” — but to increase the phase when you ride outward — that is carving. That is, the inward-of-the-turn phase MUST exist for there to be an “outward,” but the “inward” phase should be no more than to the degree needed to set the board outward. As you remember from Chapter 11, “3=1.” If you don’t remember, re-read Chapter 11.
P.S. At first you CAN roll inward more, to finally ride wider arcs, but you must and it is important to understand that
this rolling has to be eliminated at the first opportunity.
Glitch #3: Rolling out across…
… and into a traverse — those are not linked turns!
The flip side of the instruction “close the turns more” is that people start rolling the board out across and into traverses.
Video 3. Riding across
The topic of riding across was already raised in Chapter 2. It is worth noting that at the stage of mastering individual turns and studying the building of the outward trajectory, such a way of descending a mountain can be useful, but
it is not a way of riding.
Riding is riding with linked turns. The overwhelming majority want to make beautiful linked turns. In Video 3 the turns are linked through a traverse. Turns linked through a traverse are not linked turns. They are turns with a traverse shoved in between them. Want to ride wider — don’t ride boards with a radius < 15 metres.
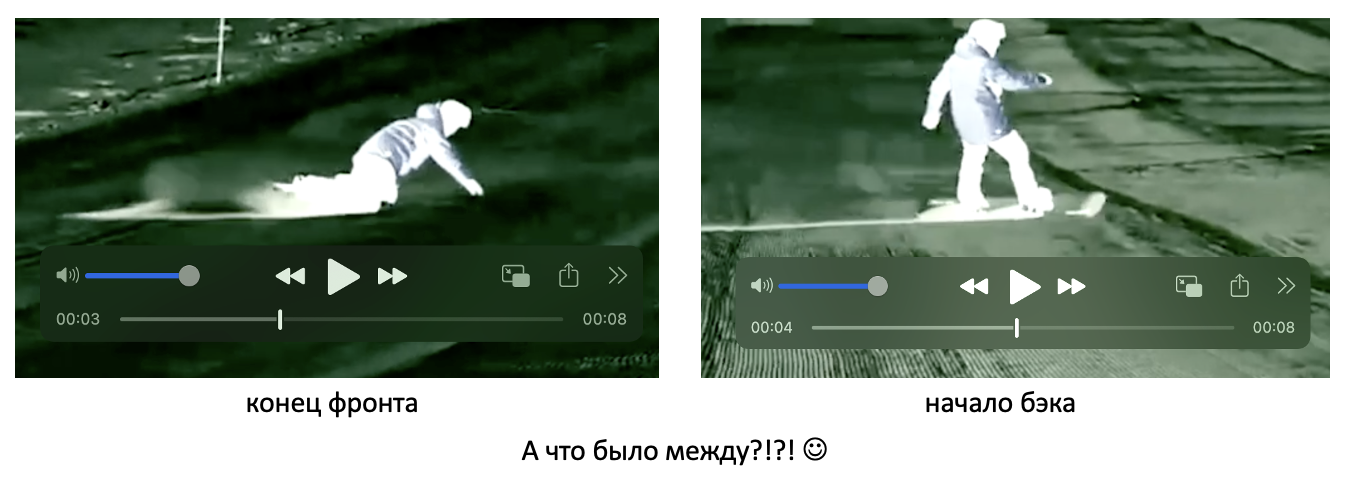
Figure 4. A traverse
Consider Figure 4: two frames from Video 3. The end of the front. The turn is already completely finished. This is obvious, because the board will not turn any more (= ride along a radius), it will just ride in a straight line to the side => after this moment there is no turn. So this freeze-frame is the full and unconditional end of the turn => it is the very last moment to FINISH the edge change. Not even to begin it! The person in the video, at this moment, is deep inside the turn; they aren’t even starting to exit the turn, which is ALREADY finished. That is, they didn’t just miss this edge-change train. The train was the morning one, and the person arrived on the platform with the last rays of the setting sun of the NEXT MONTH OF THE YEAR.
Everything that was between the front and the back is riding to the side without a change of trajectory, without angular momentum. That is called a TRAVERSE.
The first problem with this way of descending is that when the turn has finished, the centrifugal force stops working, because by its nature it works only in turns => to exit well and more or less cleanly (= not too dirtily, in this case), you have to invent some workarounds, for example roll-throughs (in their mass understanding. What kind of beast that is you can read about in the chat under the hashtag #прокатка).
The second problem with rolling the board out across is that it is a very bad position from which it is very easy to overload the nose of the board because of incorrect weight distribution and fly over it head over heels. The blame, naturally, will fall on the soft noses of modern boards, not on the across-the-slope riding technique with blown timing (sarcasm).
The third problem is that it is not safe riding. Described in Chapter 2.
The fourth problem is that it is precisely the phase of the arc where most problems await you, because in this phase the body works, by its inertia, to tear the board off its edge. Described in section 6.1.
14.4. Energy cost
You got on a swing. Sitting or standing, it doesn’t matter. The first movement is hard. The second is easier. Then even easier. Once you’ve got it swinging, the force you put into the movement is almost zero. You only shift your body weight IN TIME to where it needs to go. If instead of the first movements someone pushes you, you spend no energy at all. It is the same in riding in arcs. The first arc is hard, the second easier; the main thing is to catch the right rhythm.
You have to feel how you swing on centrifugal force — it is a pleasant and easy movement. Its difficulty is in catching the moment of exiting the arc. Because it is very short, an instant. Exit earlier — you’ll be working against centrifugal force; exit later — you’ll be fighting the instability of the turn.
A spoiler for the coming chapters… In the arc the edge angle constantly increases, and toward the apex of the arc you have to set the board at the maximum edge angle with one short movement; this gives a sharp jump in centrifugal force, and the next moment there will be an exit. This will be written about in more detail later.
14.5. How to help yourself at the front exit
Throughout the front the rear hand/shoulder goes “back and up,” the movement discussed in Chapter 12. When there is nowhere left to go “back and up,” then 95% of the time it’s time to exit. At this moment you have to make a “final” jerk of the torso toward vertical — rear hand/shoulder “back and up” (= “onto the tail and away from the slope”) in a jerk, knees a bit more toward the slope, torso in a jerk toward vertical, and immediately you extend the legs to exit into the back, where you lead yourself with the rear shoulder blade “back” — you topple the torso (section 13.3 of Chapter 13), as onto a wall, and the pelvis down (section 13.3 of Chapter 13).
“Knees a bit more toward the slope” + “rear hand/shoulder onto the tail and away from the slope in a jerk” — will give an instant increase of the edge angle, an increase of centrifugal force, and an impulse for the edge change.
The front hand can (and in the original should) help the rear hand’s movement, but carefully, so as not to tip yourself onto your back.
14.6. How to help yourself at the back exit
Just as in the front, in off-nominal situations, the movement of the rear shoulder/hand “back and up” helps (section 12.2.1 of Chapter 12), in the back there is a mirror movement — the front shoulder “forward and up.” This is also convenient to feel in water. “Forward and up” is “away from the slope,” or better “out of the turn.” You pull yourself out of the old turn with the front shoulder, as if you were going to knock down the door into the next turn with it. You raise yourself out of the arc. This same movement saves you from various instabilities.
There are two points: first — the brace into the rear leg; second — the front shoulder, which by the “forward and up” movement supports the body’s vertical = helps make the needed tilt of the torso toward the thighs + gives a slant of the shoulders toward the tail, which loads the rear leg better;
“Leaning” on these two points, the pelvis is thrown down “slightly” in front of the rear binding. The brace into the first point is given by the slope, the brace into the second point by centrifugal force (see Diagram 2 of Chapter 6 for more).
As soon as you’ve pulled yourself with the front shoulder into a state of the body over the board, the focus of attention and the work immediately switch to the rear shoulder, the pelvis falls forward, and the rear shoulder catches the structure, as described above — the front arc goes.
14.7. Riding the pelvis on the swings of centrifugal force
The key movement is the throw (fall) of the pelvis ahead of the board. In the front — a fall past the front edge; in the back — past the back edge. To fall over the front edge, the pelvis first has to be returned from the back to a state “over the board,” because while it is past the back edge, it cannot fall forward (discussed in section 12.2 of Chapter 12). Likewise with the back edge.
When initiating the front arc — you fall forward with the pelvis. It feels like an instant of falling. At some point the centrifugal force catches you, and at that same moment you have to give yourself a short impulse with the rear hand back, toward the exit from the turn, back onto the board (discussed in Chapter 12). The centrifugal force will lift you onto the board. The front has finished. At that same moment you fall backward with the pelvis; at some point the centrifugal force catches you, and at that same moment a sharp impulse with the front shoulder toward the exit (discussed in Chapter 13). The centrifugal force lifts you back onto the board. A full straightening over the board, an instant of instability, and a fall forward with the pelvis (discussed in Chapter 12). And so you ride. A fall is a F-A-L-L. At first your brain will tell you: “Stop! You’ll fall! You’ll get hurt!” and you tell it: “Don’t care! Falling!”… and you fall, but the centrifugal force catches you… and you ride.
What is described here is the beginner level of linking arcs. Largely with crutches. They will let you ride at small edge angles (up to 50 degrees). To go lower, you have to work through the stance more seriously, as well as the control movements. But this will be written about in the coming chapters.
14.8. The mirror nature of front and back
It is useful to realise how the two arcs are mirror images of one another. When that understanding appears, you gain the ability to carry movements from one arc into the other, thereby fixing mistakes and improving your technique. Below are some hints.
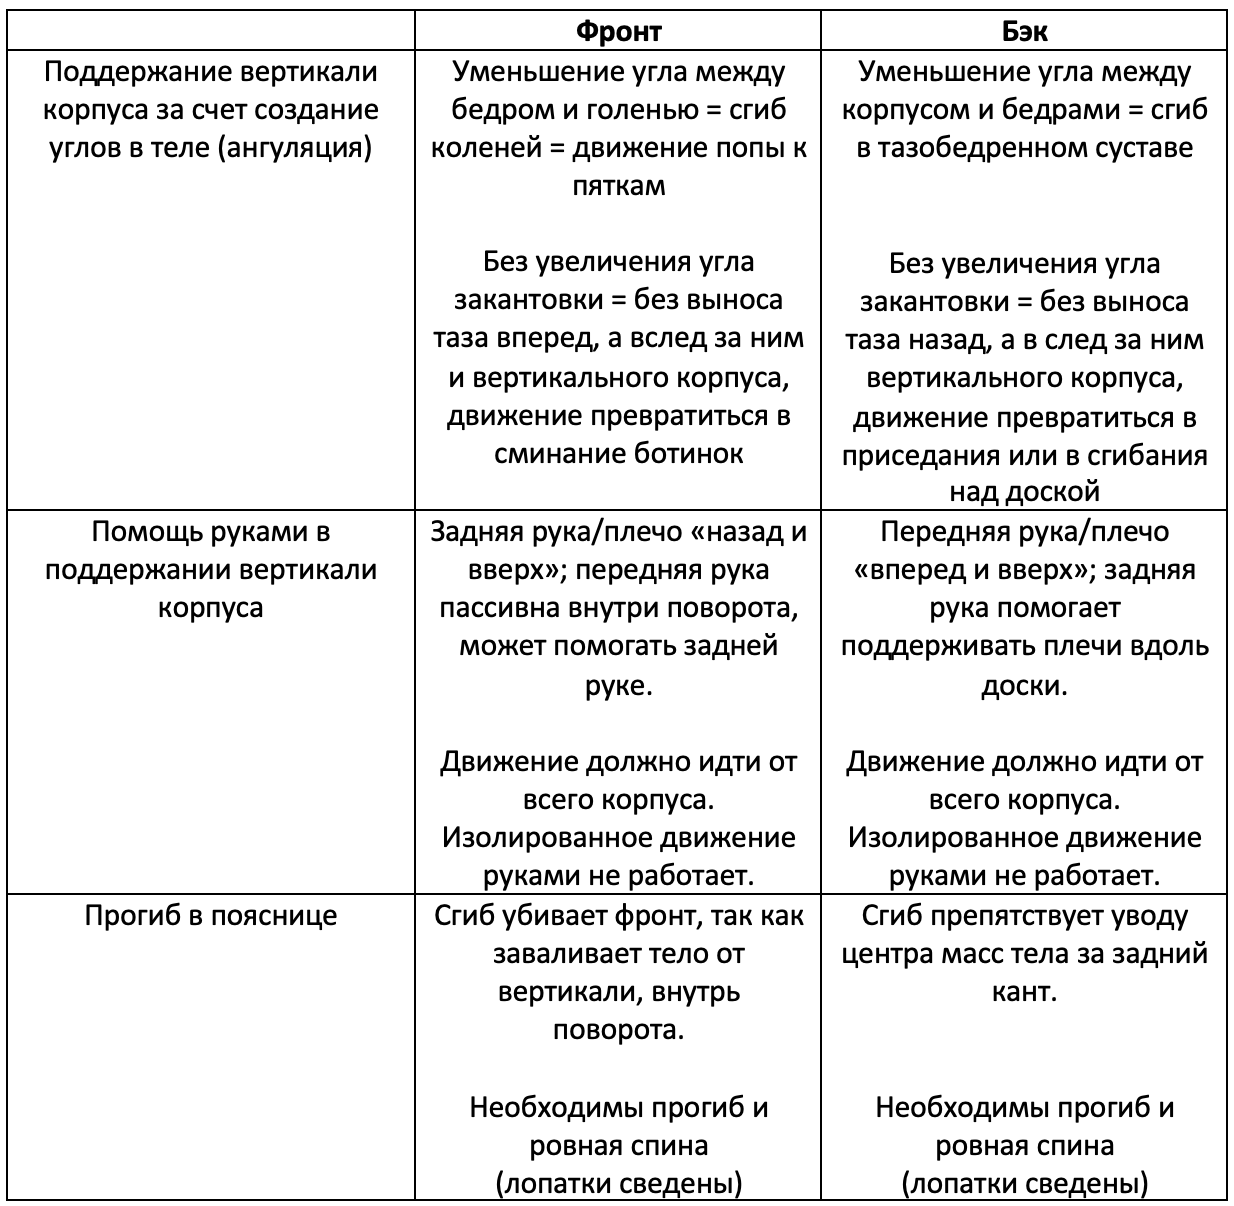
Chapter 15. Conclusion
If everything has been done right, then what you have is a good, solid carving base from which you can easily progress further. Below are examples of what riding at this stage can look like:
If a person already stands on a board and is not afraid of the speed of green and blue slopes, then this result can be achieved in 1–2 weeks of sessions from the level of “I don’t ride on edge at all.” That is, 5 days of sessions, 3 days of rest, 5 days of sessions. One session is 2–3 hours. This is NOT SEASONS or YEARS! It is 20–30 hours on the hill. A competent instructor can cut this time roughly in half, i.e. down to 10 hours on the hill. You can add some time for “grooving in” — that is another three days of 2–3 hours . . . The time estimates are taken “on average.” One thing can be said for sure: if someone says this is YEARS or SEASONS of training, then it is 100% rubbish.
The material laid out lets you make basic turns using the two main control movements. This level can be grooved in to a confident execution on green and blue slopes, but you shouldn’t get too fixated on it.
This level is: 1) the absence of superfluous and/or parasitic movements; 2) understanding and being able to build the trajectory correctly; 3) controlling the board with the two main control movements.
Next you will have to work on the stance, or dynamic posture, which will let you load the tail better and control the board across the whole range of edge angles.
The continuation of technique refinement is in the following chapters . . .
Search the chat for messages on this chapter’s topic under the hashtag: #Глава_15
Chapter G. A word to the learner
G.1. What has been, and what will be?
The preceding chapters described, generally speaking, the BASE of turns in the general sense — i.e. not necessarily carved turns, but just turns.
As a result of studying and training the material, you should have mastered:
the trajectory of turns;
balance skills on the board;
the two main control movements;
a certain number of rescue tricks.
The two main control movements were mastered in their basic configuration, i.e. the simplest variant. In the current cycle they get their development. A more complex modification of them will be presented + a certain number of elements of dynamic posture (the stance) will be given, of which at the previous stage there was likewise a minimum, namely one: “don’t bend.”
So, everything that follows is an organic development of what came before. And there is no point at all in moving on to what follows without what came before.
If the main theme of the preceding cycle can be called “the trajectory,” then for the current cycle it is “tail loading.”
Chapter 16. The backside turn
A condensed version of the chapter at this link
16.0. A warning and the theory minimum
All the following text is useless in the absence of the skill of moving along the correct trajectory.
If there is no phase of the board moving outward (see Terms and definitions), then there is no turn. No turn — nothing to talk about. Turning the board with your legs and braking are not turns.
All the following text is ⛔️HARMFUL⛔️ in the absence of an established base (see section 8.0).
It is assumed that Chapters 8–14 have been mastered, i.e. the reader knows and is able to:
- Not make parasitic movements — for example, folds in the lower back; torsional twisting of the board with the legs; crushing the boots = setting the board on edge more through tilting the shin than through moving the centre of mass; excessive toppling of the torso into the inside of the turn (excessive inclination), and so on;
- Build a trajectory toward the outside of the turn, i.e. edge the board before it turns to the fall line;
- Initiate back- and frontside turns by moving the centre of mass and the pelvis;
- Control the edge angle at least in the range from 0 to 45 degrees;
If there are doubts about any of the points, it is better to slow down and go back to the previous steps, because moving on can break your existing achievements without creating anything new. That is, everything breaks completely and you have to start over. And you’re lucky if it’s only the technique that breaks.
This chapter describes one of the variants of grasping the pelvis throw into the back = the BASIC variant of the turn. On one hand, this base is a level you rarely meet on the hills any more. I.e. a wow level. On the other hand, this base does not stop being a base. I.e. there is a lot more interesting stuff further on.
If everything is done right, then at the moment the hip comes to the slope and the pelvis throw is mastered, you will automatically get an understanding of:
the principle of tail loading;
controlling edge angles from 0 to 90 degrees;
the key to understanding the frontside turn;
stable carrying of the arc on any state of surface, even one that 9 out of 10 carvers would call “unsellable.”
Learning this on mass-market boards is something out of the realm of fantasy. Joneses, Lib Techs, Burtons, and the rest of the garbage are categorically unsuitable for learning at this stage.
16.1. Important conditions for success
In the preceding chapters, a BASE of turns in the general sense was established — i.e. not necessarily carved turns, just turns. In this chapter the carved backside turn is established.
When establishing turns, each of them is established SEPARATELY. This means only one turn is trained; everything else is sacrificed to it.
First the turn entry is established. Then the exit from it. This means that when the entry is being established, everything else serves that movement and is sacrificed to it. For example:
The start of the backside must be outward. If there is no certainty that the board is outward, you can roll more inward in the previous turn. You can do this, because the previous turn DOES NOT EXIST. Right now there is only the practice of the backside. What’s more, of the whole backside there is only the ENTRY INTO THE BACKSIDE. Everything is subordinated to making that entry as correct as possible.
The start of the backside must be at the correct speed. If for this you have to dump the tail in the front — then you have to dump the tail in the front; if you have to build speed in a straight line — then you have to build speed in a straight line.
THERE ARE NO LINKS OF ARCS! There is only one trained turn.
You have to study the throw straight away over the WHOLE range, straight away all the way, to the slope. Approaching it gradually, step by step, is not an option. Gradually means seasons. Straight away means days. The choice is yours.
!!!
LEARN the CONDENSED VERSION OF THE CHAPTER BY HEART, from the letter “C” to the word “capybara.”
!!!
16.2. The back
Video 1. The back
The back is the entry into the arc and the exit from it. The entry into the back begins even before the edge change. The butt enters the turn first. With one linear movement you have to throw the pelvis to a point on the slope just past the tail, while folding the torso (making the angle at the hip joint acute) so that it doesn’t topple into the inside of the turn but stays vertical or parallel to the axis of rotation. In short, angulate. You get a diagonal movement of the pelvis (of the centre of mass, because the torso follows the pelvis). Such a movement simultaneously loads the tail, initiates the turn, and increases the edge angle. Three functions in one movement.
If the movement is performed correctly, then you end up on the rear leg and get such a brace into it that no doubts remain about its presence, and therefore no questions remain about the way to exit the arc. Just extend the leg, jump out, push off the brace, and direct the body into the next turn.
Below each word of these two paragraphs will be spelled out in more detail.
16.3. The entry
16.3.1. What we do before the edge change
- The front is as nothing as possible, along the widest possible trajectory = in the highest possible position + minimal edge angles (no more than 10 degrees, because the widest possible trajectory). This turn does not exist; it may not even be on edge. You can roll inward, into a traverse, wherever you like; the main thing is that there is enough room on the slope for the back. Enough time to prepare for the back. And the speed is comfortable.
Everything the front is for is to prepare for the back.
- In the front you ride like a post, just a monument. It might seem you’re doing nothing, but inside you’re very busy:
- positioning the LEGS, you aim the pelvis at the needed direction of the throw (about the direction below, section 16.4.1);
- you point the board at the required angle outward;
- you prepare to throw the pelvis (= fold the structure) with one movement;
I.e. in the front you don’t rest, you prepare for the “leap” like a predator in the bushes. To an outside observer it seems you’re doing nothing.
Video 2. Front, back, and a frame breakdown of the START (!!!) of the throw. The start of the throw is with moving the pelvis back. Not with bending the knees or tilting the torso. First moving the pelvis, when the range of movement is used up, the angle at the hip joint engages, when the range of movement is used up -> the knees.
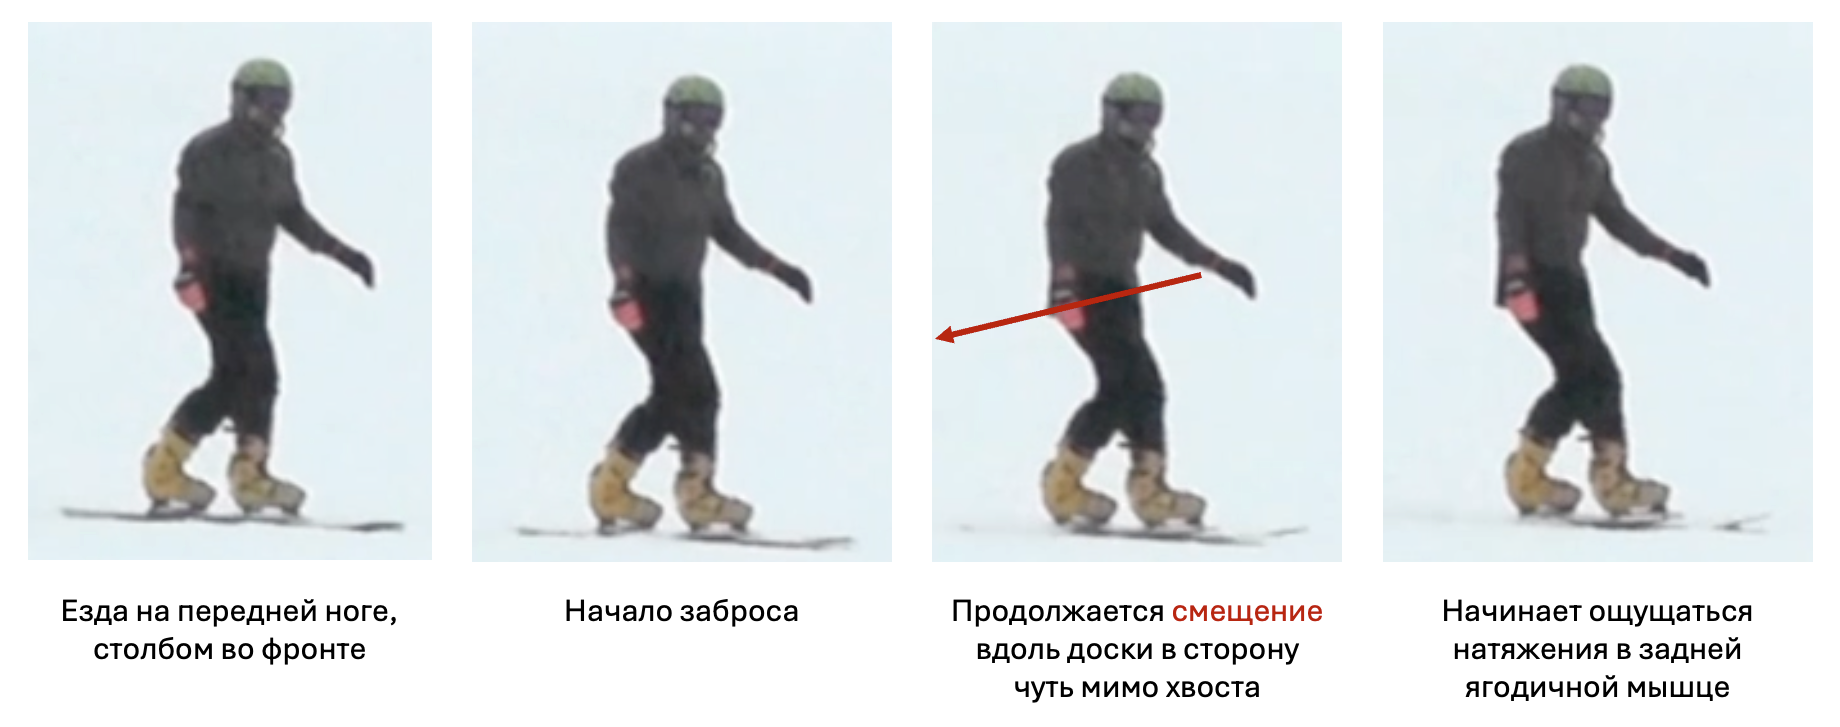
Four consecutive frames
How to point the pelvis where it needs to go?
a) brace the shin of the front leg into the spoiler of the front boot;
b) both knees (and the femurs) are pointed by a turn of the LEGS (not the pelvis) in one direction, roughly at angles of 55–60 degrees (for stiff boots this is, BY INTERNAL FEEL, slightly (!!!) more acute than the angle of the front binding; for soft boots — significantly more acute);
c) the knees are spread apart, neither knee topples into the inside of the stance, the shins as perpendicular to the board as possible; it’s clear the rear leg will be bent a bit more, but you have to strive not to bend it at the ankle but on the contrary to make it more vertical, to strive to brace it into the spoiler of the rear boot;
d) the legs set the trajectory along which the pelvis will go diagonally just past the tail, by the increasing tension of the rear glute muscle;
e) back straight, shoulder blades together, chest forward.
More on how to point the pelvis: the first 30 minutes of this video.
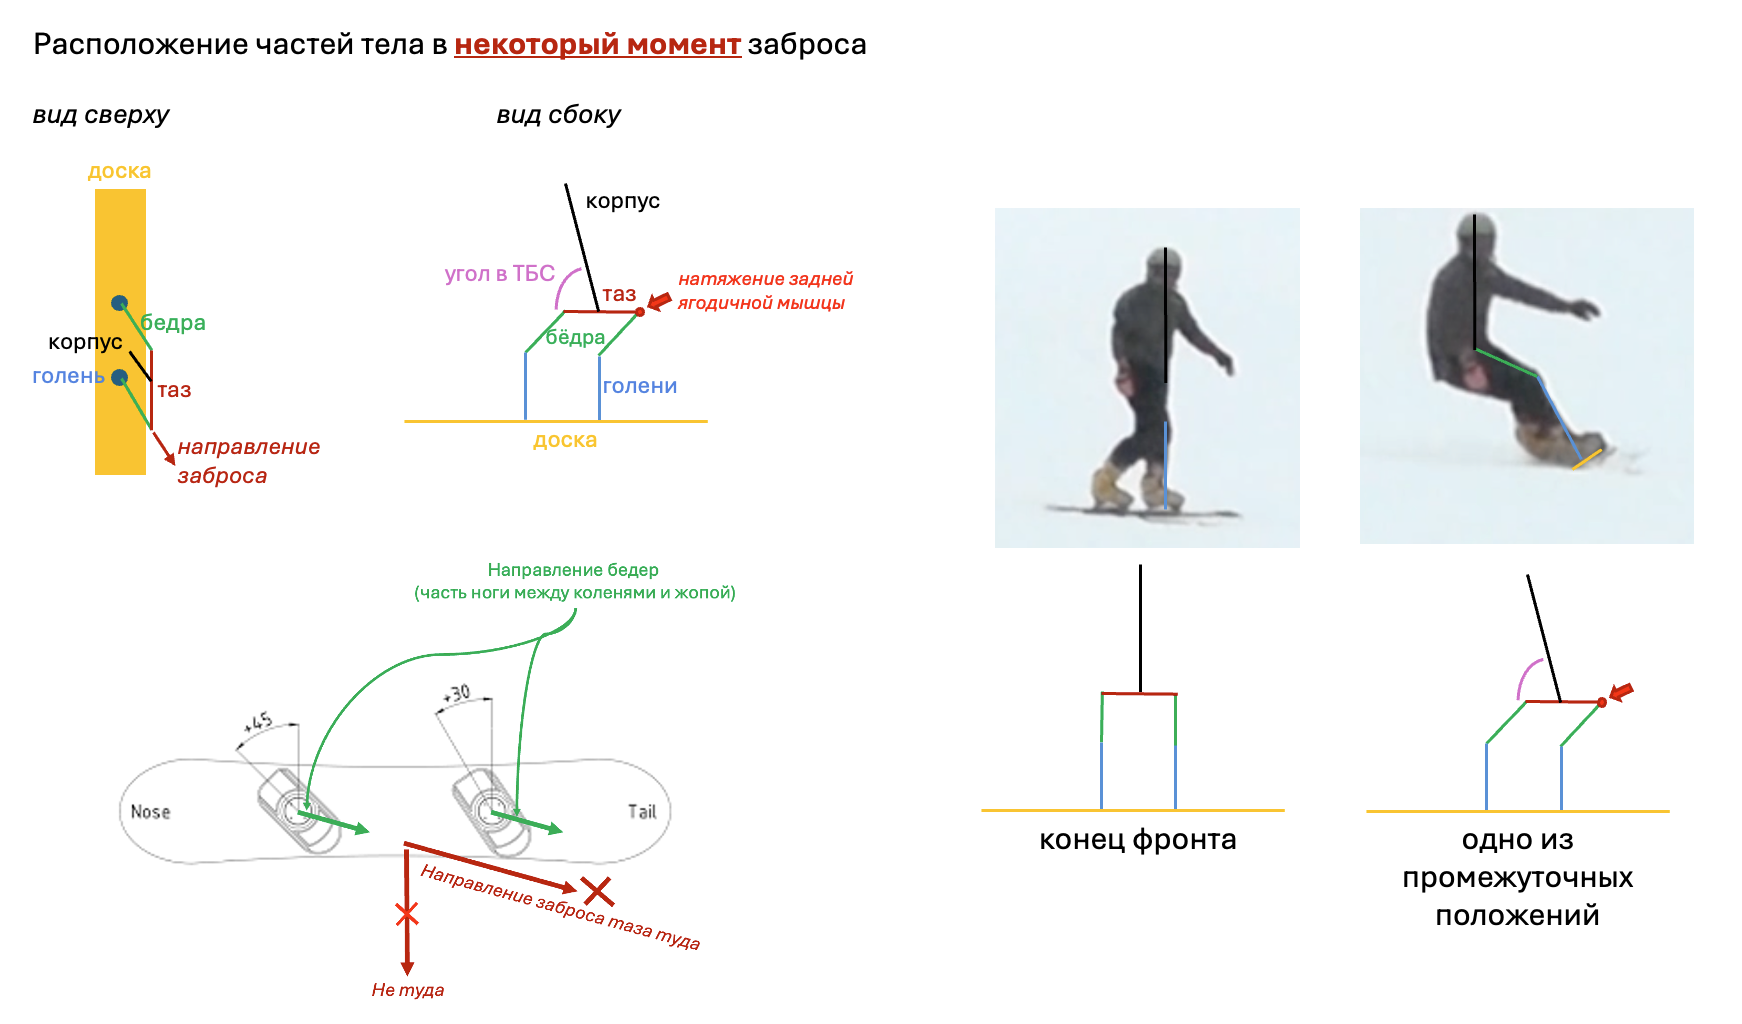
The figure shows a diagram of an intermediate body position at some moment of the throw. Not the initial one, and not the final one. However, such a state of affairs can occur both at the start and at the end, depending on the trajectory, the depth of the throw, the speed, and the slope angle.
Mastering the back and tail loading as a movement, rather than the taking-up of a pose, can be helped by understanding this intermediate position as a kind of checkpoint on the path of the throw. A position of distinct loading of the rear leg.

The checkpoint. An instant, not a pose
If you finish the front on the front leg, then from it, “with a full swing,” you can send the pelvis in the set direction, keeping this checkpoint in your head — when “you start to feel the tension in the glute muscle” => the direction is roughly correct and you can, by that tension, press the butt all the way down with additional and maximum acceleration. A movement with a full swing will let you definitely not take up a pose, not freeze, but “shoot past” it, going further along the direction of the throw. The main thing is that this direction was chosen correctly. Such an execution lets you not fixate on a pose but be aware of the movement.
16.3.2. The pelvis movement. The end is the beginning
The end of the front. The board is moving outward. The body structure is assembled and ready to fold with ONE LINEAR MOVEMENT. Then, not waiting for the edge change, the pelvis has to be driven like a spear into a point next to the rear binding, slightly behind it (the diagram in the figure above).
The pelvis movement folds the structure, not the folding of the structure that moves the pelvis.
The movement is short and precise, like driving a nail flush into wood in one blow. In the front the nail was tacked in, in the back it was driven home. It is a movement of driving the pelvis into the slope — not the whole torso, only the pelvis. Only the butt goes toward the slope; the torso stays orthogonal to the slope, doesn’t topple into the turn. In short, “angulate.”
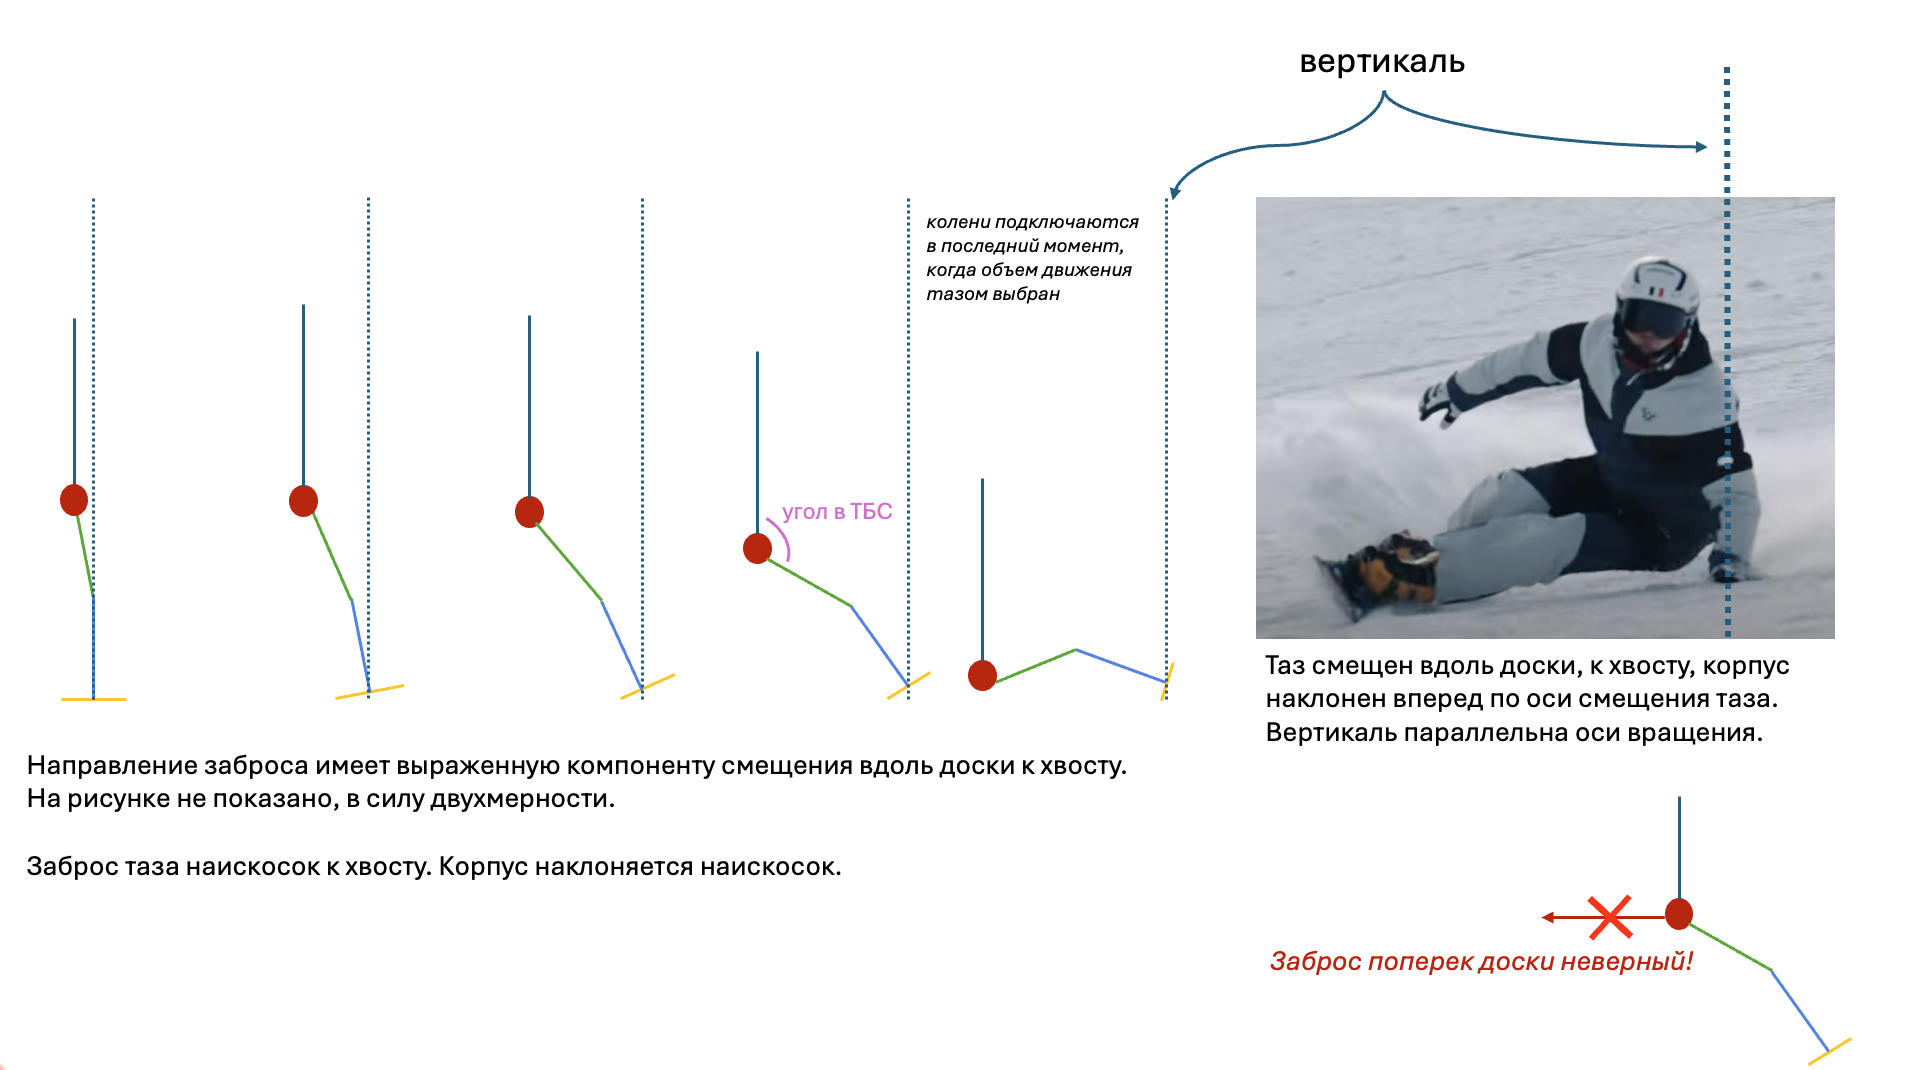
The movement of moving the pelvis back creates the angle at the hip joint and the tilt of the straight torso. Moving the pelvis back is also a bend of the knees on STATIONARY shins. Moving the pelvis “yanks” the shins, like levers that tip the board onto its edge.
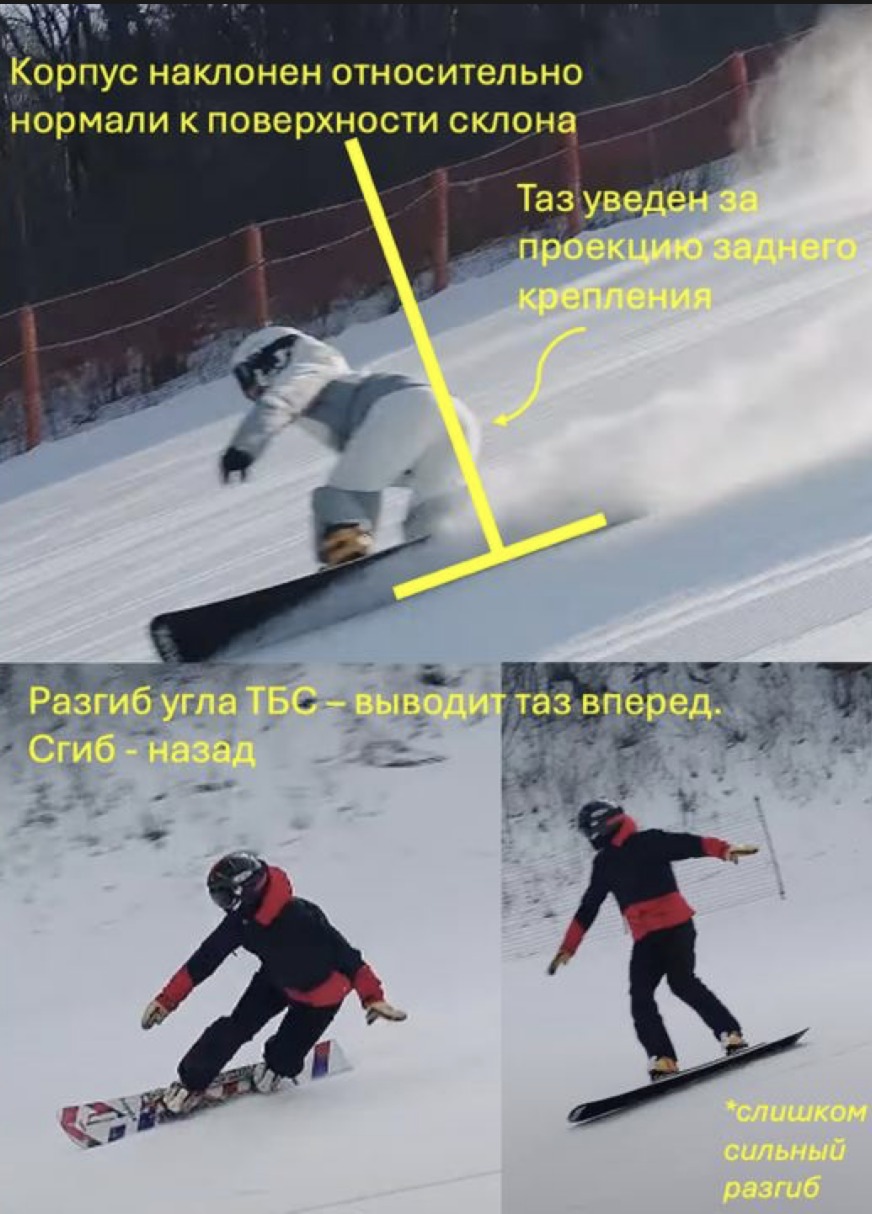
The link between moving the pelvis, the tilt of the torso, and the angle at the hip joint
To start moving the pelvis you DON’T need to wait for the start of the back. You don’t need to wait for the back edge to engage. The throw movement ITSELF engages the back edge.
The exit from the front IS the entry into the back
If the end of the front is on the front leg (see section 16.3.1), then the tension in the glute muscle will appear during the throw and will grow together with the brace into the rear leg.
16.3.3. The torso movement. The beginning is the end
The throw into the back is one movement along a line. For the throw into the back, the torso is set up during the front. So that at the right moment, with ONE movement, you can go to the very bottom, and so that nothing hinders this going. “The very bottom” is the end of the back, the exit from it. So, AT THE END OF THE FRONT the torso must be set into the position for the END OF THE BACK. A position that takes into account that the board will make a circle around.
From the end of the front to the end of the back, the torso position DOES NOT CHANGE. There is ONLY the pelvis throw, which folds the whole structure. There is NO winding/rotating into plus. There are no wind-ups / over-rotations / extra-turns / twists / add-ons, and so on.
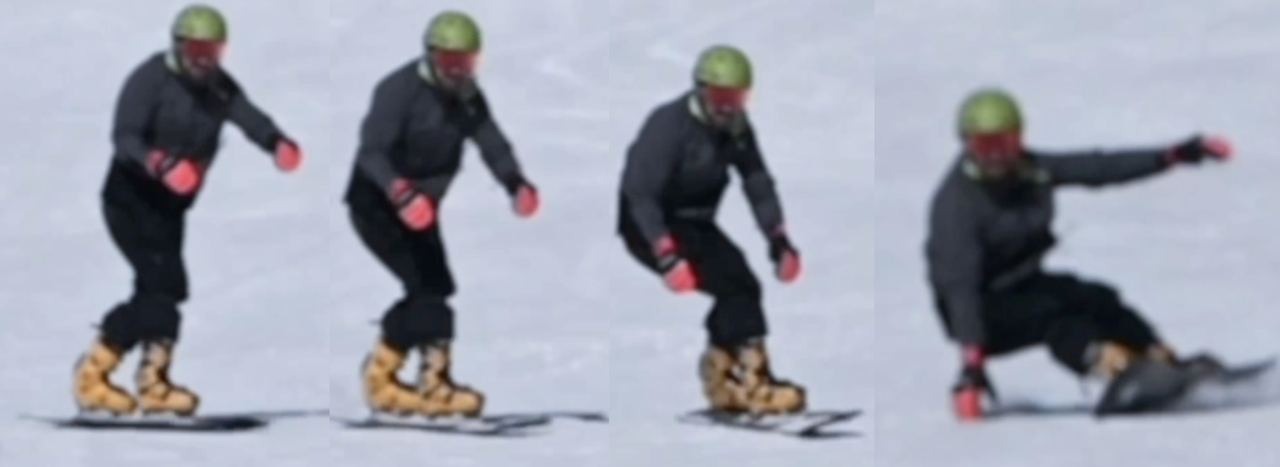
At the end of the front the torso is set up for the end of the back. So that nothing hinders the throw.
In the frame breakdown you can see that while still in the high position, at the end of the front, I set the front hand into the inside of the turn (the back) with the torso, so it arrives at the slope where I need it. The hands are markers of the shoulders’ position. The shoulders are set by the TORSO, by the CORE muscles. I don’t reach with this hand. I don’t wind the shoulders. By setting the TORSO, I set the hand in the air. The pelvis throw folds the structure and the hand arrives at the slope on its own.
I take up, with the TORSO, the “along” position ahead of time, so that at the very bottom (= at the exit) I end up “along.”
The torso is static in rotation during the turn. Rotation of the torso is the next stage of development. Grafting rotation on before mastering movements along a line is an attempt to master integration while skipping the stage of understanding addition.
The torso is the part between the butt and the shoulders; it can rotate independently of the pelvis’s rotation.
P.S.
Setting up the torso at the end of the front for the end of the back, at this stage, is a cheat that can help when studying the back as a separate turn, and that works worse on links of arcs (at the current level), because it requires correctly setting the torso for each turn. Later you will have to understand how to do all the same things while keeping the torso along the board. Such an understanding will give a stable execution of the back. This cheat helps get rid of everything superfluous and focus only on the pelvis throw.
IMPORTANT!!!
AT THE END OF THE FRONT — all body parts must have the arrangement they will have at the exit from the BACK, so that the ONLY thing to do at the entry into the back (= at the exit from the front) — is to throw the pelvis along a line, and everything else must be able to fold in tune with this throw and not hinder it.
16.4. The throw
The throw is folding the structure (bending the knees, tilting the torso) with one movement of the pelvis toward the slope. The folding is secondary and happens so as not to hinder the pelvis going toward the slope. The movement begins with the pelvis. The turn begins with the pelvis. You enter the turn with the PELVIS. You don’t topple with the whole torso. With the pelvis.
The cheeks of the butt enter the turn first. A turn butt-first.
The pelvis movement is the lead violin in folding the whole structure. Everything else helps the movement of moving the pelvis. I.e. you don’t bend the knees or tilt the torso, you lead the pelvis to a point next to the rear binding; everything else serves this movement = bends and folds OBEYING the PELVIS movement. The throw movement has to be perceived as a one-way ticket. You train ONLY THE ENTRY.
There is no exit
If you do everything right, you won’t have questions about how to exit. If you do it wrong, you’ll sit down on the slope. It is a one-way ticket. The main task: throw the pelvis as low as possible, and as close as possible to the tail of the board. Everything else doesn’t matter.
Video 3. What grooving in the initiation of the back can look like
16.4.0. The trajectory comes first
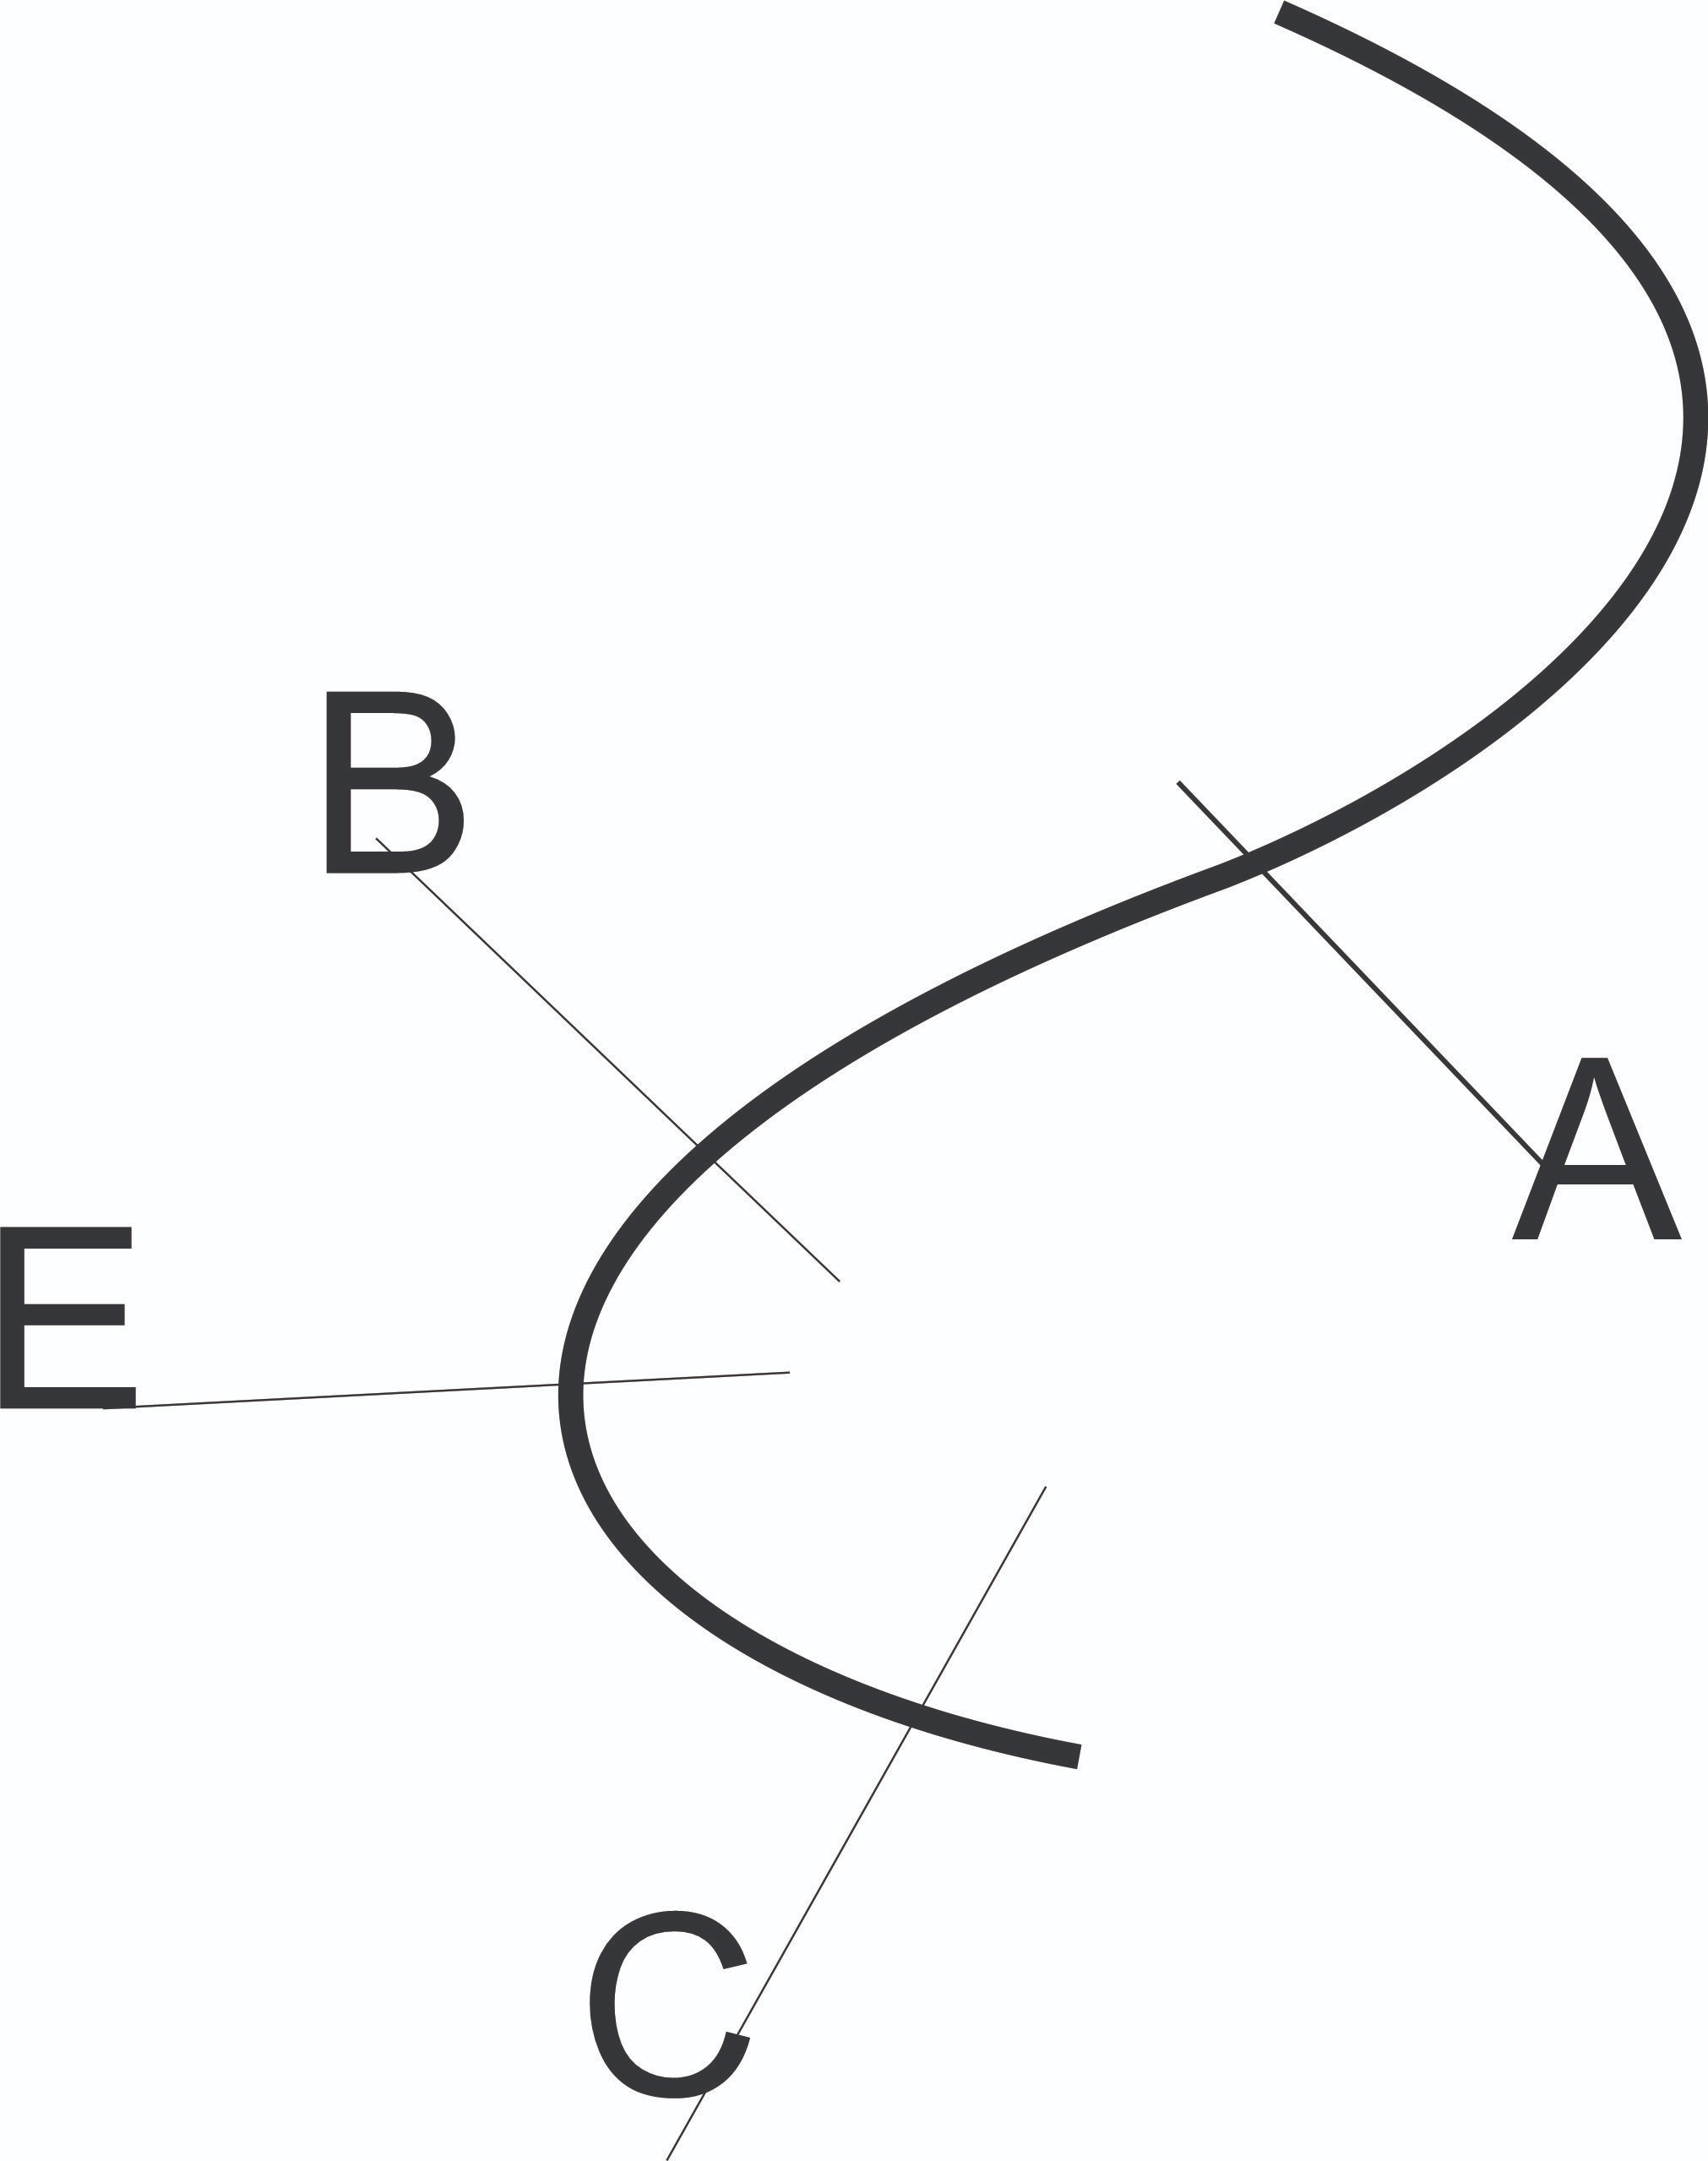
“A” — the point where the back begins
“B” — the point where you should reach maximum edging (hand on the slope).
“B-C” — the “lower trajectory” where you can roll to buy time and put your hand on the slope, because you DON’T MAKE IT in time to do this at point “B.”
Past “C,” at first, you can also roll — all the more so since you aren’t going to exit the arc.
But as soon as it becomes a bit more comfortable, you have to move the point of arriving at the slope higher and higher. “B” is ideal. That’s what you should strive for.
As soon as this point ends up somewhere in the middle between “B” and “C” — then you’ll be able to exit the arc and start the front “on the fly.” In reality, what feels like “B” will most likely be “E,” but the goal, what you should strive for, is “B.”
16.4.1. A tool for choosing the direction of the throw
The direction of the pelvis movement is set by the direction of the knee bend and/or the tilt of the femurs (the part between the knees and the butt). THE LEGS! THE LEGS! THE LEGS! Must be positioned so that bending the knees!! THE KNEES! Tilts the femurs (the part between the knees and the butt) toward the tail => and sends the pelvis there too.
Video 4. Joints can rotate about their own axis. This rotation sets the direction of the throw. The thigh — the part of the leg between the knee and the butt — points at this direction.
The ankle joint in this scheme is FIXED. It is set in concrete. Immovable property.
The shins tilt = the board tilts
The shin is the part between the knee and the board; it can tilt ONLY TOGETHER WITH the board. If the ankle is not fixed, the transmission of force to the board will be broken. The shin is the lever that the departing centre of mass “yanks,” tipping the board over.
Video 5. The shins tilt = the board tilts. The shins are the two levers that the shift of our centre of mass “yanks,” and that tip the board onto its edge.
More on the shins-as-levers here at 49:20.
During the pelvis throw the board must respond, STRAIGHT AWAY from the first instants of movement, with an increase of the edge angle. And NOT STOP responding to the movement. If the board doesn’t respond => the pelvis is going the wrong way, or you’re just bending or squatting.
(!!!) It is very useful to sort this out at home between two walls. To EVERY movement of moving the pelvis off the board, however small, it must respond with edging. At any point in time along the arc.
At home it is convenient to sort out ONLY the moment of initiating the back. Working through the full throw without outside help WILL NOT WORK.
If the board doesn’t respond to the movement of moving the weight off the board => the movement is NOT CORRECT. If the amplitude of the movement is higher than the amplitude of the increase of the edge angle — the movement is NOT CORRECT.
16.4.2. The sensations of the throw
A good move of the pelvis back feels like letting the board out forward. A feeling may appear that the board is rolling out from under you. These are the correct sensations. Someone might call this a roll-through, but it is NOT A ROLL-THROUGH (a more detailed discussion here).
Video 6. The fundamental difference between the body shifting relative to the board and the board shifting relative to the body (a roll-through). With my hands at the start of the video I show the direction of the thighs (the part of the leg between the knees and the butt). The thighs are pointed so that their backward tilt (the knee bend) can send the pelvis further along the board backward. However, the throw movement itself must begin not with the knee bend, but with the pelvis back (see Video 2 above).
16.4.3. Tail loading
As was said above, the diagonal movement of the pelvis (the centre of mass): initiates the turn AND loads the tail AND increases the edge angle. Three in one.
If the movement is performed correctly, then you end up on the rear leg and get such a brace into it that no doubts remain about its presence.
The tail-loading MOVEMENT is a MOVEMENT! It is not a pose.
There isn’t much more to say here, but for the eager, this same idea is spelled out again in more detail and in slightly different words here, and also in the chat under the hashtags #бэк, #загрузка_хвоста, #основная_стойка.
16.4.4. Pelvis “along” or “across the angles”?
Focusing attention on the rotation of the pelvis while mastering the back at this stage is not only useless but harmful. What matters is the direction of the throw and the brace into the rear leg. Both are regulated by the LEGS. Leave the pelvis alone, work on the legs, look for the brace into the rear leg. A brace in the turn of such force as if a barbell had been placed on top of you. That kind of brace. If you get carried away with rotating the pelvis “across the angles” and looking for cherished poses — you’ll never find that brace.
This same idea is spelled out again in more detail and in slightly different words here, and also in the chat under the hashtags #бэк, #основная_стойка.
16.5. Mistakes
16.5.1. Mistakes at the start of the movement
The movement must begin with moving the pelvis, not with bending the knees or the back (told in more detail here):
You squat over the board rather than throwing the pelvis. Squats don’t set the board on edge.
You bend over the board rather than moving the pelvis. The movement begins with moving the pelvis, not with tilting the torso. Moving the pelvis tilts the torso. If you do it the other way around, you’ll just be tilting the torso = bending, without moving the pelvis.
Toppling the front shoulder into the inside of the turn, reaching with the front hand toward the slope, slant of the shoulders (front lower than rear). The shoulders should be parallel to the slope; for this, by feel, the front shoulder should be slightly raised. The shoulders are a marker of the torso’s position. The shoulders are set by the torso, by the core. If the shoulders are slanted with the front toppling into the inside of the turn, then the torso will topple forward and unload the tail. Sport rides that way, because it rides on different principles. Don’t look at sport.
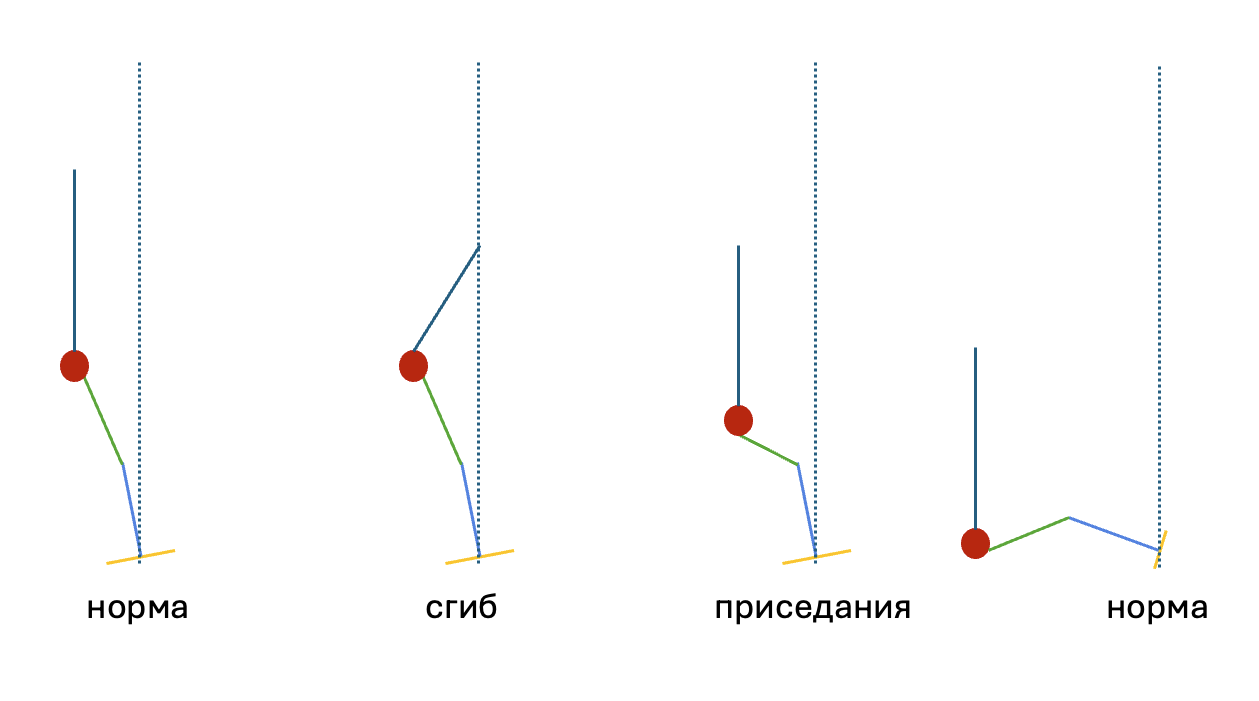
The figure is not entirely accurate, because it is two-dimensional and doesn’t show the movement of shifting the pelvis along the board toward the tail. However, the purpose of this figure is to show how the edge angle, the angle at the hip joint, and the angle at the knees are connected to one another. It handles this task quite well.
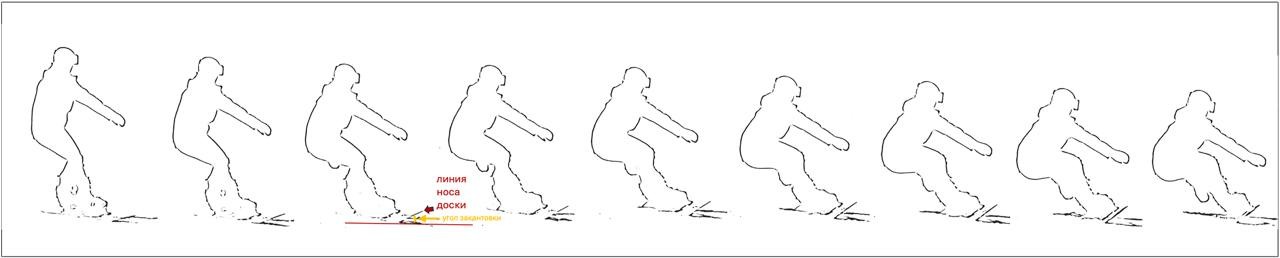
A frame breakdown of a fold in the back that substitutes itself for moving the pelvis in the proper direction. There is folding, but no edging of the board. You have to move the pelvis past the board into the turn; with this movement you pull/tilt the shins, which will tip the board over. There is not enough shin tilt, at the expense of moving the pelvis in the correct direction.
16.5.2. Mistakes in choosing the direction of the throw
You shift along the board rather than past it. That way you can do an ollie and lose the board — it will slide out from under you.
You shift across the board = not enough along. Until there is a continuous shift along the board “toward the tail, but past” — nothing will work. If the range of travel is small, then it must be stretched out, or edge the board faster. As soon as the shift along the board has stopped — you’ve ended up on the front leg => wait for trouble. (search for more info in the chat: #задняя_нога #передняя_нога)
First you shift along the board, and then you topple into the inside of the turn. It may seem that this way you first load the tail and then initiate the turn. But no. Tail loading and initiating the turn are ONE movement. It is very simple. Linear. Because of its simplicity it is hard to learn, because one simple movement combines three functions:
- initiates the turn
- loads the tail
- increases the edge angle.
All of this is grafted onto ONE SIMPLE LINEAR MOVEMENT.
16.5.3. Mistakes from not thinking much
Performing a rotation to keep the stance or load the tail. Rotation of the torso is the next stage of development. Grafting rotation on before mastering movements along a line is an attempt to master integration while skipping the stage of understanding addition (see section 16.3.3);
Twisting the pelvis across the angles -> breaking the shin levers -> toppling the whole torso;
These and many other possible mistakes are examined in the video:
An overview of common mistakes when learning turns
16.6. The exit
After the entry has been mastered, you have to start mastering the exit. Specifically, learning to exit at the apex of the arc. For this you have to arrive at the slope before the apex. And for that you have to increase the entry speed and be 210% on the rear leg.
The brace into the rear leg
In the back (and not only there) you have to maximise the brace into the rear leg. And this is the only thing you can maximise without limits. If you can’t exit the back / jump out of the arc at any moment — you’re not on the rear leg.
As a result of a correctly performed throw: a brace into the rear leg should appear in the turn. It will be so large that there will be no doubt that it is it. You have to look for the direction of the throw and the arrangement of body parts that maximise this brace.
While there are problems with the brace into the rear leg and tail loading — there will be sticking in the arc and problems with exiting the turn on time. A full solution to the problem of loading the rear leg is the key to understanding the exit from the back.
16.7. Summary
The brace into the rear leg. Thighs and knees pointed acutely (no less than 40 degrees). Don’t squat and don’t bend over the board. “Poking” the pelvis into the slope with a SIMPLE LINEAR MOVEMENT toward the tail, but past it -> tilt the shins and tip the board onto its edge, without toppling the torso. The shins move ONLY TOGETHER WITH THE BOARD.
Even more info on this chapter in the chat under the hashtags: #Глава_16, #бэк
P.S. Useful exercises
In short, learning the back
When establishing turnS, each of them is established SEPARATELY. This means only one turn is trained; everything else is sacrificed to it.
When establishing a turN, first the entry into the turn is established. After the entry is established, the exit from it is established. This means that when the entry is being established, everything else serves that movement and is sacrificed to it.
We are establishing the back. Consequently, the front is as nothing as possible, along the widest possible trajectory, in the highest possible position, with minimal edge angles. This turn does not exist. Everything it is for is to control speed for a comfortable entry into the back. Preparing the body for the throw into the back. Setting the correct trajectory of the board.
At the end of the front:
board outward;
back straight, shoulder blades together, chest forward;
knees pointed in one direction, roughly at angles of 55–60 degrees, and spread a little “apart,” so as not to topple/bend the shins inward toward the centre of the board, especially the rear leg (point 3 aims at the same thing);
shins as vertical as possible, the front shin has a light brace into the spoiler of the front boot; the rear shin — strive for this;
the legs set the trajectory along which the pelvis will go diagonally just past the tail, by the increasing tension of the rear glute muscle;
the torso is oriented for the back;
AT THE END OF THE FRONT — all body parts must have the arrangement they will have at the exit from the BACK, so that the ONLY thing to do at the entry into the back (= at the exit from the front) — is to throw the pelvis along a line, and everything else must be able to fold in tune with this throw and not hinder it.
Check all points 0, 1, …, 5 in your mind. Everything ready? Then
not waiting for the edge change, drive the pelvis like a spear into a point next to the rear binding, slightly behind it. The throw movement is short and precise, like driving a nail flush into wood in one blow. In the front the nail was tacked in, in the back it was driven home. It is a movement of driving the pelvis into the slope. Not a toppling of the whole torso into the turn, but only the driving of the pelvis there. Only the butt goes toward the slope; the torso is vertical (parallel to the axis of rotation). The pelvis movement creates the angle at the hip joint, which keeps the torso vertical. You get angulation.
The throw is folding the body structure with one SIMPLE LINEAR MOVEMENT of the pelvis toward the slope, to a point just past the tail, in the direction of the tension of the rear glute muscle — all at once and until the pelvis braces into the slope.
We are practising only the entry into the turn. Consequently, the throw is a one-way ticket. The main goal is to reach the very bottom. If everything is done right, the exit will come off on its own; if not — you’ll sit down on the slope.
The pelvis-throw movement “yanks” the shins and tips the board onto its edge. The shins move ONLY TOGETHER WITH THE BOARD.
- initiating the turn
- loading the tail
- increasing the edge angle
— this is all ONE SIMPLE LINEAR MOVEMENT of the throw. You have to look for the SIMPLE LINEAR MOVEMENT. If something hinders it — remove it. If you want to add something (for example, rotations, wind-ups, and so on) — that is a false path.
When the entry is performed correctly, from the start of the turn to its end you will feel a growing brace into the rear leg. With a brace into the rear leg, the exit at any moment will be easy and pleasant. After that, you have to learn to start exiting at the apex, and for this you have to arrive at the lowest point of the slope BEFORE the apex — i.e. increase the speed of the throw or the amount of outward, or both.
capybara
What’s next . . .
And what’s next — subscribe here so you don’t miss whatever comes next :)